IOM – FLEXY II – 1007 – E Page 34
MOU N TI N G AN D AD JU STING PULL EYS
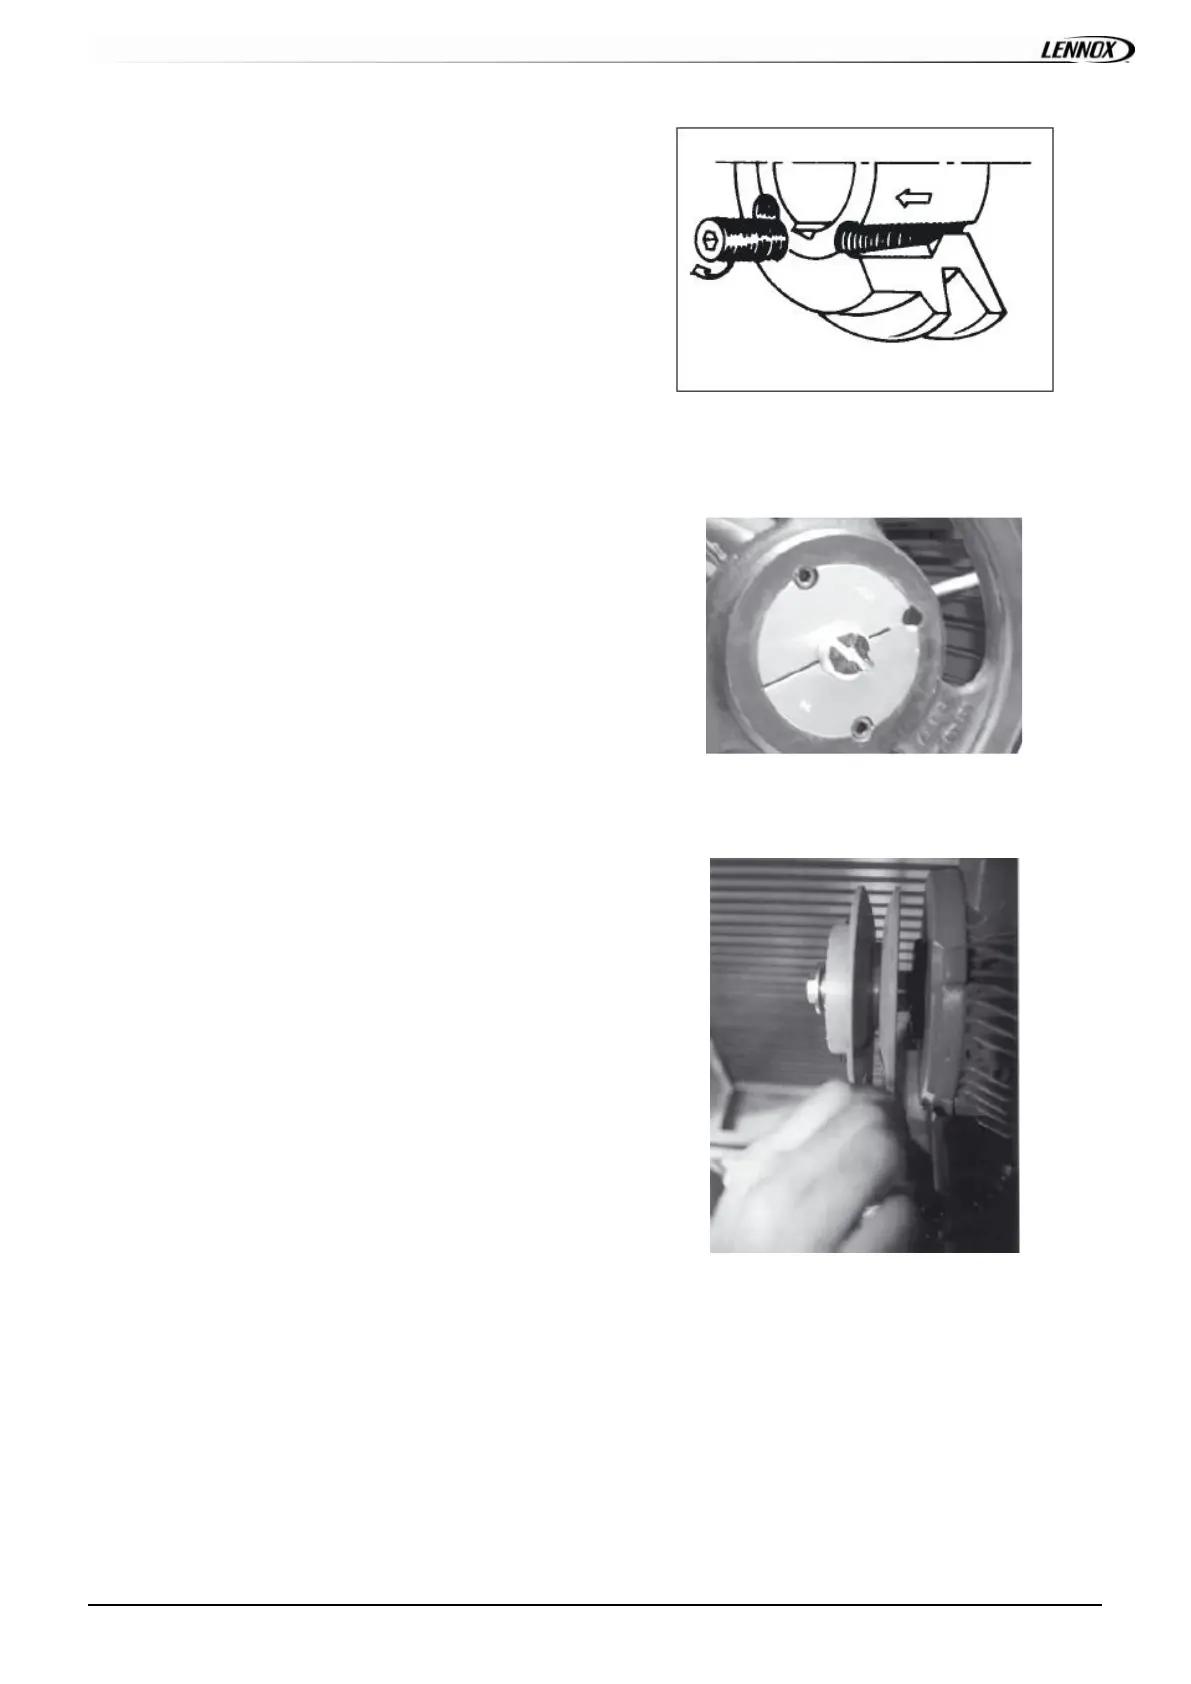
FAN PULLEY REMOVAL
Remove the 2 screws and put one of them in the
extraction threaded screw.
Screw in f ully. The hub and the pulley will separate from
each other.
Remove the hub and the pulley by hand without damaging
the machine.
FAN PULLEY INSTALLA TION
Clean and de-grease the shaft, hub and conical bore of the
pulley. Lubricate the screws and install the hub and pulley.
Position the screws without turning them.
Place the assembly on the shaft and screw in the screws
alternativ ely and ev enly. Using a mallet or a hammer with
a wooden wedge, tap on the face of the hub to keep the
assembly in place. Torque the screws to 30 N m.
Tak e t he pulley in bot h hands and s hake it v igorous ly to
make sure everything is in place.
Fill the holes with grease for protection.
NOTE: During installation, the key should nev er protrude
out of its groove.
After 50 operating hours, check that the screws are still in
place.
MOTOR PULLEY INSTAL LA TION & REMOVAL
The pulley is held in pos it ion by the key and a screw
located in the groove. After unlocking, remov ing this screw
by pulling against the shaft spindle (if necessary, use a
mallet and tap unif ormly on the hub to remove it).
To as s emble, proc eed in the rev ers e order af ter hav ing
cleaned and de-greased the motor shaft and the pulley
bore.
PULLEYS ALI GN MEN T
After adjusting one or both of the pulleys, check the
transmission alignment using a ruler placed on the inner
face of the two pulleys.
NOTE: The warrant y m ay be affect ed if any major
modification is made to the transmission without obtaining
our agreement bef orehand.
 Loading...