13
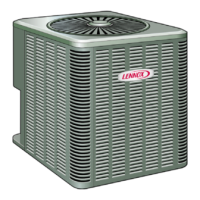
• The unit base should be elevated above the depth of
average snows as illustrated in “Figure 20. Outdoor
Unit on Brackets above Snow Line”
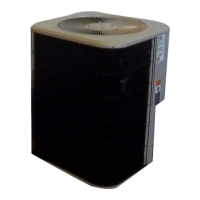
• In heavy snow areas, do not place the unit where drift-
ing will occur as illustrated in “Figure 21. Outdoor Unit
Air Flow Obstructed by Snow” on page 13
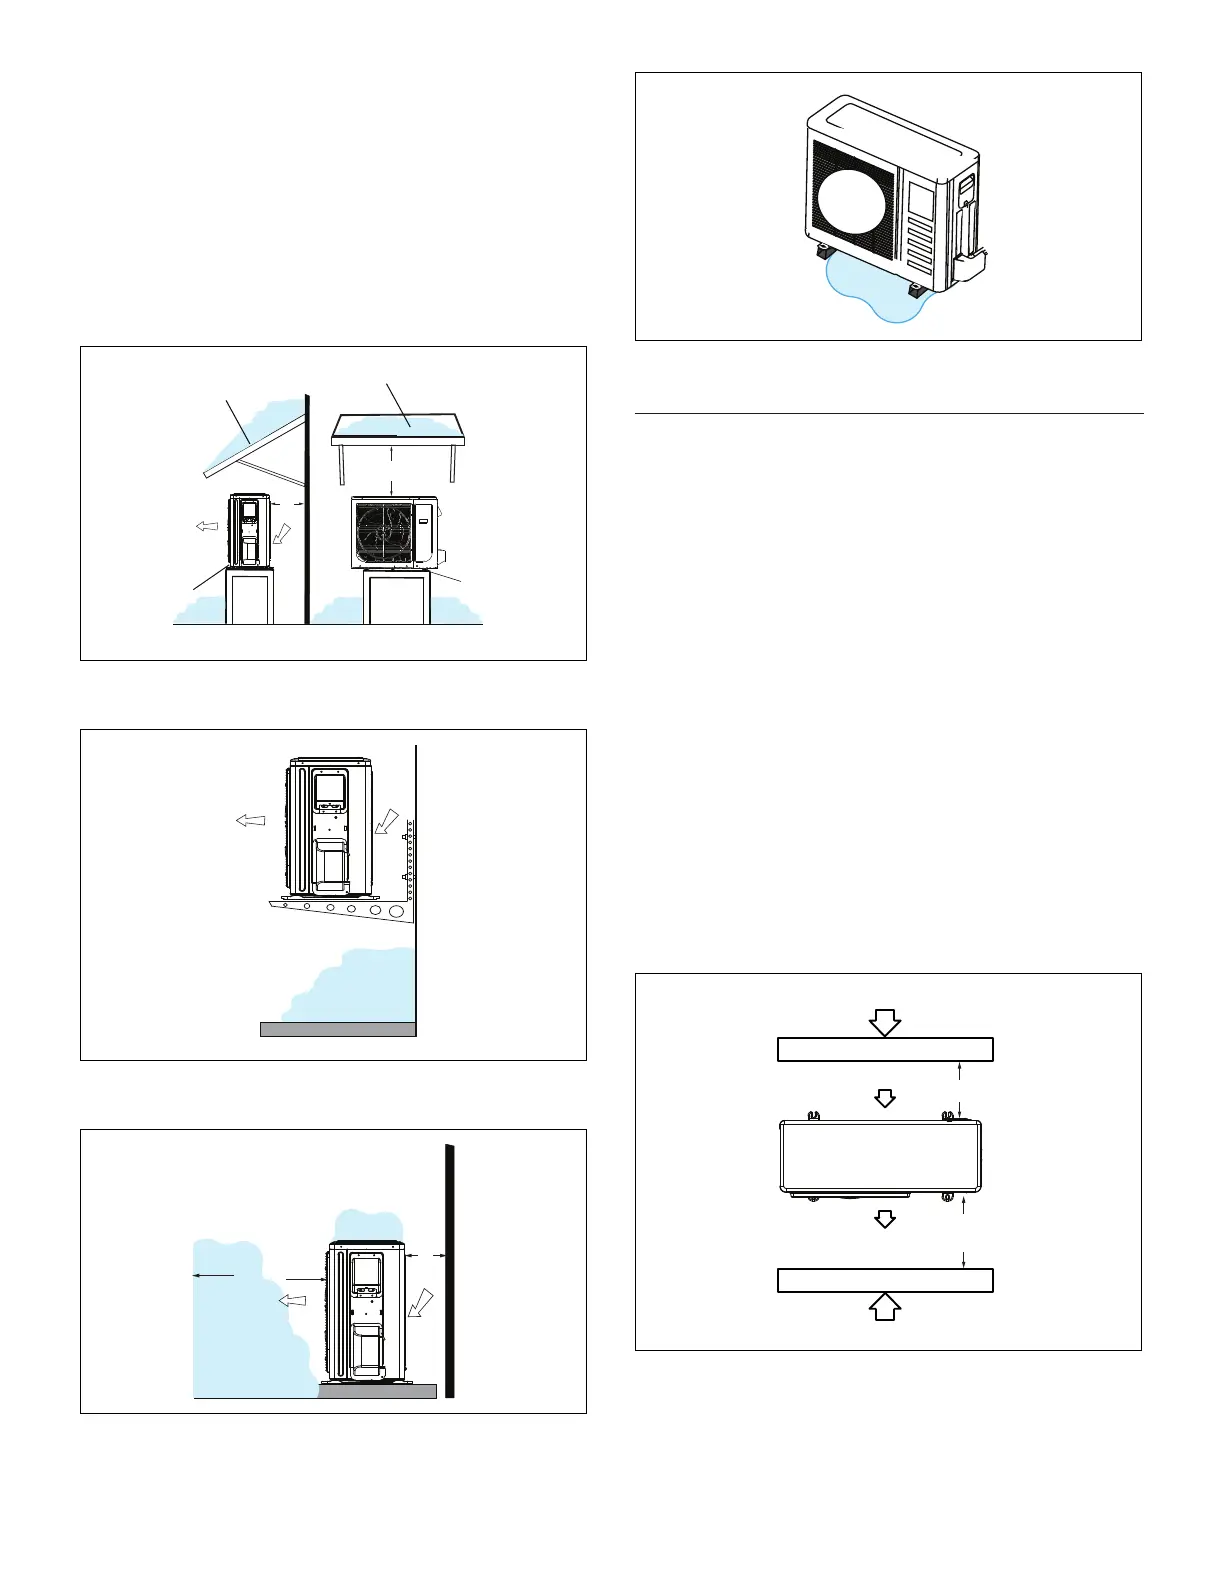
• Carefully consider how to manage defrost water dis-
posal to prevent ice from blocking walkways or creat-
ing a safety hazard near the outdoor unit as illustrat-
ed in “Figure 22. Avoid Defrost Water Ice Hazard” on
page 13
12 in
305 mm
Air Inlet
Air Outlet
24 in
610 mm
Side View
Front View
Protective canopy
Protective canopy
Pedestal
(stand)
Pedestal
(stand)
Figure 19.
Figure 20.
Line
Air Outlet
Air Inlet
12 in
305 mm
79 in
2007 mm
Figure 21.
Snow
Figure 22.
Prevailing Winds
Normally wind bafes are not required for a outdoor unit.
However, in order to maximize reliability and performance,
the following best practices should be followed.
If unit coil cannot be installed away from prevailing winter
winds, some method of protecting the coil is recommended.
However, minimum clearances as reference in “Figure 9.
Outdoor Unit Clearances - Inches (mm)” on page 8
must be observed at all times.
Common application examples are:
• When prevailing winds are from the air inlet side, then
position the wind barrier a minimum of 12 inches (305
mm) from the unit as illustrated in “Figure 23. Wind
Barrier”
• When prevailing wind is into the discharge side, then
position the wind barrier a minimum 79 inches (2007
mm) from the front of the unit as illustrated in “Figure
23. Wind Barrier”
• Outdoor unit can be installed in a dog house style
shelter as illustrated in “Figure 24. Dog House-Style
Shelter”
• a roof overhang as illustrated in “Figure 25. Unit in-
stalled in Alcove”
12” (305mm)
Min. Distance
Wind Barrier
Inlet Air
Prevailing Winter Winds from Air Inlet Side
Discharge Air
Wind Barrier
Prevailing Winter Winds From Air Discharge Side
79” (2007mm)
Min. Distance
Figure 23. Wind Barrier
 Loading...