Mechanical installation
Preparation
Mounting the shrink disc with a rotating cover
4
38
Lenze ¯ MA 12.0014 ¯ 5.1
4.3.10 Mounting the shrink disc with a rotating cover
( Stop!
¯ Do not disassemble new shrink disc.
¯ Never tighten clamping screws before the machine shaft has been
inserted, since otherwise the hollow shaft may undergo plastic
deformation.
¯ During operation, the shrink disc has to be covered so that it is safe
against contact by implementing suitable measures (e.g. cover).
¯ Degrease hollow shaft bore and machine shaft!
Depending on the design, the shrink discs may be equipped with a rotating cover
(pos. 1).
) Note!
This cover is fitted to the shrink disc on delivery.
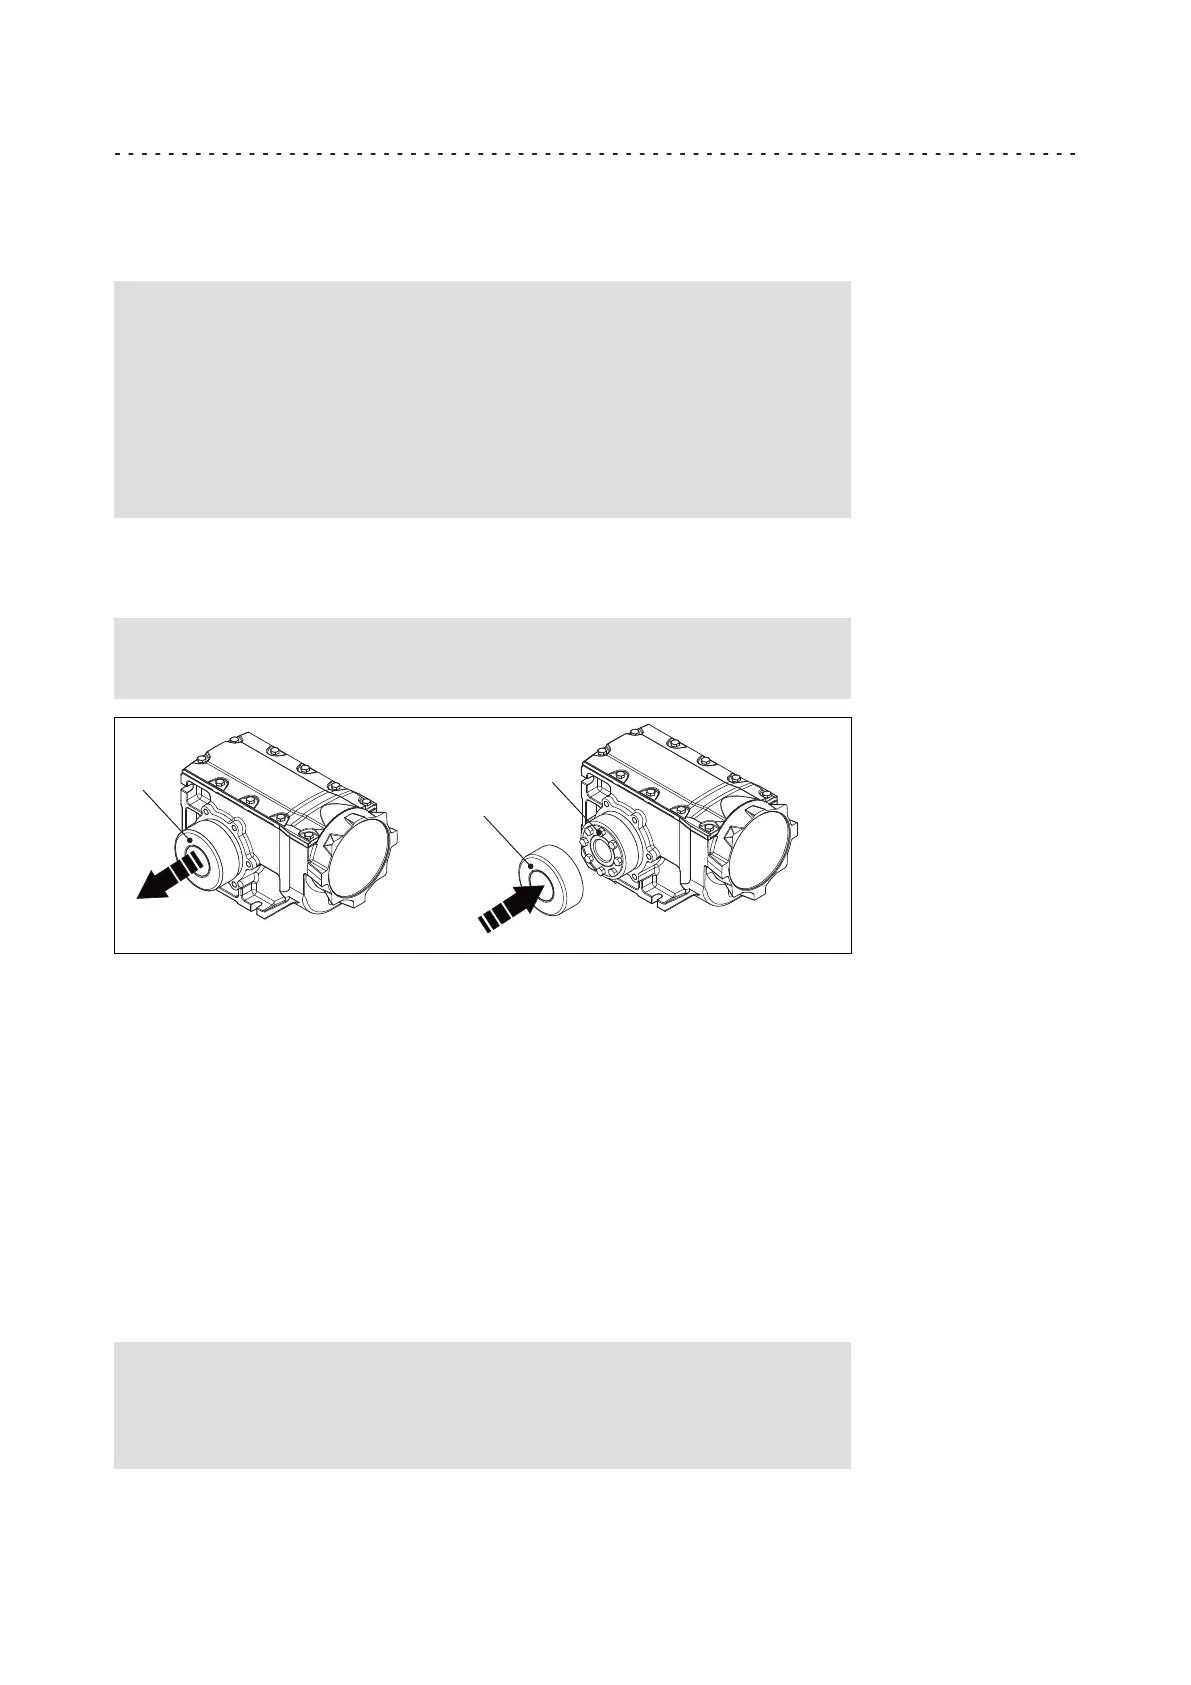
1.
1
1
8.
2
g500−B−001 des/dms
Fig. 6 Cover of the clamping screws
1 Protection cover
2 Clamping screws
1. Remove protective cap (1), if available.
2. Check machine shaft:
– Diameter in fit tolerance h6
– Material yield point Re > = 360 MPa
– E−module approx. 210000 MPa
– Surface roughness R
z
£ 15 mm
– Concentricity in order to prevent unnecessary additional forces caused by
tensioning.
3. Thoroughly clean and degrease hollow shaft bore and machine shaft.
) Note!
Thoroughly degrease the bore over the entire hollow shaft length to
make sure that remainders of the anticorrosion agent will not be carried
off into the area of the shrink disc when pushing on the machine shaft.
4. Slightly loosen clamping screws (2) one after the other, do not unscrew!
5. Push drive onto machine shaft.

 Loading...