Maintenance
3.4 Removing and Fitting
the Internal Demister
Required tools:
Allen keys size 6 and 8
Required spare parts:
Gasket for oil case . . . . . . . . . . . . . . . . . . 200 09 148
Internal demister: . . . . . . . . . . . . . . . . . . . . 390 26 014
The internal demister is spring-mounted in a frame.
When it is clogged, it rises periodically to reduce the
pressure difference created. The resultant noise at high
intake pressures indicates that the internal demister is
dirty.
Periodically clean or replace the internal demister; the
maintenance interval depends on the application. Use a
suitable solvent for cleaning.
Shutdown the pump and drain the oil (see Section 3.2).
Remove the six recessed screws (10/6) on the oil case
(10/4). Don’t remove the non-recessed screws; they
hold the motor flange in place.
Pull the oil case forward off the pump.
Remove the gasket (10/5).
Unscrew screw (10/1).
Remove small washer (10/1), spring (10/1), large washer
(10/1) and O-ring (10/1)
Lift off the frame (10/2) and remove the internal demister
(10/3).
Clean all parts and check that they are in perfect
condition; if not, replace them with new parts.
Reassemble in the reverse order.
Torque for the screws (10/6) is 12 Nm.
17
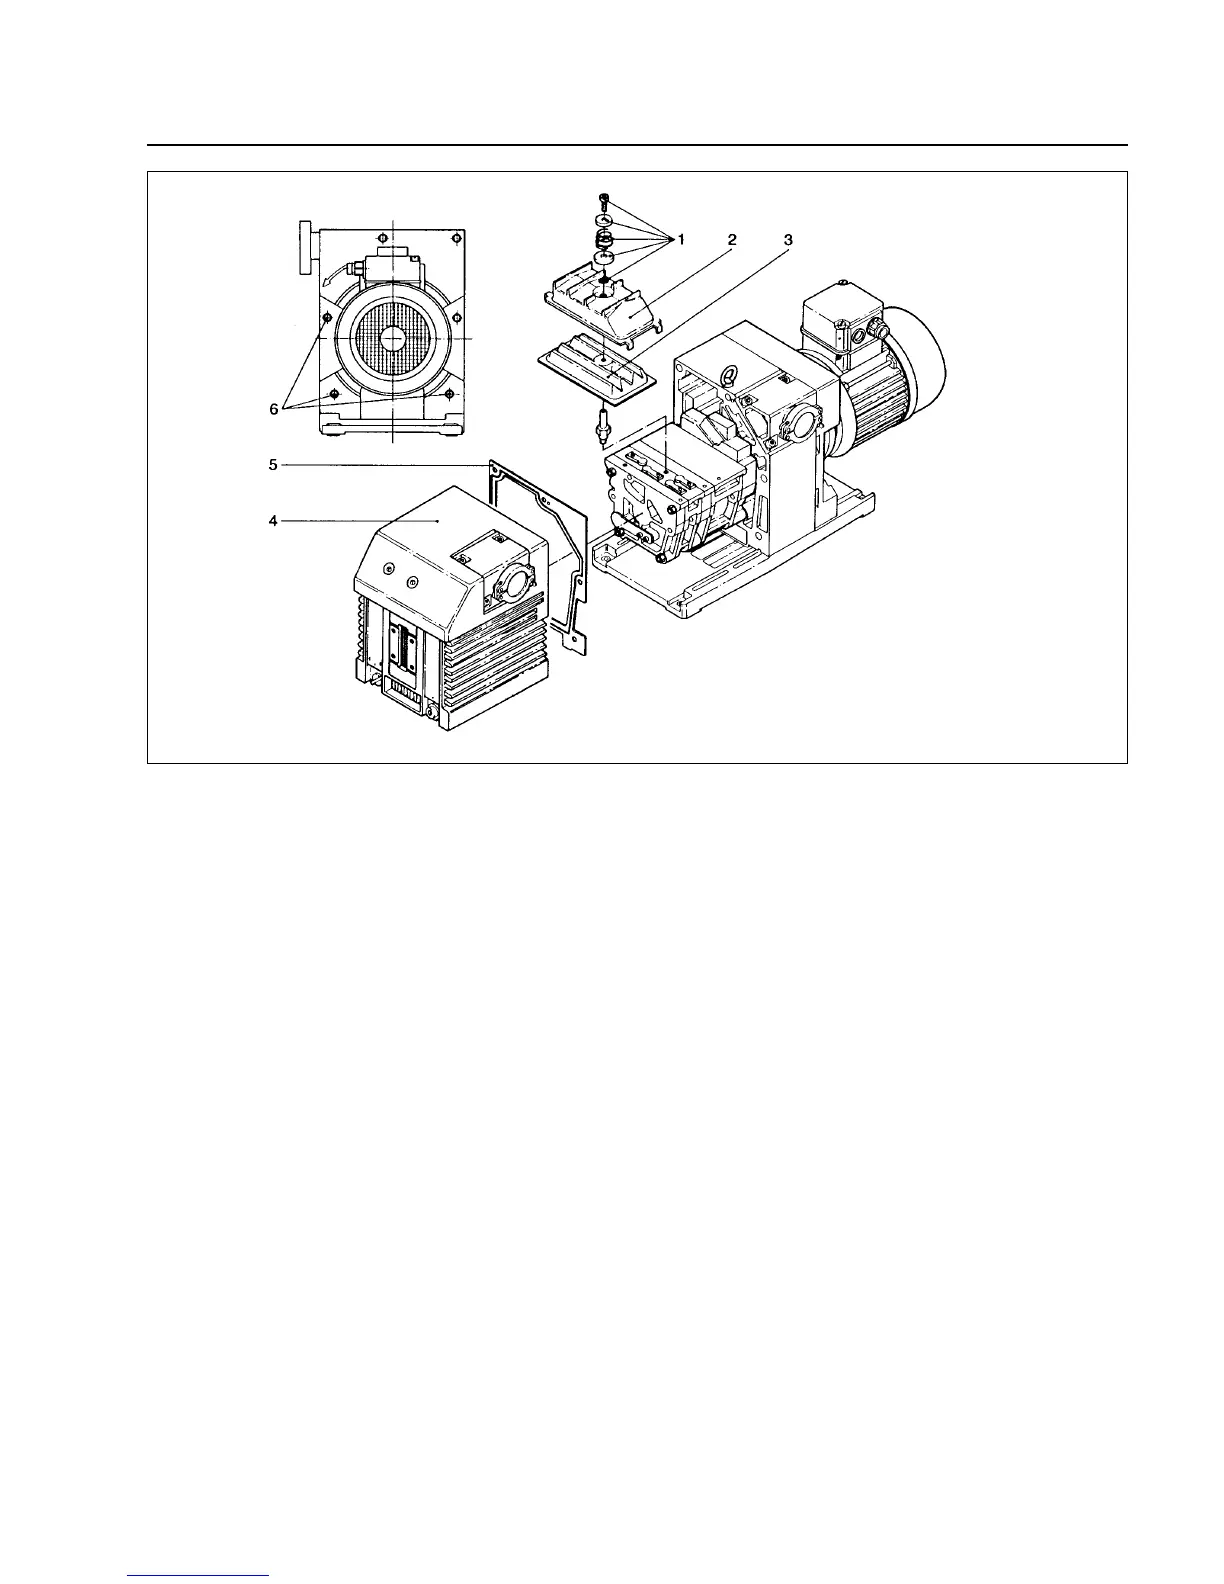
Fig. 10 Removal and fitting of the internal demister
Key to Fig. 10
1 Screw with small washer, spring,
large washer and O-ring
2 Frame for demister
3 Demister
4 Oil case
5 Gasket
6 Fixing screws
 Loading...