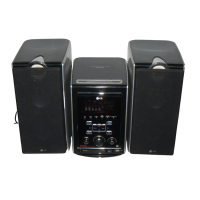
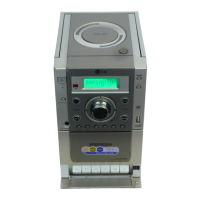
8
Sleep Function
When the sleep timer is used, the power is auto-
matically turned off after the specified time has
elapsed.
1. To specify the time delay before the power is
turned off, press SLEEP.
In the display window you can see
for about 5 seconds.
This means that the system turns off
automatically after 90 minutes.
Each time the button is pressed the time
interval before it turns off is reduced by
10 minutes. i.e. 80...70... etc.
Select the desired time to turn off.
2. While the sleep function is active press
SLEEP briefly. The time remaining until it
turns off is displayed for about 5 seconds.
ote
If you press SLEEP while the sleep time is dis-
played, the SLEEP time is reset.
To cancel the sleep timer mode
If you wish to stop the function, press the SLEEP
button repeatedly until “SLEEP 10” appears, and
then press SLEEP once again while “SLEEP 10” is
displayed.
Audio Adjustment
Volume Adjustment
•Turn VOLUME CONTROL KNOB clockwise to
increase the sound level, or counterclockwise to
decrease it on the front panel.
•
Press VOLUME CONTROL ( ) to increase the
sound level, or press the VOLUME CONTROL ( )
to decrease it on the remote control.
XDSS (Extreme Dynamic Sound System)
Press XDSS to reinforce treble, bass and the
surround effect. The “XDSS ON” or “XDSS OFF”
indicator lights. To cancel, press XDSS again.
MUTE
Press MUTE to mute your unit.
When activated “MUTE” indicator flashes in the
display window.
MP3 Optimizer
This function optimizes the compression of MP3
files whilst improving the bass sounds
Press ‘OPTIMIZER’ on the front panel to switch on
or off.
Sound Quality Adjustment
•To activate stereo sound
You can choose between 4 fixed sound
impressions.
Select a desired sound mode by using
the EQ button.
FLAT : linear frequency response
ROCK : more bass, more treble
POP : less bass, less treble
CLASSIC: for orchestral music
• Headphone Socket
Connect a stereo headphone plug ( 3.5mm)
into the headphone jack.
The speakers are automatically disconnected
when you plug in the headphone.(not supplied)
Adjusting the voltage
-
-
OPTIONAL
If your unit is equipped with a voltage selector at
the back, be sure to set it to your local power sup-
plied before connecting the AC power cord.
 Loading...