12 ENGLISH
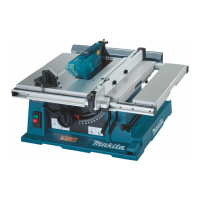
There must be a clearance of about 4 - 5 mm between
the riving knife and the blade teeth. Loosen the hex
bolts (A), adjust the riving knife accordingly and tighten
the hex bolts (A) securely. Attach the table insert on the
table with the screw, then check to see that the blade
guard works smoothly before cutting.
1
2
3
► 1. Riving knife 2. Blade guard 3. 4 mm - 5mm
clearance
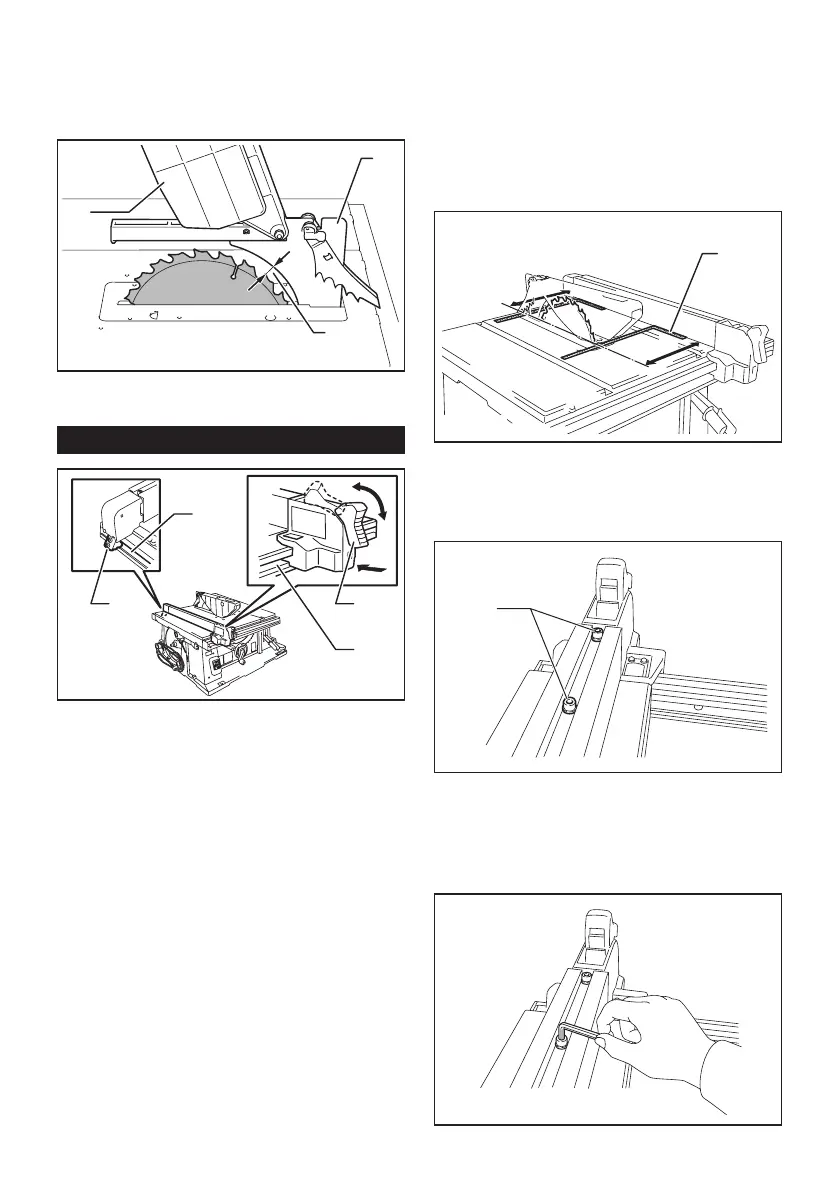
Installing and adjusting rip fence
1
2
3
3
► 1. Hook 2. Knob 3. Guide rail
1. Fit the hook on the tip of the rip fence into the far
guide rail on the table or sub table (R) and install and
push the rip fence forward so that the fence holder
engages with the nearmost guide rail.
2. To slide the rip fence on the guide rail sideways,
return the knob on the fence holder fully without pulling
the lever on the knob.
To secure the rip fence, pivot fully the knob on the fence
holder.
3. To remove the rip fence, pull the lever on the knob
and pivot the knob fully forward while pulling the lever.
To check if the rip fence is parallel with the saw blade,
secure the rip fence 2 - 3 mm from the saw blade. Raise
the blade up to maximum elevation. Mark one of the
blade teeth with a crayon. Measure the distance (A) and
(B) between the rip fence and saw blade. Take both mea
-
surements using the tooth marked with the crayon. These
two measurements should be identical. If the rip fence is
not parallel with the saw blade, proceed as follows:
1
A
B
► 1. Scale
1. Position the rip fence in the sliding position.
2. Loosen the two hex bolts on the rip fence with the
hex wrench provided.
1
► 1. Hex bolts
3. Adjust the rip fence until it becomes parallel with
the saw blade.
4.
Pivot down the knob on the rip fence toward the operator.
5. Tighten the two hex bolts on the rip fence.
 Loading...