11 ENGLISH
CAUTION: Be sure that the saw blade is
installed so that the teeth are aligned in the cut-
ting (turning) direction.
CAUTION: Check the arbor hole diameter of
the saw blade before installing the saw blade.
Always use the correct ring for the arbor hole of
the saw blade you intend to use. The size of the
supplied ring(s) varies depending on the country.
• For tool for a 30 mm hole-diameter saw blade,
the ring 30 mm in outer diameter is provided.
• For tool for a 25.4 mm and 25 mm hole-diameter
saw blade, the silver and black rings are pro-
vided. Use the silver ring for 25.4 mm hole-di-
ameter saw blade and the black ring for 25 mm
hole-diameter saw blade.
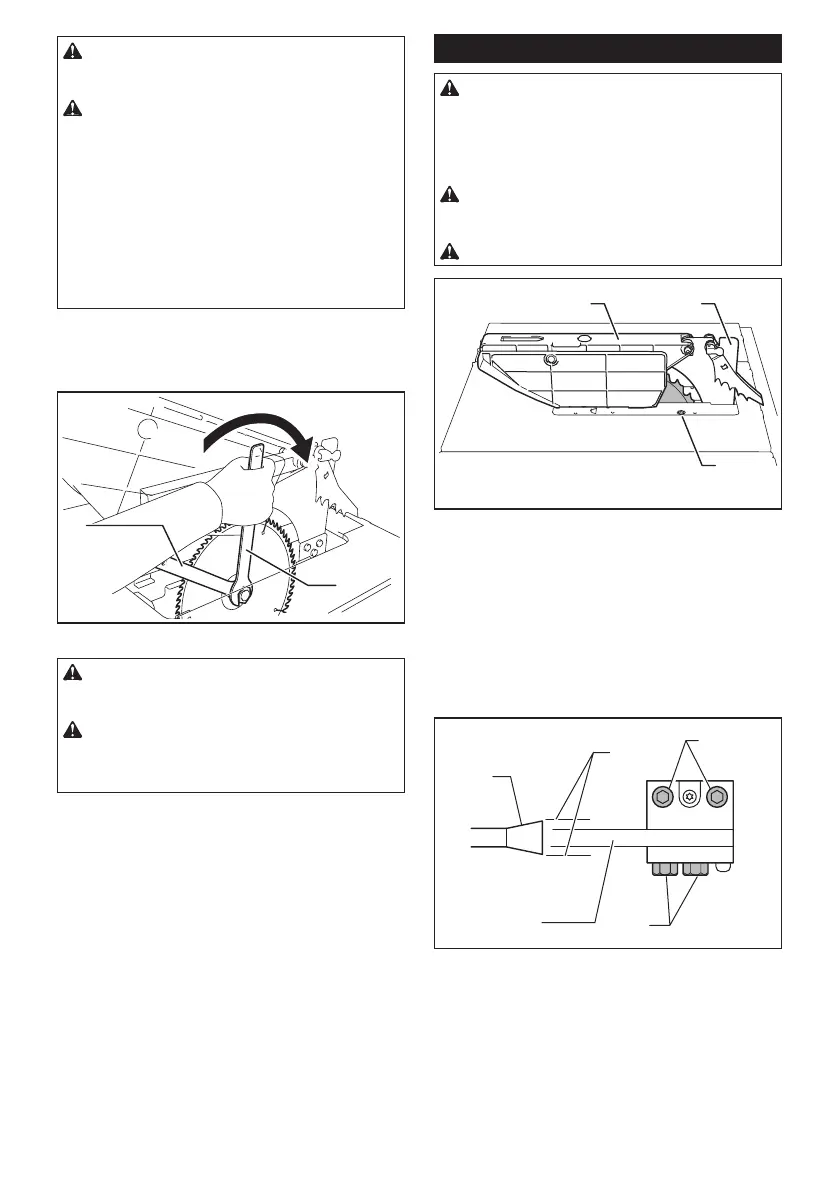
4. To secure the saw blade in place, hold the outer
ange with the offset wrench, then tighten the hex nut
clockwise with the wrench. BE SURE TO TIGHTEN
THE HEX NUT SECURELY.
1
2
► 1. Offset wrench 2. Wrench
CAUTION: Keep the ange surface clean of
dirt or other adhering matter; it could cause blade
slippage.
CAUTION: Be sure to hold the hex nut care-
fully with the wrench. If your grip should slip, the
wrench may come off the hex nut, and your hand
could strike the sharp blade edges.
5. Attach the table insert in place with the screw.
Adjusting the riving knife
CAUTION: If the saw blade and riving knife
are not aligned properly, a dangerous pinching
condition may result during operation. Make sure
they are properly aligned. You could suffer serious
personal injury while using the tool without a properly
aligned riving knife.
CAUTION: NEVER make any adjustments
while tool is running. Disconnect the tool before
making any adjustments.
CAUTION: Don't remove the riving knife.
3
► 1. Blade guard 2. Riving knife 3. Screw
The riving knife position is factory-adjusted so that
the saw blade and riving knife will be in a straight line.
However, you need to adjust it if the saw blade and
riving knife are not in a straight line.
Loosen the screw on the table insert and remove it from
the main table. Loosen the hex bolts (B) and adjust the
blade guard mounting portion (stay) so that the riving
knife is aligned directly behind the saw blade. Then
tighten the hex bolts (B) to secure the stay and put the
table insert in place.
1
2
3
4
5
► 1. Blade 2. These two clearances should be equal.
3. Riving knife 4. Hex bolts (B) 5. Hex bolts (A)
 Loading...