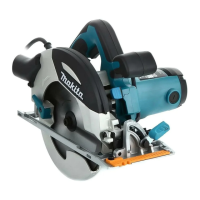
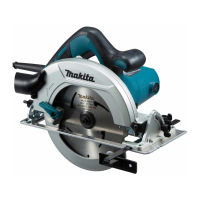
9 ENGLISH
FUNCTIONAL
DESCRIPTION
CAUTION:
• Alwaysbesurethatthetoolisswitchedoffand
unpluggedbeforeadjustingorcheckingfunction
on the tool.
Adjusting depth of cut
►Fig.7: 1. Lever
CAUTION:
• Afteradjustingthedepthofcut,alwaystighten
the lever securely.
Loosentheleveronthedepthguideandmovethebase
upordown.Atthedesireddepthofcut,securethebase
bytighteningthelever.
For cleaner, safer cuts, set cut depth so that no more
thanonebladetoothprojectsbelowworkpiece.Using
proper cut depth helps to reduce potential for danger-
ousKICKBACKSwhichcancausepersonalinjury.
Bevel cutting
►Fig.8: 1. Front lever
►Fig.9: 1.Rearwingnut
Loosen the front lever and rear wing nut. Set for the
desiredangle(0°-50°)bytiltingaccordingly,then
tighten the lever and wing nut securely.
►Fig.10: 1. Stopper
Use the 45° stopper when you do precise 45° angle
cutting.Turnthestopperclockwisefullyforbevelcut
(0°-45°)andturnitcounterclockwisefor0°-50°bevel
cuts.
Sighting
►Fig.11: 1. 0° position 2. 45° position 3. Cutting line
4. Screw
For straight cuts, align the 0° position on the front of
thebasewithyourcuttingline.For45°bevelcuts,align
the 45° position with it. The position of the top guide is
adjustable.
Switch action
►Fig.12: 1. Switch trigger 2.Lock-offbutton
CAUTION:
• Before plugging in the tool, always check to see
that the switch trigger actuates properly and
returns to the "OFF" position when released.
Topreventtheswitchtriggerfrombeingaccidentally
pulled,alock-offbuttonisprovided.Tostartthetool,
pushinthelock-offbuttonandpulltheswitchtrigger.
Releasetheswitchtriggertostop.
Do not pull the switch lever hard without pulling the
lock-offlever.Thiscancauseswitchbreakage.
Lighting the lamp
For Model HS6101, HS7101
CAUTION:
• Do not look in the light or see the source of light
directly.
►Fig.13: 1. Light
The lamp lights up when the tool is plugged. The lamp
keeps on lighting until the tool is unplugged.
NOTE:
• Use a dry cloth to wipe the dirt off the lens of
lamp. Be careful not to scratch the lens of lamp,
or it may lower the illumination.
• Do not use gasoline, thinner or the like to clean
thelensoflamp.Usingsuchsubstanceswill
damage the lens.
ASSEMBLY
CAUTION:
• Alwaysbesurethatthetoolisswitchedoffand
unpluggedbeforecarryingoutanyworkonthe
tool.
Removing or installing saw blade
CAUTION:
• Besurethebladeisinstalledwithteethpointing
up at the front of the tool.
• Use only the Makita wrench to install or remove
theblade.
►Fig.14: 1. Hex wrench 2. Loosen 3. Tighten 4. Shaft
lock
Toremovetheblade,presstheshaftlocksothatthe
bladecannotrevolveandusethewrenchtoloosenthe
hexboltcounterclockwise.Thenremovethehexbolt,
outerangeandblade.
For tool with the inner ange for a
15.88 mm hole-diameter saw blade
►Fig.15: 1. Mounting shaft 2.Innerange3. Saw
blade4.Outerange5.Hexbolt
Mounttheinnerangewithitsrecessedsidefacing
outward onto the mounting shaft and then place saw
blade,outerangeandhexbolt.
BESURETOTIGHTENTHEHEXBOLTCLOCKWISE
SECURELY.
 Loading...