3
2.1 READ AND SAVE THESE INSTRUCTIONS - CONTINUED
CHAPTER 2: IMPORTANT SAFETY INSTRUCTIONS
PROPER USAGE
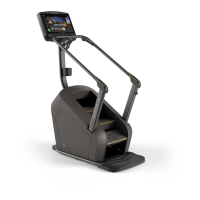
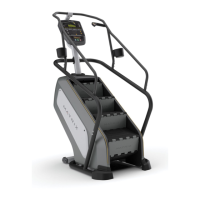
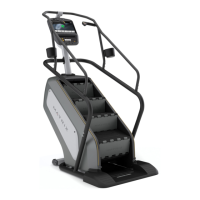
MOUNTING THE CLIMBMILL
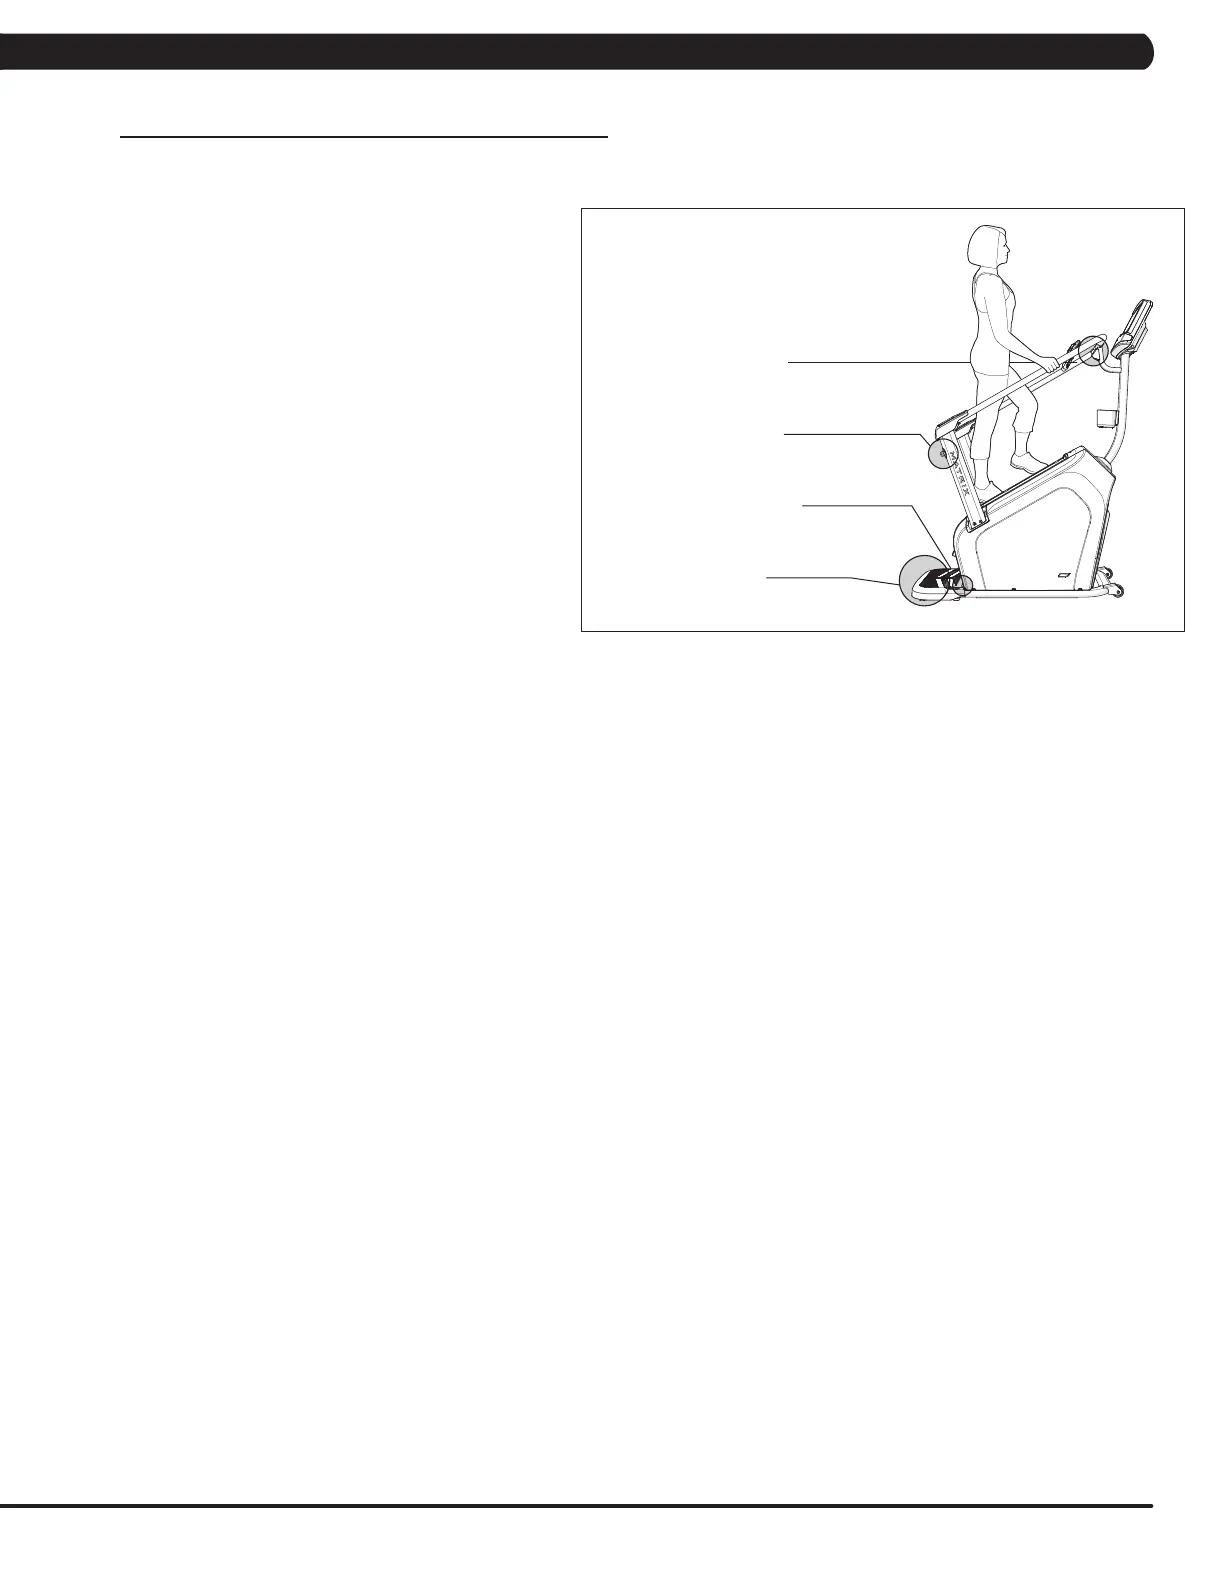
1. There are two EMERGENCY STOP BUTTONS on the
ClimbMill. One emergency stop button is located at the top of
the handlebars and the second is located on the lower right
side handlebar. The EMERGENCY STOP BUTTONS will
bring the step surfaces to a complete stop when pressed.
2. The CONTROL ZONE will bring the step surfaces to
a complete stop upon detecting an object. The AUTO-
STOP SENSOR will bring the step surfaces to a complete
stop upon detecting an object under the bottom step.
3. Stand directly behind the ClimbMill on the CONTROL
ZONE. Grasp the handlebars and step onto the ClimbMill
until you are within comfortable reach of the console, top
emergency stop lever, and in-reach handlebar controls.
4. To determine proper workout position, stand on the
steps within comfortable reach of the console. Maintain a
constant distance from the console and in-reach handlebar
controls. Keep your knees slightly bent at all times.
5. Dismounting the ClimbMill - After the steps have
come to a complete stop and while grasping the
handlebars, step down onto the CONTROL ZONE.
POWER
The power cord must be plugged into the power socket, which is
located in the front of the equipment on the front of the machine.
The power switch is located next to the power socket. Make
sure it is in the on position. Unplug cord when not in use.
WARNING!
Never operate product if it has a damaged cord or plug, if it
is not working properly, if it has been damaged, or immersed
in water. Please reference contact information on the back
cover of the INFORMATION CARD for assistance.
Emergency stop
Emergency stop
AUTO-STOP SENSOR
CONTROL ZONE
 Loading...