Sealing Material
• It is possible to seal one of the four air discharge outlet (sealing two or more air discharge outlet could
cause a malfunction).
• Remove the front panel and inserting the seal material into the air discharge outlet at the indoor unit to
seal the air outlet.
• The sealing material is the same length as the longer air discharge outlet. If it is desired to seal the
shorter air discharge outlet, cut the sealing material to shorten it.
• Push the sealing material in about 10 mm beyond the bottom surface of the indoor unit so that it does
not touch the air louver. Be sure not to push the sealing material in any farther than about 10 mm.
Overall Checking
• Ensure the following in particular:
1) The unit is mounted solidly and rigidly in position.
2) Piping and connections are leak proof after charging.
3) Proper wiring has been done.
• Drainage check - pour some water into the main drain pipe from the flexible drain hose.
• Test run
1) Conduct a test run after water drainage test and gas leakage test.
2) Watch out for the following:
a) Is the electric plug firmly inserted into the socket.
b) Is there any abnormal sound from the unit.
c) Is there any abnormal vibration with regard to the unit itself or piping.
d) Is there smooth drainage of water.
• Check that:
1) Condenser fan is running, with warm air blowing off the condensing unit.
2) Evaporator blower is running and discharge cool air.
3) The remote control incorporate a 3 minute delay in the circuit. Thus, it requires about 3 minutes before the
outdoor condensing unit can start up.
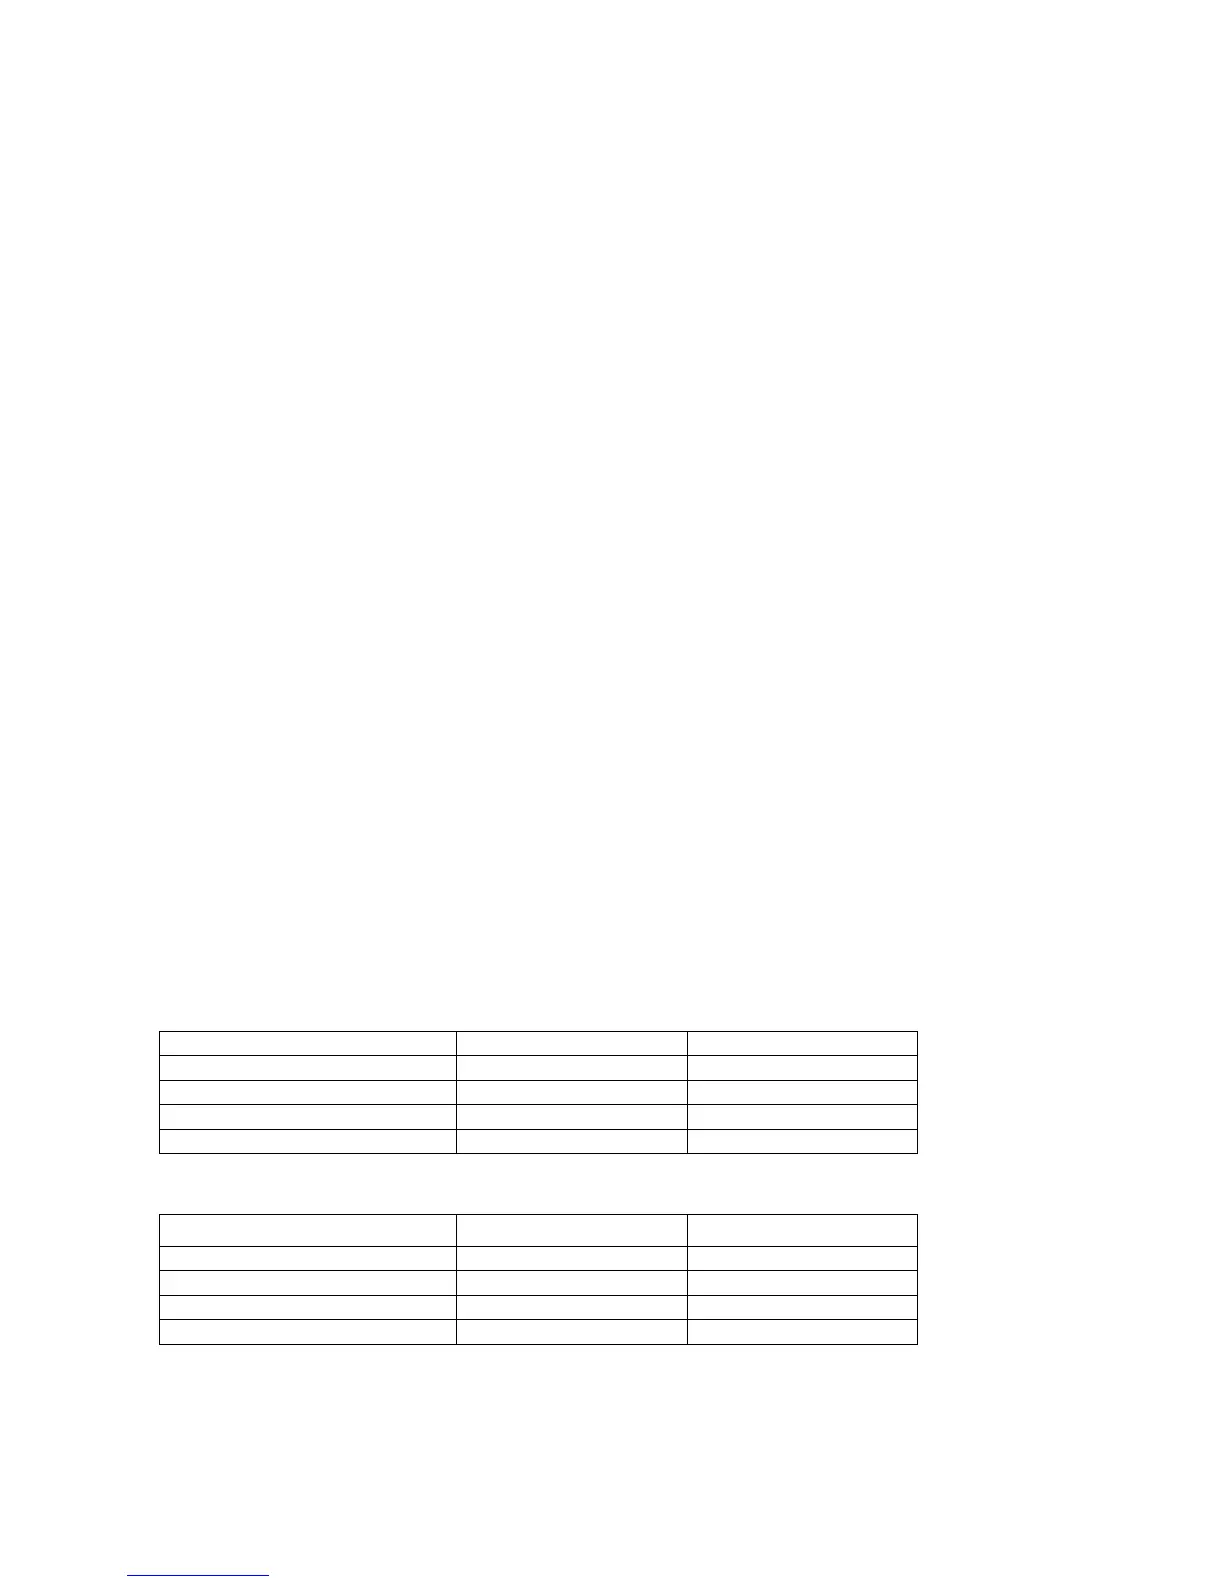
Standard Operation Conditions
Cooling Only
TEMPERATURE
Ts°C Th°C
MINIMUM INDOOR TEMPERATURE 19.4 13.9
MAXIMUM INDOOR TEMPERATURE 26.7 19.4
MINIMUM OUTDOOR TEMPERATURE 19.4 13.9
MAXIMUM OUTDOOR TEMPERATURE 46.0 24.0
Heat Pump
TEMPERATURE
Ts°C Th°C
MINIMUM INDOOR TEMPERATURE 15.0
-
MAXIMUM INDOOR TEMPERATURE 26.7
-
MINIMUM OUTDOOR TEMPERATURE - 8.0 - 9.0
MAXIMUM OUTDOOR TEMPERATURE 24.0 18.0
Ts : Dry bulb temperature
Th : Wet bulb temperature
84
 Loading...