OUTBOARD INSTALLATION
97
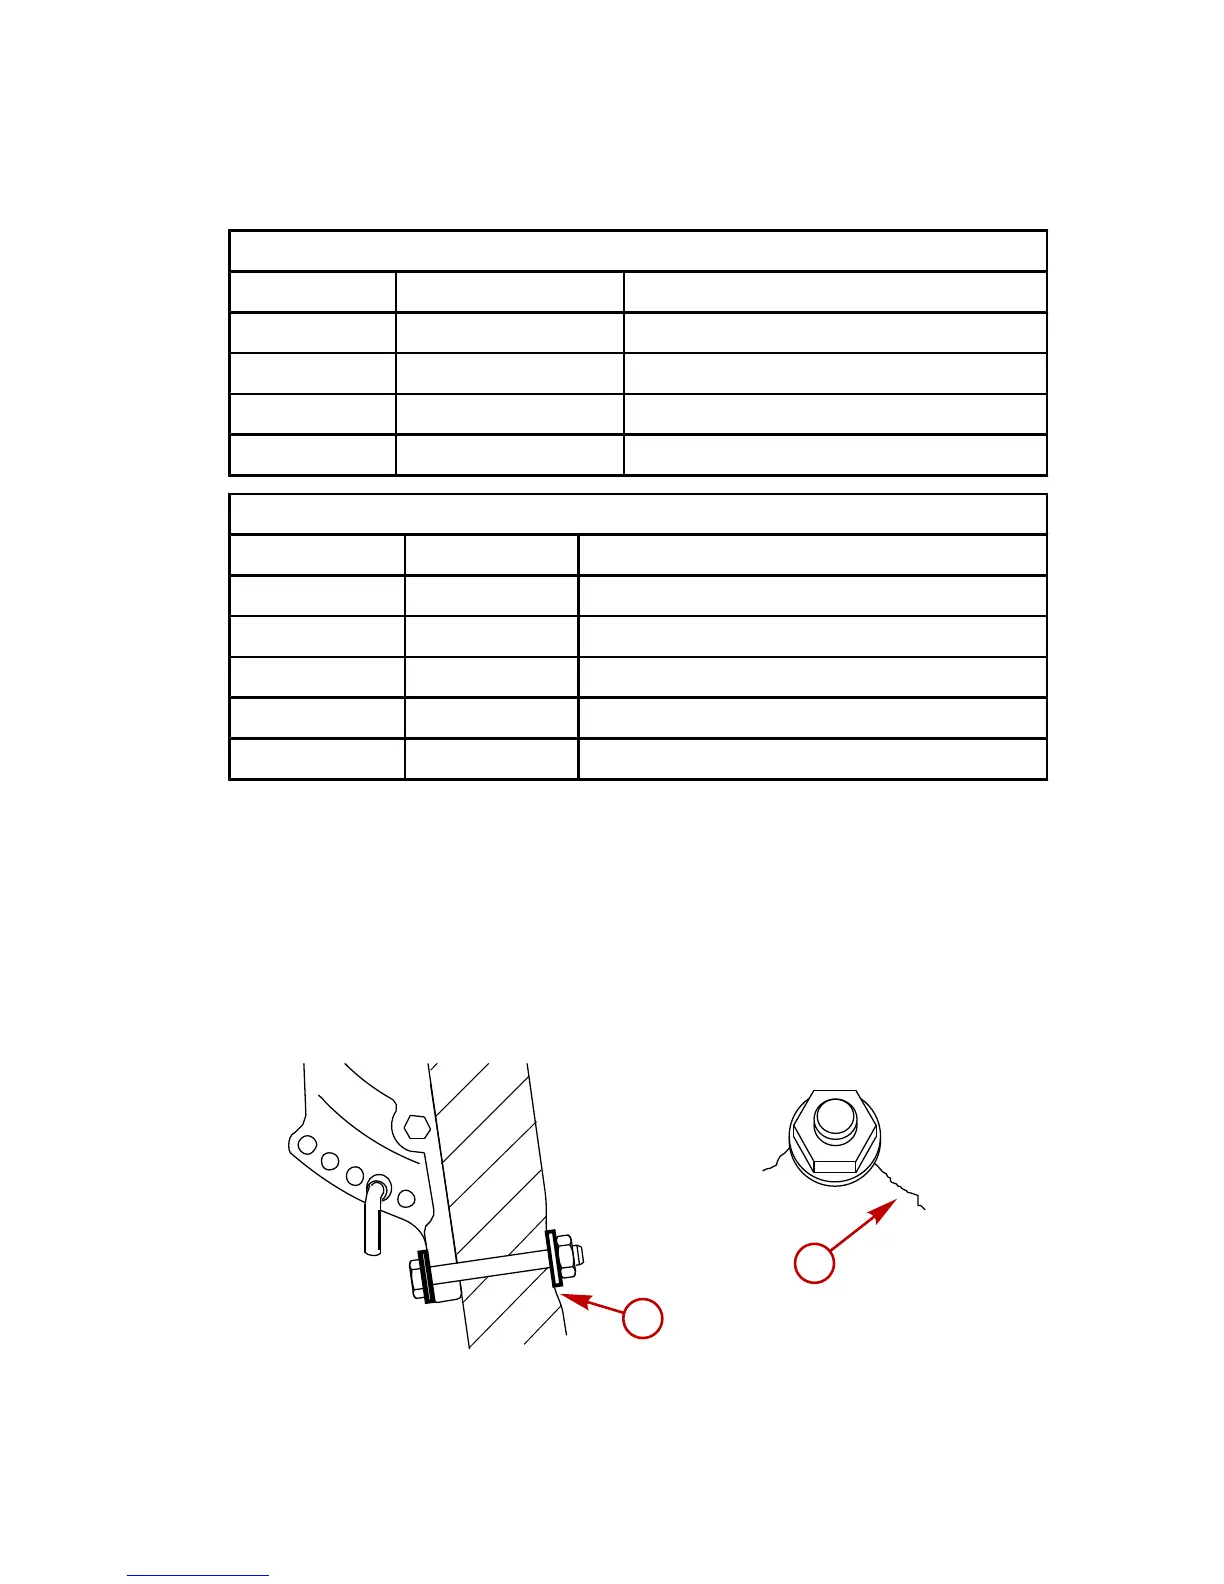
Fastening the Outboard to the Transom
MOUNTING BOLTS
Outboard Transom Mounting Hardware ‑ Supplied with Outboard
Part Number Part Name Description
10‑67755‑1 Transom bolt 1/2‑20 x 4.50 in. long (2.25 in. thread)
11‑826711‑17 Nylon insert locknut 1/2‑20
12‑28421 Washer ‑ Inner 0.516 in. ID x 1.50 in. OD
12‑54012 Washer ‑ Outer 0.53 in. ID x 0.87 in. OD
Available Transom Mounting Bolts
Part Number Part Name Description
10‑67755005 Transom bolt 1/2‑20 x 2.50 in. long (1.25 in. thread)
10‑67755006 Transom bolt 1/2‑20 x 3.50 in. long (1.25 in. thread)
10‑814259 Transom bolt 1/2‑20 x 4.00 in. long (2.25 in. thread)
10‑67755‑1 Transom bolt 1/2‑20 x 4.50 in. long (2.25 in. thread)
10‑67755‑2 Transom bolt 1/2‑20 x 6.50 in. long (2.75 in. thread)
CHECKING BOAT TRANSOM CONSTRUCTION
IMPORTANT: Determine the strength of the boat transom. The
outboard mounting locknuts and bolts should be able to hold 75
Nm (55 lb. ft.) of torque without the boat transom yielding or
cracking. If the boat transom yields or cracks under this torque, the
construction of the transom may not be adequate. The boat
transom must be strengthened or the load carrying area increased.
 Loading...