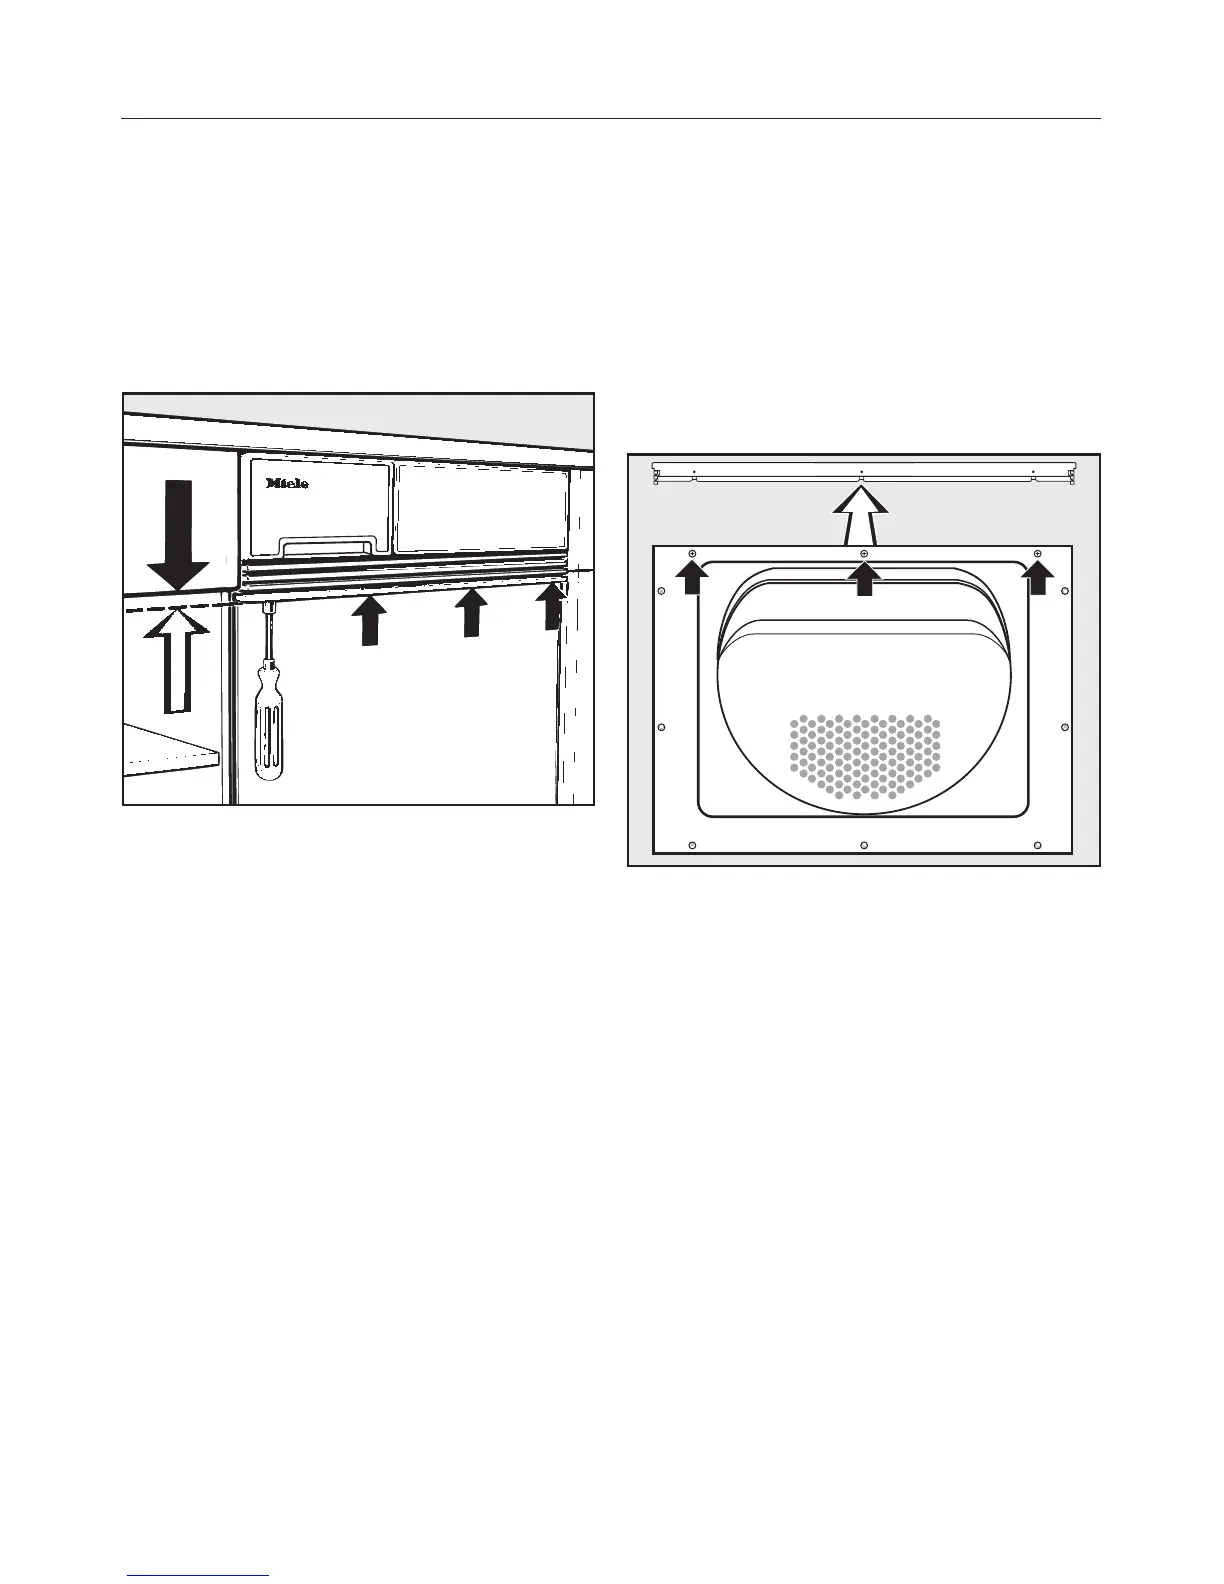
Matching the fascia panel to
the height of adjacent drawer
fronts
The fascia panel can be aligned with
the drawer fronts by adjusting the
spacer bars.
^ Using a socket spanner, turn
clockwise or anti-clockwise until the
required height is reached.
If necessary individual bars can be
removed or more added.
^
To do this, use the socket spanner to
loosen the nuts.
An adapter kit with spacer bars and
longer screws can be ordered as an
optional accessory. This can be used to
add spacer bars from below up to a
maximum of 25 mm.
After fitting the bars, cut or pinch off
any excess length from the screws.
Removing the spacer bars
All the spacer bars can be removed if
the upper edge of the front panel needs
to be flush with the upper edge of the
appliance front directly underneath the
fascia panel. See "Fitting a front panel
made by another manufacturer".
^
Open the door.
^ Unscrew and remove the 3 screws
(see arrows).
^
Remove all the spacer bars.
The 3 holes which are now free should
be used to screw the front panel to the
machine front later on.
Installation
43
 Loading...