System Introduction
1-2
<11>
<13>
<12>
<14>
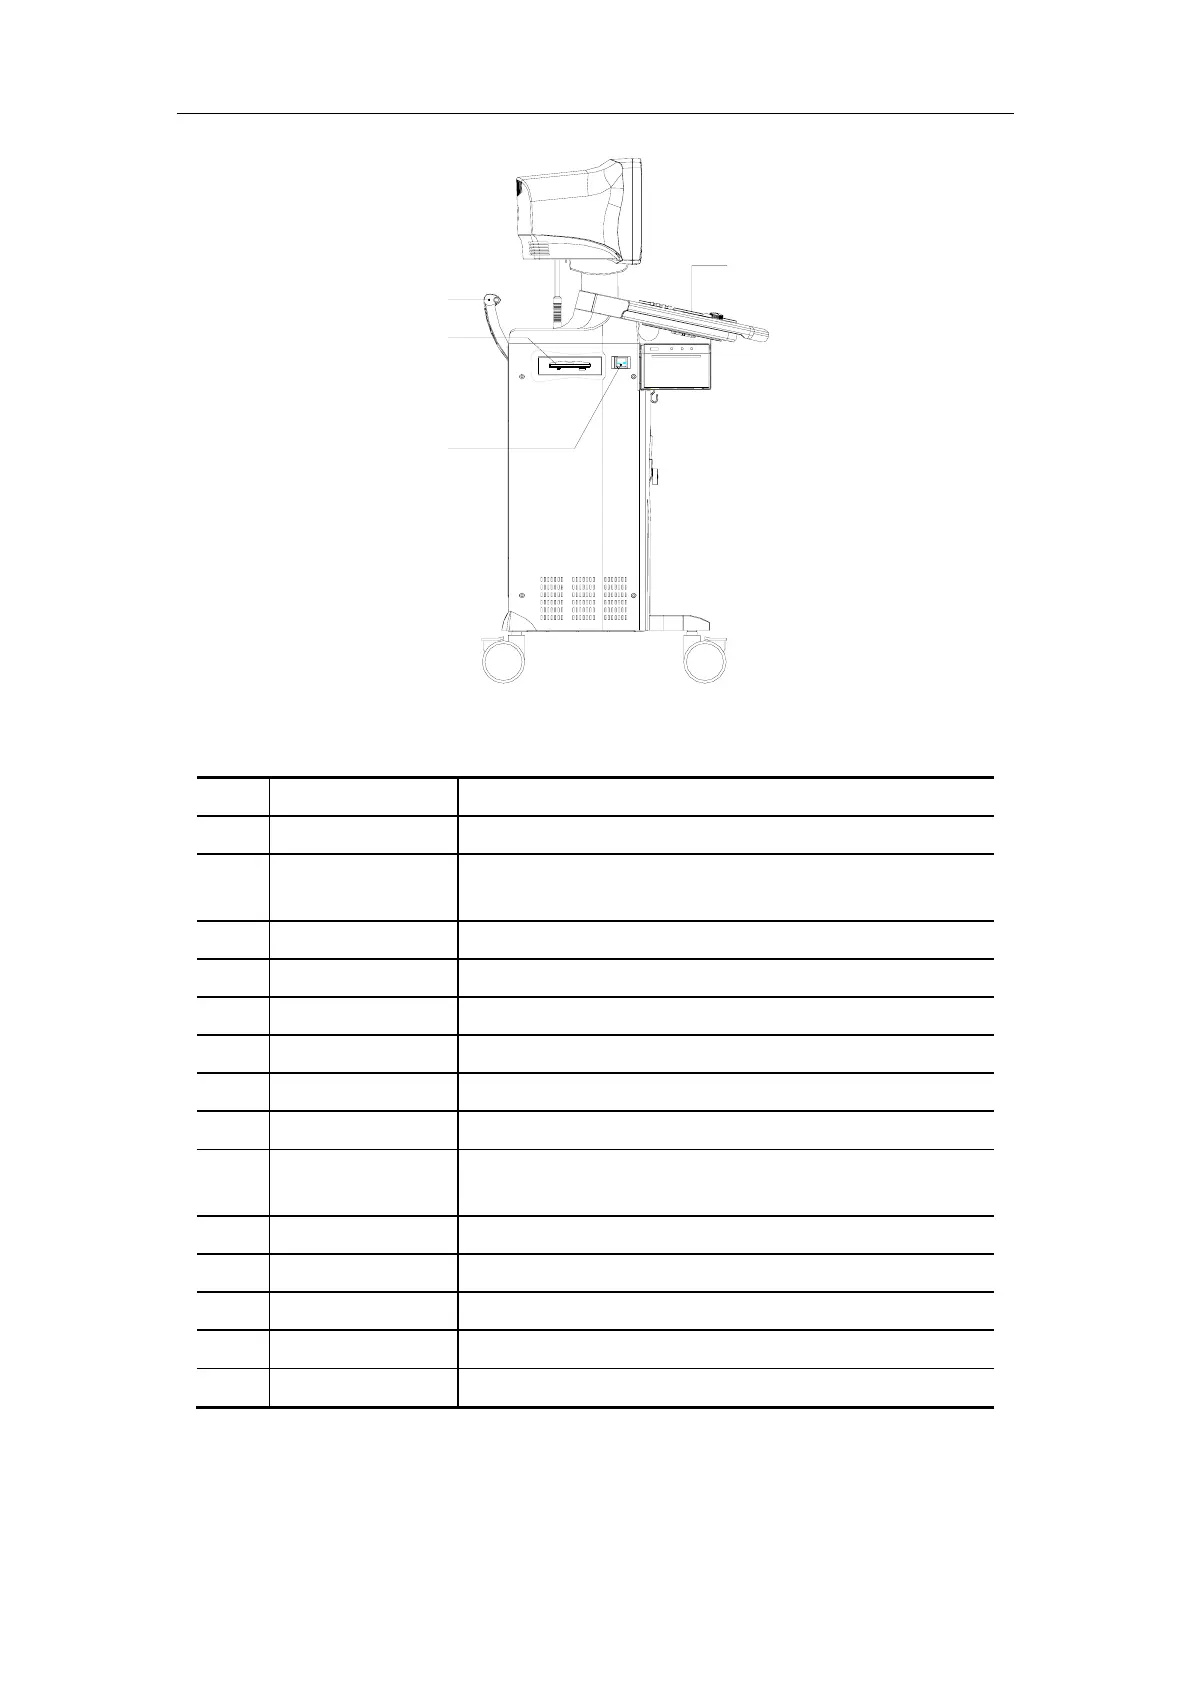
Left View
No. Part Introduction
<1> Monitor Display images and parameters, etc.
<2> Transducer cable
hanger
Hook for the transducer cable
<3> Transducer holder Place the transducer provisionally
<4> Printer area Place the video printer
<5> Video out Connect the video printer
<6> AC out Connect the AC power cable for the video printer
<7> Remote Connect the remote cable for the video printer
<8> Transducer socket Connect or disconnect the transducer with the main unit
<9> Footswitch switch
socket
Connect or disconnect footswitch
<10> Casters Lock or move the system
<11> Control panel User interface
<12> Handle Move the system
<13> CD-RW Backup data to a CD or read data from a CD
<14> Power switch Power on / off

 Loading...


