EasyManuals Logo

Minelab E-Trac User Manual

Minelab E-Trac
49 pages
To Next Page IconTo Next Page
To Previous Page IconTo Previous Page
Page #14 background image
22
23
Introducing the Detection Screens Pattern Screen
The E-Trac comes pre-programmed with
three unique Detection Screens. The selection
of the appropriate Detection Screen for
the current conditions will depend on your
preferences and experience. The three
Detection Screens are:
Pattern
Digital
QuickMask
All the information required for detecting
targets is contained within these three
Detection Screens, and when combined
with audible target responses, no buried
treasure is safe.
When the detector is turned on for the first
time, the Pattern Screen will be displayed
on the LCD and E-Trac is ready to begin
detecting. Target information is presented to
you via the Smartfind Discrimination Pattern,
Sensitivity Gauge, FE-CO numbers and Depth
Gauge. The information available to you in
the Pattern Screen is invaluable for successful
detecting with E-Trac.
Information is refreshed in ‘real time’; enabling
fast, clear and reliable interpretation of a
potential targets qualities. With practice and
experience you will be better able to interpret
the information displayed, leading to more
successful detecting.
The Smartfind Window is in the centre of
the Pattern Screen. It displays the active
Discrimination Pattern (p. 21). Above the
Smartfind Window is the area in which
an accepted targets FE-CO numbers will
appear. During and after a detection, a
Target Crosshair will appear in the Smartfind
Window, displaying the target’s FE-CO
coordinates relative to the rest of the
Discrimination Pattern. The FE-CO numbers
and Target Crosshair will remain until a new
‘accepted’ target is detected. Display Timeout
(p. 79), in the Preferences Menu, can be
turned on and this will clear detection results
after a five seconds.
The Depth Gauge is located to the right of
the Discrimination Pattern.
The Sensitivity Gauge is to the left, and by
default it is turned on. The Sensitivity Gauge
can be turned off via the Preferences
Menu (p. 78).
The Detect button on the Control Panel
switches between the Pattern and Digital
Screens, and returns you to these Screens if
you are in the Main Menu, QuickMask or Edit
Screen. In addition, the QuickMask button
provides a shortcut between the QuickMask
Screen and the Pattern/Digital Screens (see
diagram below).
The last Detection Screen used will appear
the next time you turn on the detector. Any
adjustments to Discrimination Patterns made
in the Pattern Screen will be retained and
used in Digital as well.
Ferrous-Conductivity
Numbers
The area where FE-CO
numbers of an accepted
target are displayed.
Discrimination Pattern
(Accepted)
The white (clear) area of
the Disc. Pattern is the
target FE-CO numbers
that you have accepted.
Discrimination Pattern
(Rejected)
The black area of the
Disc. Pattern is the target
FE-CO numbers that you
have rejected.
– This dialogue box (p. 37) will appear, allowing you to confirm whether or not you wish to
load the QuickMask Discrimination Pattern into either the Pattern or Digital Screen.
Auto Sensitivity Gauge
The left bar, and the
number at the top, is
the user-set Sensitivity.
The right bar is the
‘suggested’ Sensitivity.
Depth Gauge
Represents the
approximate depth of
a target beneath the
coil. The range, from top
to bottom, is 0–30cm
(0–12”).
QuickMask
Digital
Pattern
Detect
Detect Detect
QuickMask QuickMask

Other manuals for Minelab E-Trac

Questions and Answers:

Question and Answer IconNeed help?

Do you have a question about the Minelab E-Trac and is the answer not in the manual?

Minelab E-Trac Specifications

General IconGeneral
Transmission TechnologyFull Band Spectrum (FBS) Multifrequency Technology
Microprocessor32bit, 48MHz microprocessor – fast and powerful
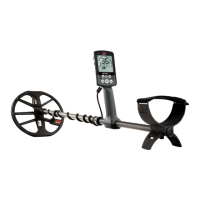
CoilUltra-lightweight 11” Double D (DD) waterproof coil
ConnectivityUSB connector for communication with Personal Computer
SoftwareIntuitive User Interface; Fast Target processing; Multi-language functionality
QuickMask™Fast and Easy adjustment of Ferrous and Conductivity Discrimination
User Modes4 Minelab Modes and 4 My Modes
Depth GaugeAccurate Gauge active in Normal detecting and Pinpoint mode
PinpointNon-motion with modulated audio and visual Crosshair on LCD, 2 Modes – Normal and Sizing
Discrimination2 Dimensional Smartfind™ Discrimination
Target Identification2 Dimensional Smartfind™ Size / Conductivity and Ferrous characteristics Conductivity 1-50, Ferrous 1-35
Sensitivity AdjustmentFully Automatic; adjustable to be more aggressive or conservative, Manual Setting 1-30
Sensitivity GaugeAuto Level, Manual Level, Suggested Level
ThresholdFine adjustment level from 1-50
Recovery SpeedSelectable Fast & Deep
Trash DensityLow for areas with isolated targets or High, for areas with more trash
Noise CancelAutomatic & Manual selection of 11 channels
Audio Response4 Settings: Normal, Long, Smooth, Pitch Hold
Tone ID Number of Tones1, 2, 4 and Multi-tone; customizable for Conductivity or Ferrous response
Tone ID Variability30 adjustable steps for better Target Identification
HeadphoneInput ¼” 100Ω Stereo Jack
Ground Balance ModesAuto Ground Compensation - Advanced Digital Filtering
Ground SettingsNeutral for most ground conditions, Difficult for more mineralized soils
Batteries1600 mAh NiMH or Alkaline batteries
Low Battery Audio AlarmAudio and visual indication
Visual DisplayLarge 3.4” (8.65cm) greyscale LCD panel with Contrast adjustment and Backlight
PatentsUS 4890064; US 5537041; US 5506506

Related product manuals