14 | minnkotamotors.com
©2023 Johnson Outdoors Marine Electronics, Inc.
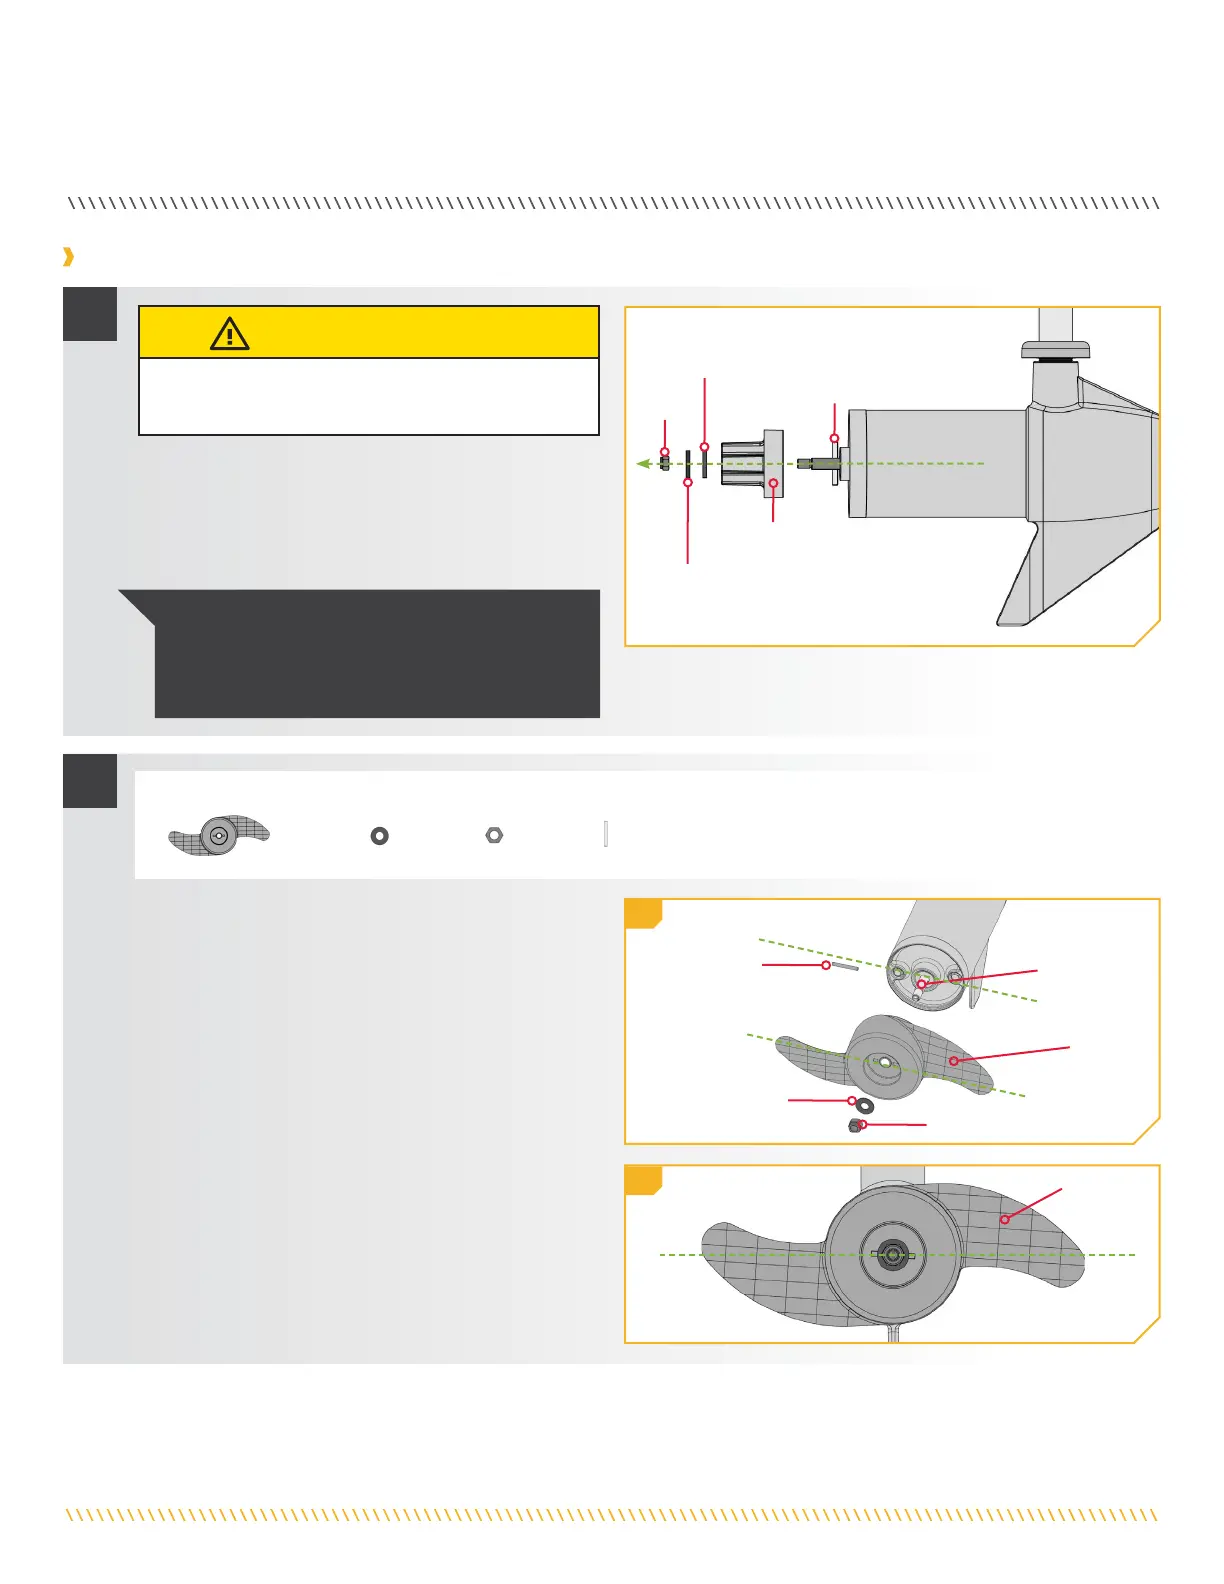
INSTALLING THE PROP
a. While holding the Shipping Spacer with a pliers
or vise grip, remove the Prop Nut, Red Shipping
Washer, Prop Washer and Spacer, being careful
not to lose the Drive Pin. Reuse the Prop Nut, Prop
Washer and Drive Pin to attach the Propeller.
1
CAUTION
Disconnect the motor from the battery before
beginning any prop work or maintenance.
NOTICE: The Shipping Spacer and Red Shipping
Washer are for shipping purposes only and must
be discarded. The Red Shipping Washer will rust if
used to attach the Propeller.
Prop Prop
NutNut
Shipping Shipping
Spacer Spacer
(discard)(discard)
Red Red
Shipping Shipping
Washer Washer
(discard)(discard)
Prop Prop
WasherWasher
Drive Drive
PinPin
Installing the Prop
ITEM(S) NEEDED
b. Take the Drive Pin (Item #8) and slide it through
the Hole in the Armature Shaft. Position the Drive
Pin horizontal by grasping the Armature Shaft and
rotating it with the Drive Pin in place.
c. Align the Propeller (Item #5) so it is also horizontal
and parallel with the Drive Pin. Slide the Propeller
onto the Armature Shaft and Drive Pin until it is
seated against the lower unit.
d. Install the Prop Washer (Item #6) and the Prop Nut
(Item #7) onto the end of the Armature Shaft.
#8 x 1#7 x 1#6 x 1#5 x 1
2
PropellerPropeller
PropellerPropeller
Prop NutProp Nut
Prop WasherProp Washer
Drive PinDrive Pin
Armature Armature
ShaftShaft
2b
2c
 Loading...