8. An Example Program for Manual/Automatic Ventilation Fan
The following is an example for a ventilation fan controller, using a Mitsubishi Alpha2
programmable controller. The program will have two modes.
Manual mode - will cause the fan to start when the “START” push-button (connected on the
Input 01) is momentary pressed, and continue to run until the “STOP” push-button (connected
on the Input 02) is momentary pressed.
Automatic mode - will cause the fan to start when the “START” push-button (connected on
the Input 01) is momentary pressed, and continue to run for 20 seconds.
The ventilation fan should turn off anytime when the “STOP” push-button is pressed.
1. Run the Mitsubishi Alpha programming software (Start | Programs | Mitsubishi Alpha
Controller | Alpha Programming)
2. Click on the “File” menu item and select “New”
3. Select the controller type being programmed
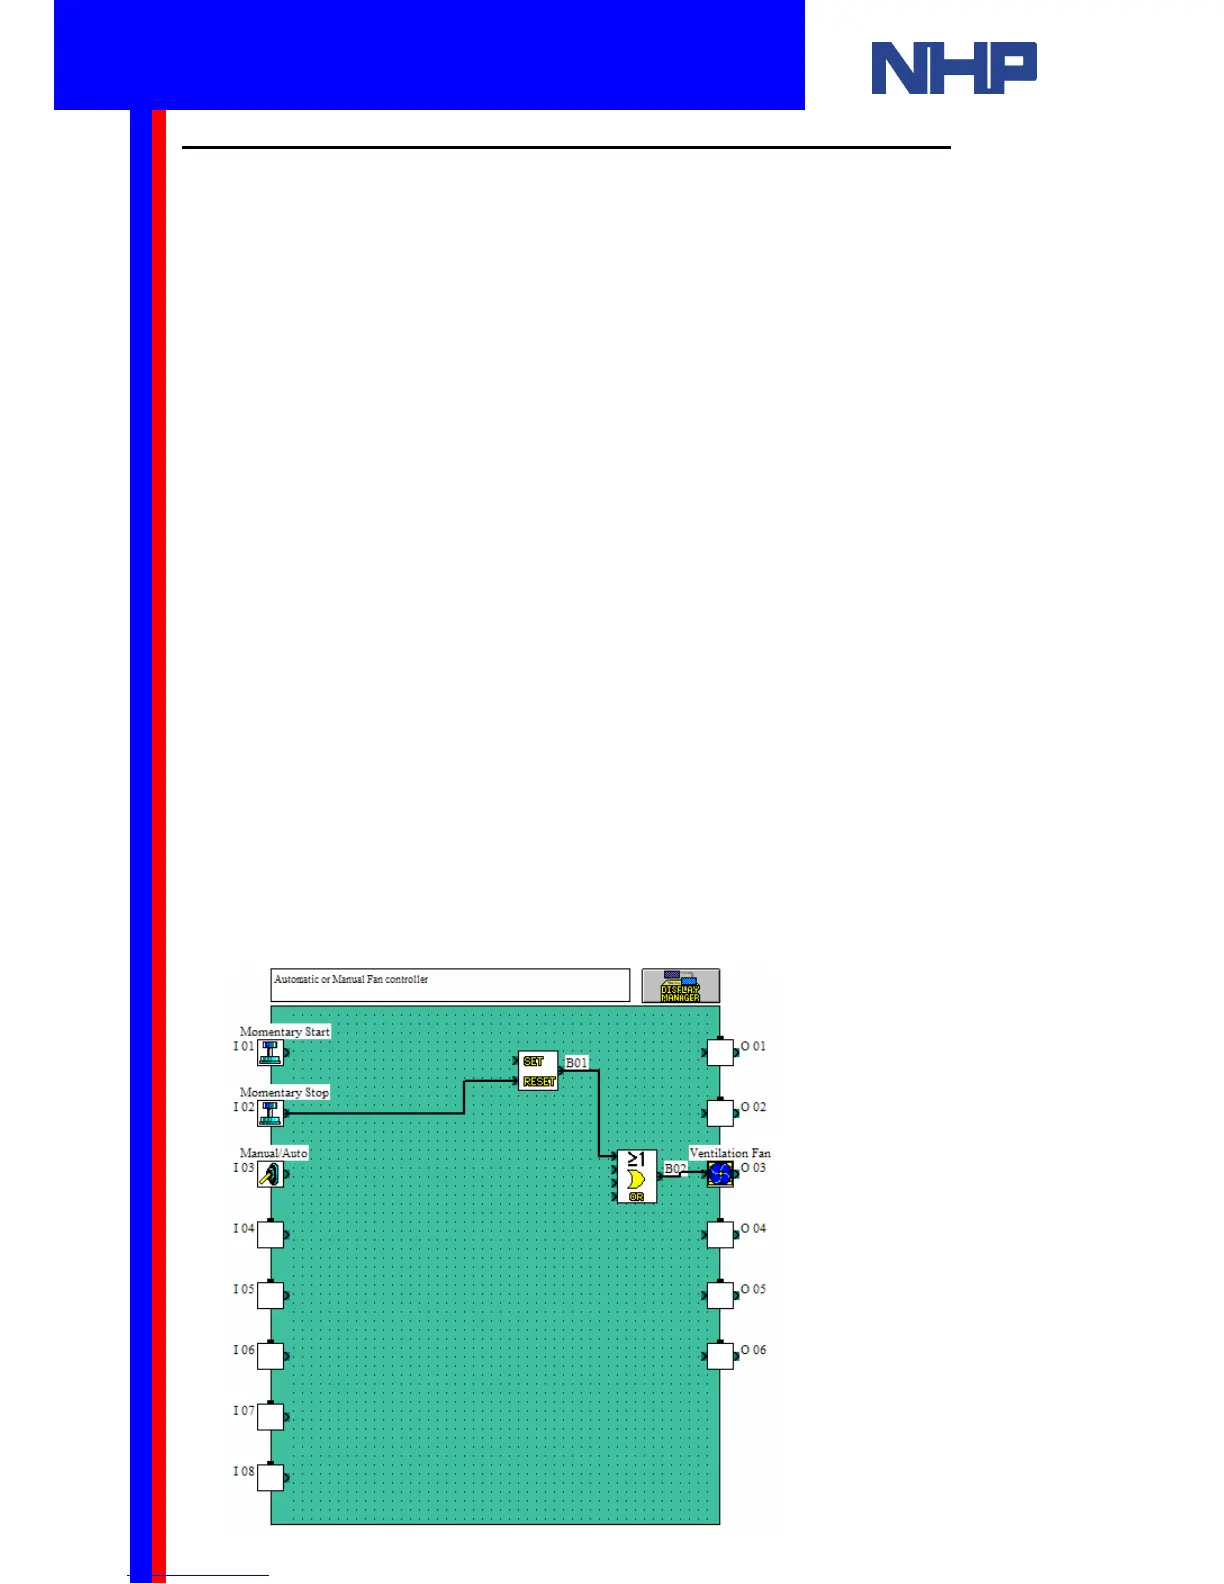
4. Change the FBD Title to “Automatic or Manual Fan Controller”
5. Double click on the first input (I 01) and label it as “Momentary Start” (Type the label into
the “Comment” edit box, in the property window of the object)
6. Label the second input (I 02) as “Momentary Stop”; Third input (I 03) as “Manual/Auto”;
Third output (O 01) as “Ventilation Fan”
7. Click on the “FUNC” symbol into the Accessories Toolbar to display the function blocks for
this group. Search for the “SET RESET” function block, and click on it
8. Click on the FBD to paste the “SET RESET” function block (B01)
9. Click on the “LOGI” symbol into the “Accessories” Toolbar to display the function blocks
for this group. Search for the “OR” function block, and click on it
10. Click on the FBD to paste the “OR” function block (B02)
11. Select the wiring tool by clicking on the “Wiring” toolbar
12. Connect the Input 02 to the “RESET” point of the “SET RESET” function block (B01)
13. Connect the output point of the “SET RESET” function block (B01) to the first input of the
“OR” function block (B02)
14. Connect the output point of the “OR” function block (B02) to the Output 03
Q u i c k S t a r t G u i d e
 Loading...