EN-9
ENGLISH
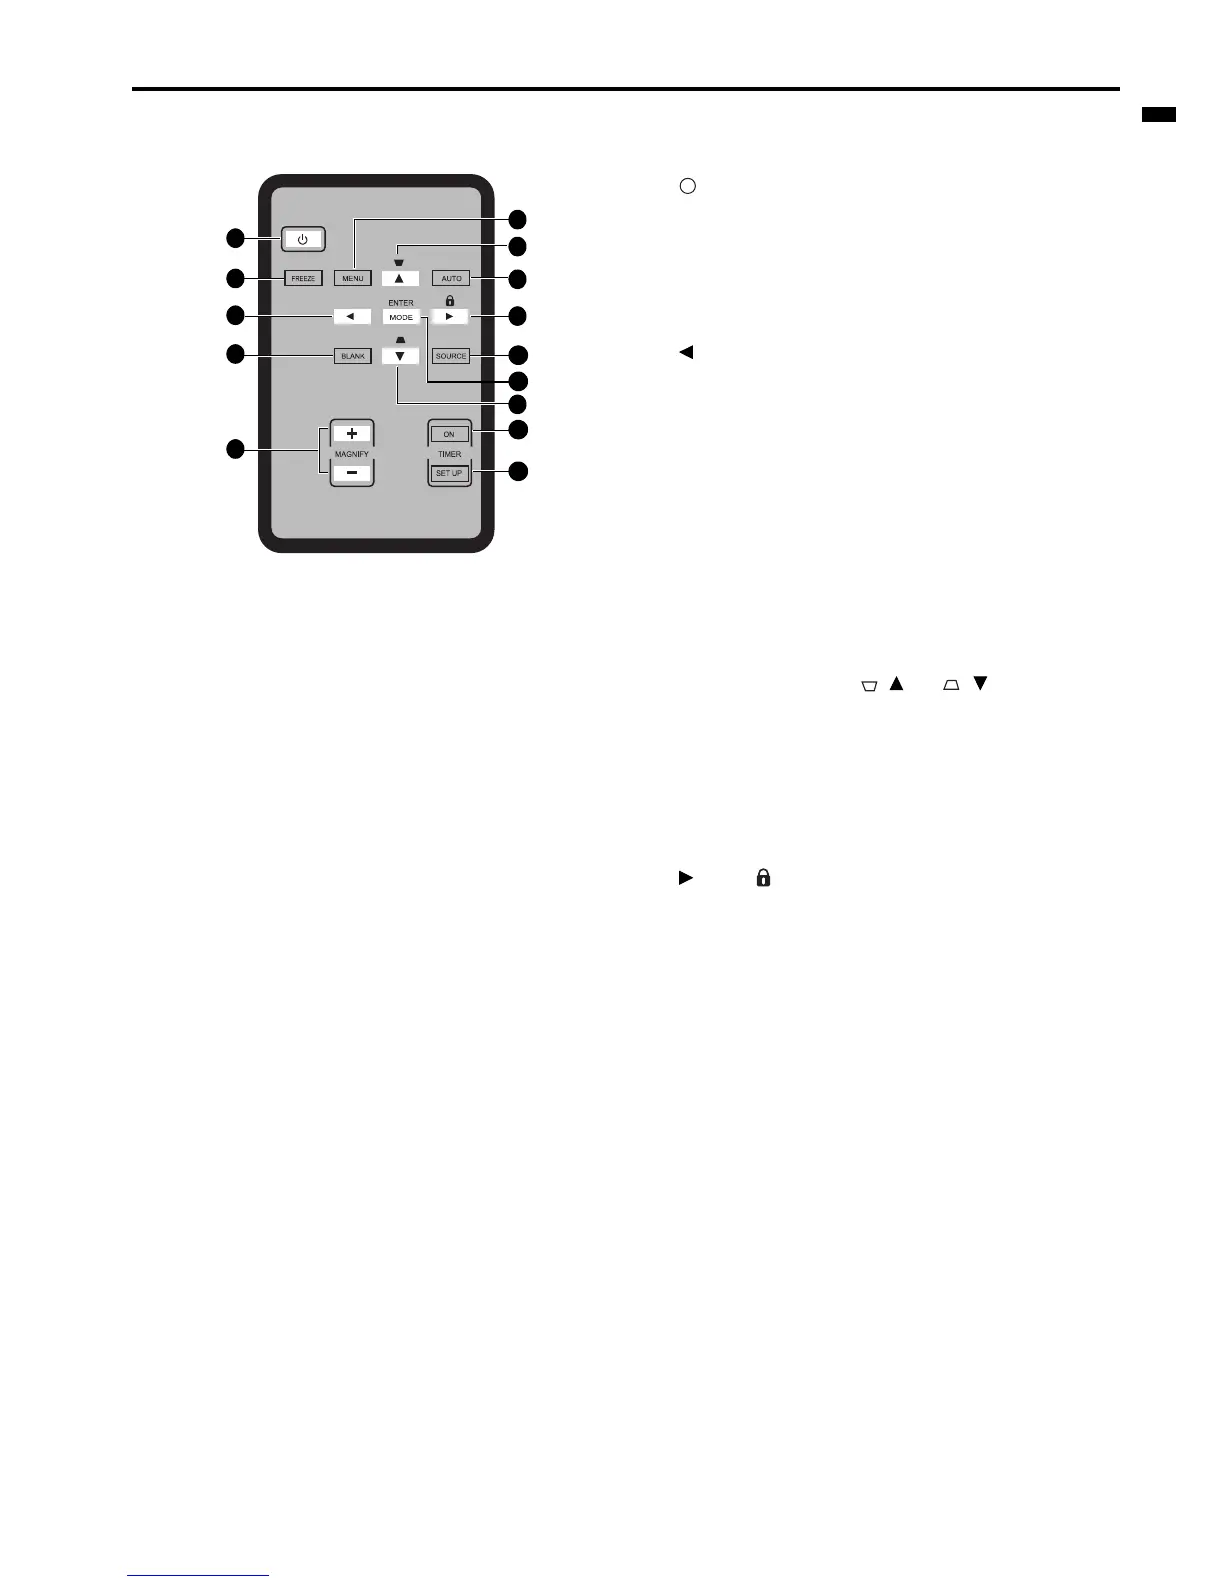
Remote control
1. Power
Toggles the projector between standby mode and on. See
"Starting up the projector" on page 17 and "Shutting down
the projector" on page 29 for details.
2. FREEZE
Freezes the projected image. See "Freezing the image" on
page 28 for details.
3. Left
Selects the desired menu items and makes adjustments. See
"Using the menus" on page 18 for details.
4. BLANK
Used to hide the screen picture. See "Hiding the image" on
page 28 for details.
5. MAGNIFY keys (+, -)
Magnifies or reduces the projected picture size. See
"Magnifying and searching for details" on page 22 for
details.
6. MENU
Turns on the On-Screen Display (OSD) menu. Goes back to
previous OSD menu, exits and saves menu settings. See
"Using the menus" on page 18 for details.
7. Keystone/Arrow keys ( / Up, / Down)
Manually corrects distorted images resulting from an
angled projection. See "Correcting keystone" on page 22
for details.
8. AUTO
Automatically determines the best picture timings for the
displayed image. See "Auto-adjusting the image" on page
21 for details.
9. Right/
Activates panel key lock. See "Locking control keys" on
page 28 for details.
When the On-Screen Display (OSD) menu is activated, the
#3, #7 and #9 keys are used as directional arrows to select
the desired menu items and to make adjustments. See
"Using the menus" on page 18 for details.
10. SOURCE
Displays the source selection bar. See "Switching input
signal" on page 20 for details.
11. MODE/ENTER
Depending upon which input signal is selected, selects an
available picture setup mode. See "Selecting a picture
mode" on page 24 for details.
Enacts the selected On-Screen Display (OSD) menu item.
12. TIMER ON
Activates or displays an on-screen timer based on your own
timer setting. See "Setting the presentation timer" on page
27 for details.
13. TIMER SET UP
Enters presentation timer setting directly. See "Setting the
presentation timer" on page 27 for details.
 Loading...