11
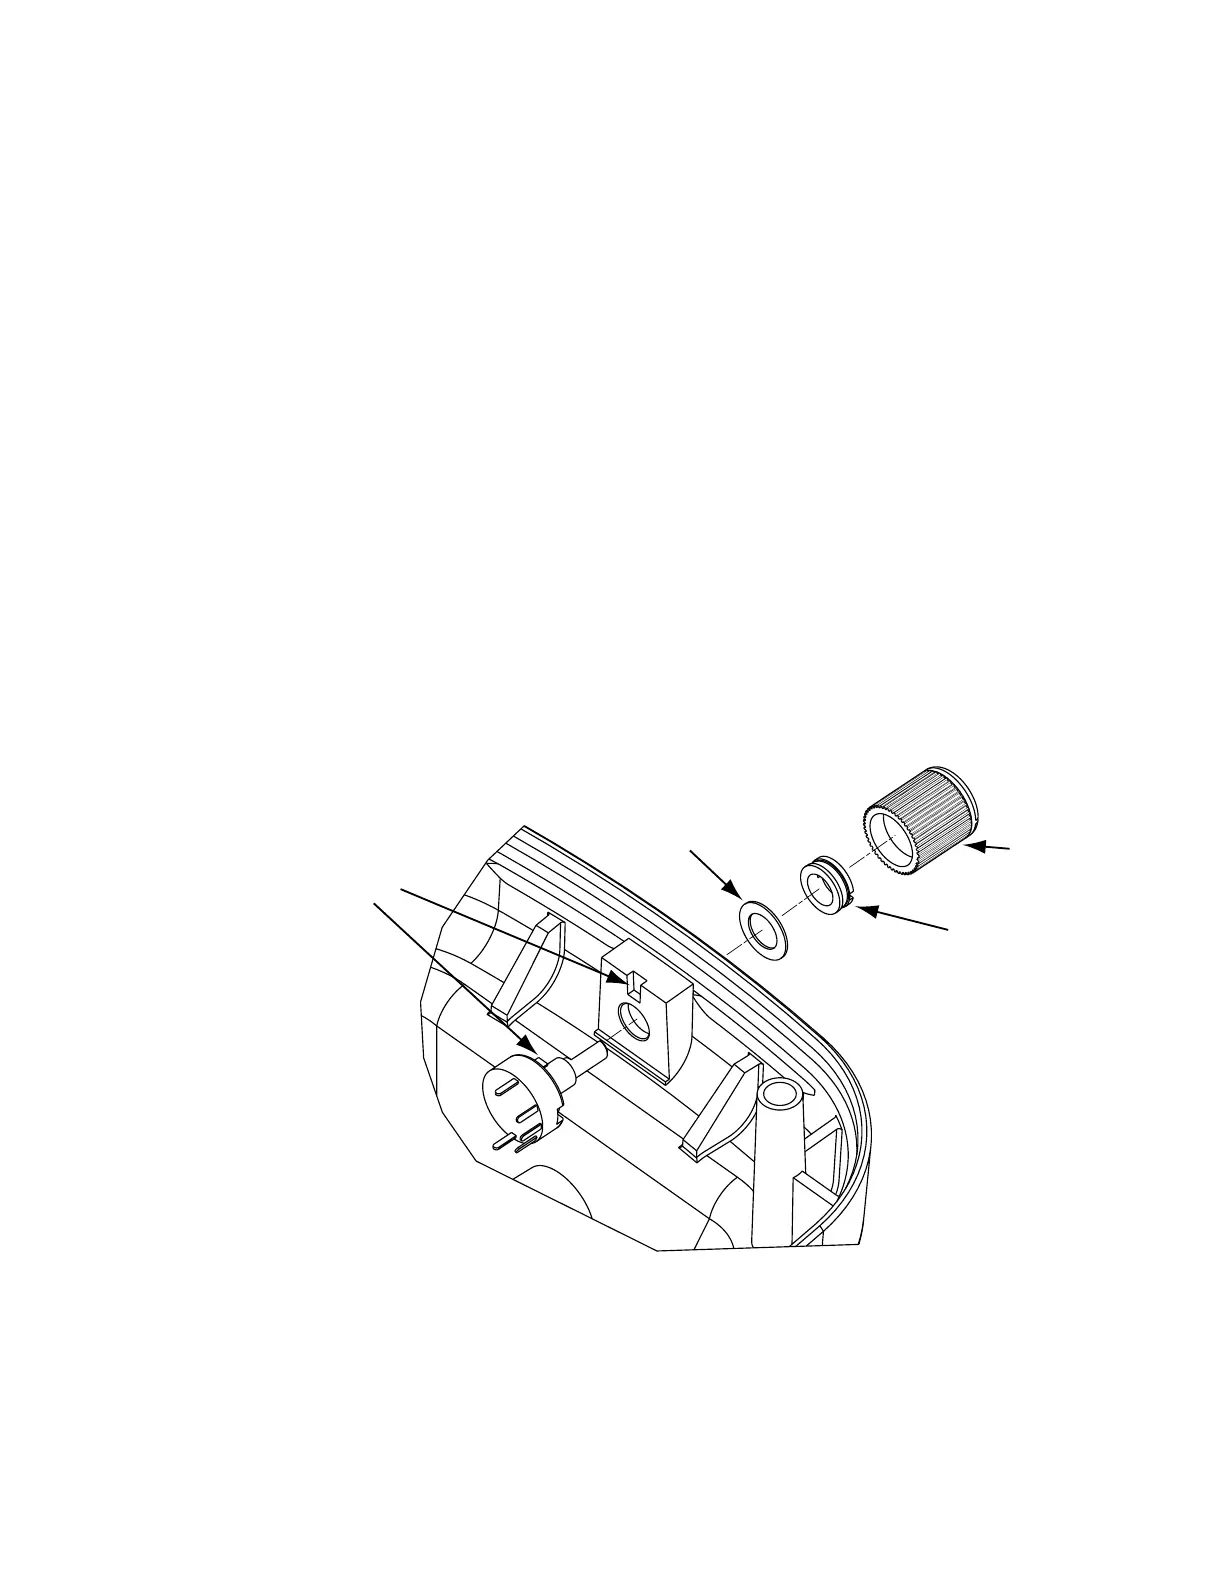
6. Refer to Figure 7 on page 12. Carefully slide a new O-ring,
Motorola part no. 3205082E01, over shaft and threaded bushing
until it is flat on face of new potentiometer.
7. Refer to Figure 6. Insert new potentiometer into hole in rear
housing. Be certain than key engages into slot in rear housing.
8. Place a new wave washer, Motorola Part No. 3205082E48, over
threaded shaft of new potentiometer.
9. Refer to Figure 7 on page 12. Install a new O-ring. Motorola Part
No. 3205082E48, on a new spanner nut, Motorola Part No.
0205609X01.
10.Thread spanner nut onto threaded shaft of new potentiometer
until it is hand tight.
11.Using an adjustable torque screwdriver, Motorola kit RSX4043( )
with a spanner wrench tip, Motorola part no. 6680371B03,
tighten spanner nut to a torque of 8-inch-pounds (0.91 Newton
Meter).
12.Using solder iron, connect wires to new Volume potentiometer as
shown in Figure 8 on page 12.
13.Perform procedure titled
Final Reassembly
on page 15.
MAEPF-26573-O
Volume
Potentiometer
Key
Wave
Washer
Volume
Knob
Spanner
Nut
Figure 6 Removing Volume Potentiometer
 Loading...