Section 2 Installation
Part Number 020002777 10/11 2-13
Mounting The Dispensing Tower
SECURED BY BOLTING TO THE COUNTER
1. Locate the drain pan and mounting screws. Mount the
dispensing tower onto the counter.
2. Locate the rubber drain hose and clamp. Attach it to the
drain pan fitting.
3. Apply a bead of plumber's putty to the bottom of the tower.
4. Position the tower on the counter. Route the drain line,
electrical cord and product tubes through the opening in
the counter. Pull the tower backwards into position. Verify
that the drain pan is secure.
5. Remove the access panel. Locate the 1/4" 20 mounting
screws, flat washers, lock washers and nuts supplied in the
installation kit. Mount the tower via the slots inside the
tower.
SECURED WITH MOUNTING CLAMPS
1. Position the tower on the counter-top in it's final location.
2. Locate the rubber drain hose and clamp. Attach it to the
drain pan fitting.
3. Locate the angle mounting clamps, the 1/4"-20 x 1" Hex
Head screws, and the internal tooth washers supplied with
tower installation kit.
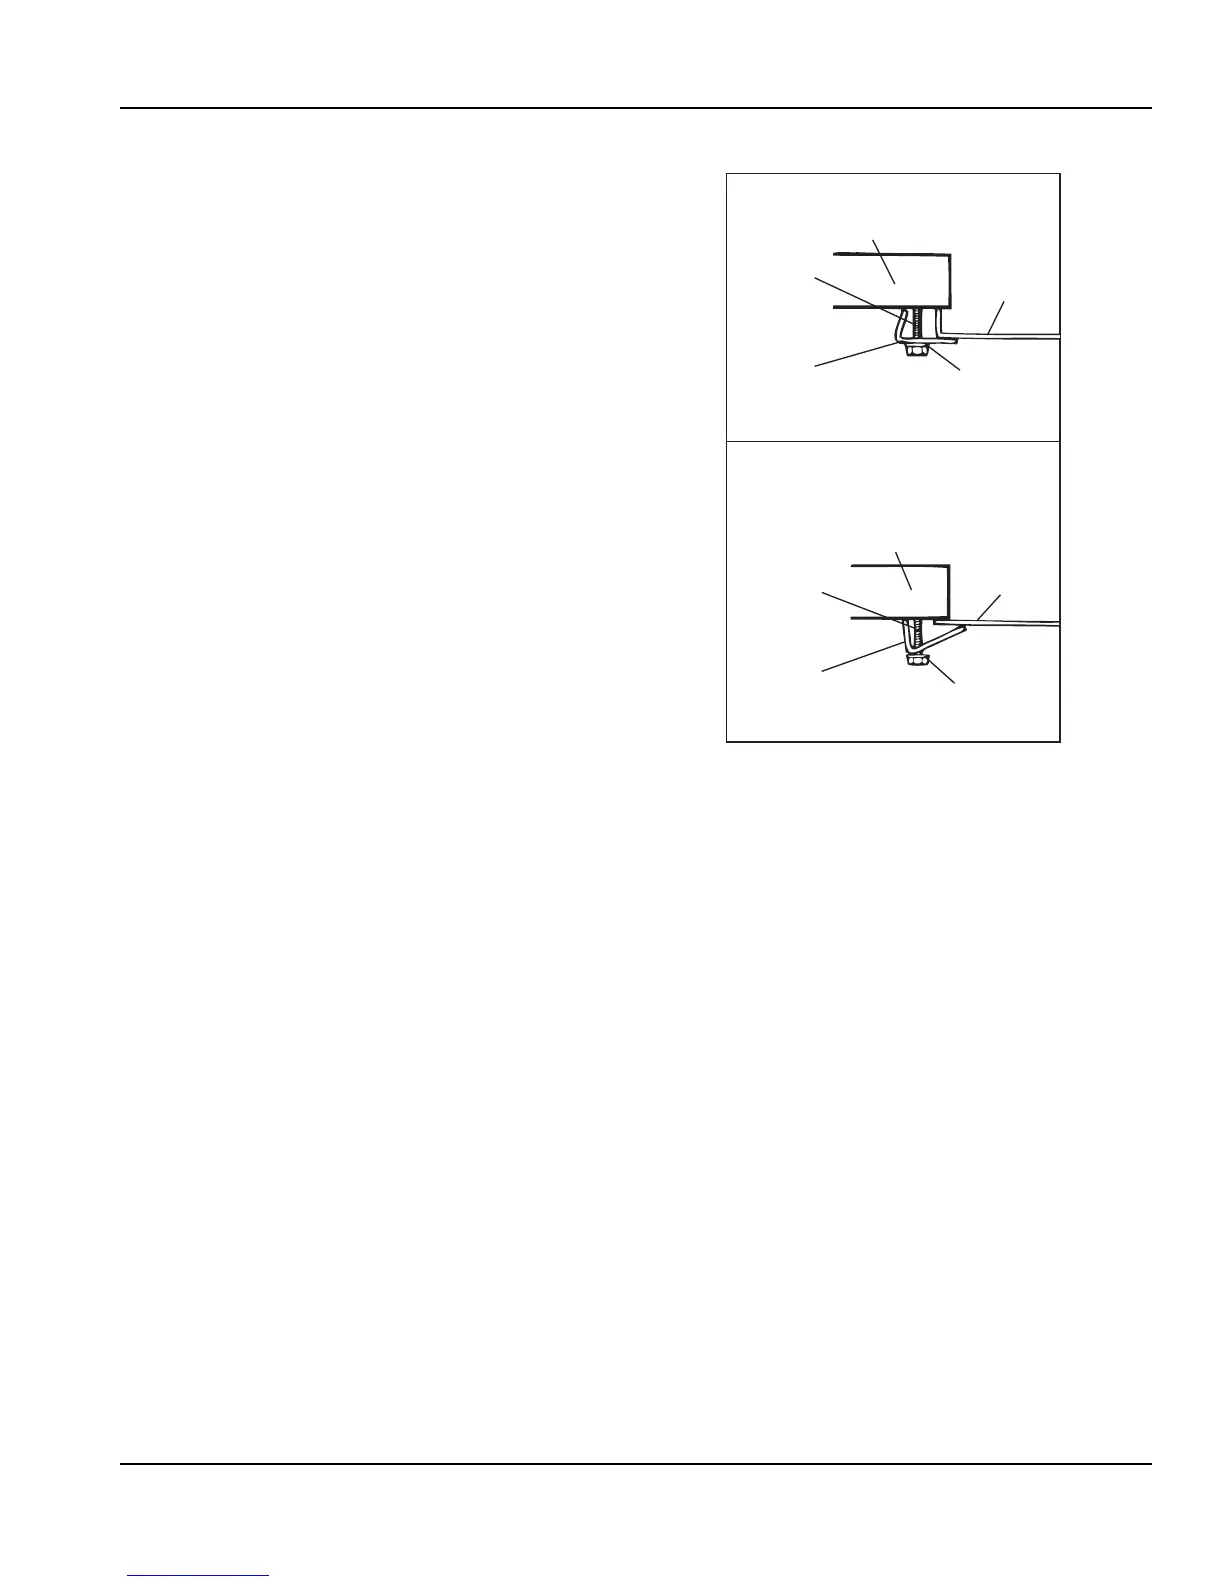
4. Secure the tower to the counter top with angle mounting
clamps, screws, and washers provided in kit. (see figure 1)
NOTE: If the tower is to be mounted to a flat counter top
as in Figure 1 View B, it will be necessary to seal the
edge of the tower to the counter top with R.T.V. sealant.
5. Route the beverage conduit up to the stainless steel Barb
Stem Adaptors at the base of the dispensing tower. If the
lines of the conduit are of different lengths, always connect
the shortest line first. Use two (2) tab clamps at every
connection.
View "B"
Flat Counter
View "A"
Pre-formed Counter-Top
1
/
4
"-20
Hex Head
Screw
Dispensing
Tower
Angle
Bracket
Internal
Tooth
Washer
Dispensing Tower
1
/
4
"-20 Hex
Head
Screw
Counter Top
Internal
Tooth
Washer
Angle
Bracket
Counter Top
 Loading...