IV. Assembly
56
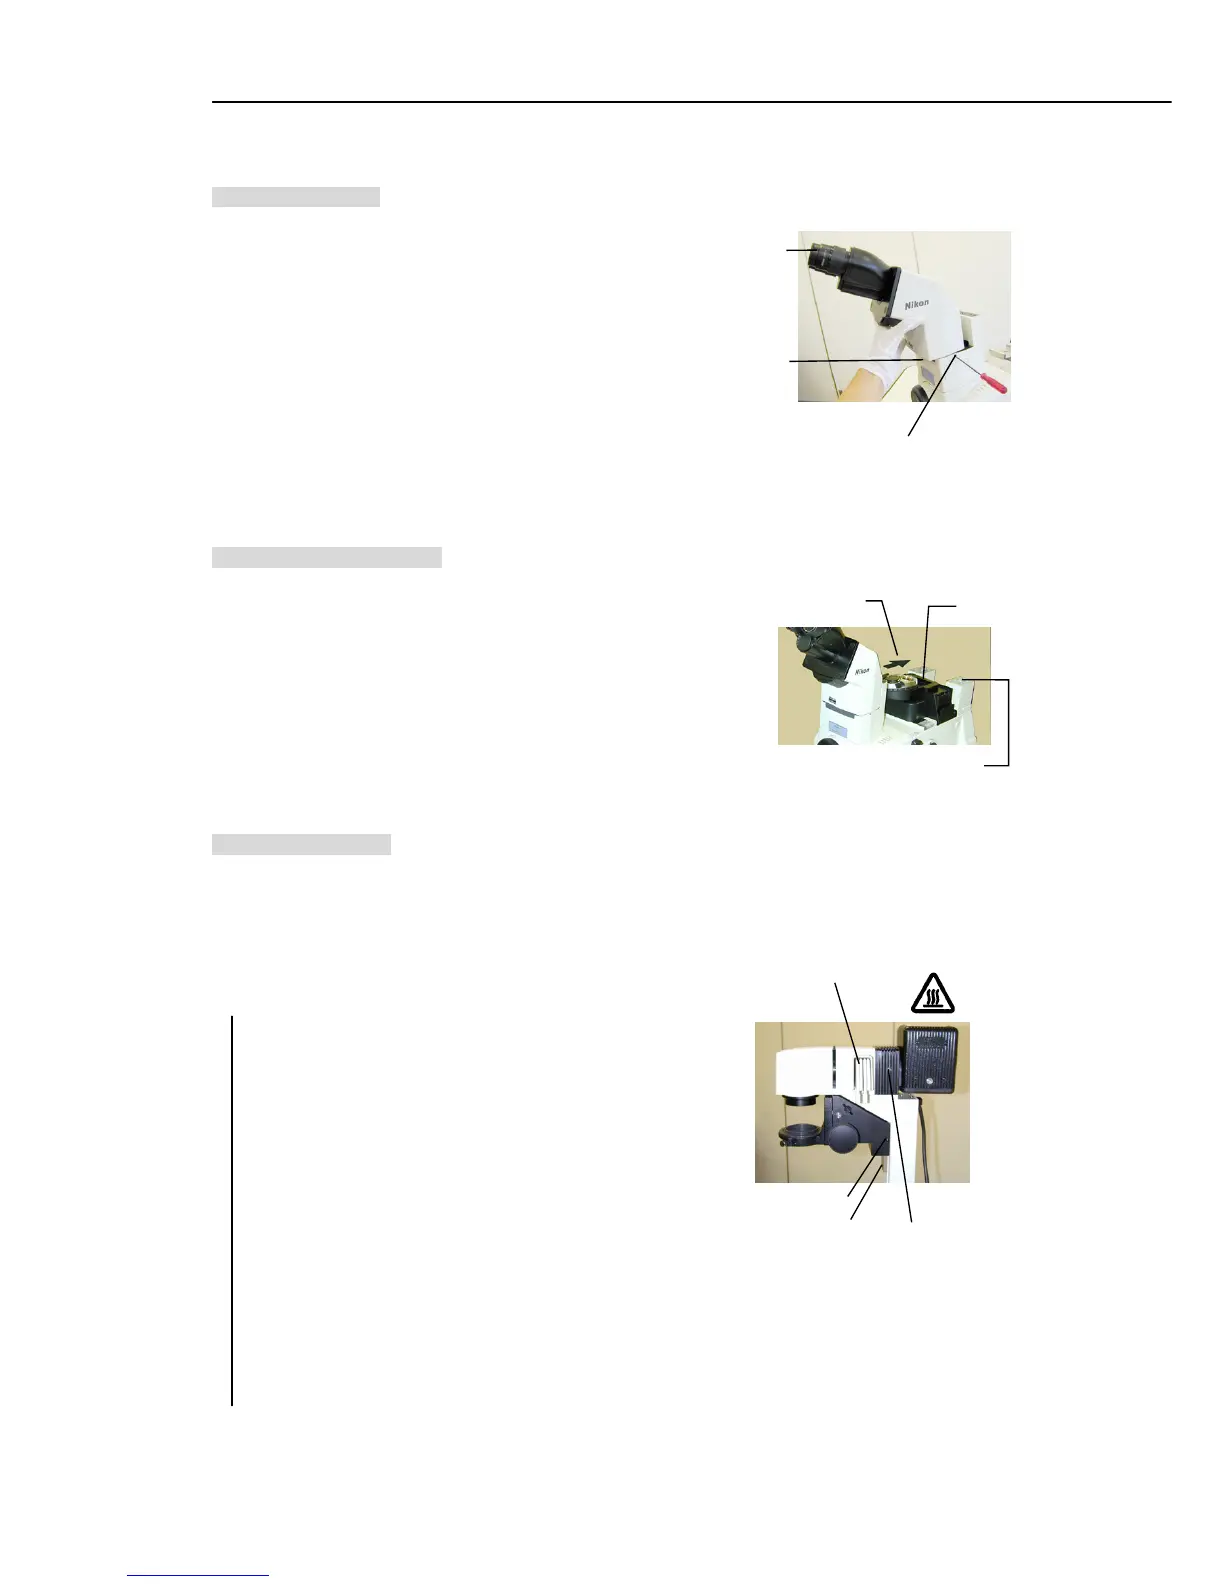
2. Eyepiece tube
1) Loosen the eyepiece tube clamp screw at the front of the base
using hexagonal screwdriver.
2) Remove the rubber cover.
3) Slide on the eyepiece tube from the front side till it hits the limit,
and then fix it by the clamp screw.
4) Put on the rubber cover.
5) Attach the eyepieces.
(Match 3 grooves on the eyepiece with 3 projections on the
eyepiece sleeve. The eyepieces on the right and left should be o
iece
Eyepiece tube
clamp screw
3. Revolving nosepiece
Attach the revolving nosepiece to the rectangular groove at the
center of the microscope.
Pressing the nosepiece from the front side to the rear, secure it by
two M5 hexagonal head bolts.
Screw on the objectives in an order that the magnification increases
as the nosepiece is turned clockwise when seen from above.
Bolts
Press the nosepiece in
this direction and secure.
Dia-illuminator is set here.
4. Dia-illuminator
Remove the carrying handle from the base.
Place the dia-illuminator oo the rear mount. Make sure that the
positioning pins on the mount fit into the holes on the illuminator.
Fix the illuminator with four M5 hexagonal head bolts supplied together.
If “T-DH dia-illuminator 100W” is to be used, do the following also.
1) Attach the condenser mount
Attach the condenser mount sliding it from the bottom to the top
along the dovetail groove. (Slide it up until it hits the limit.)
Fix the condenser mount securely with the clamp screw on the
right side.
Attach the stopper screw to the illuminator.
When using a condenser lens other than the ELWD or ELWD-S,
loosen the clamp screw, slide the condenser mount down until it
makes contact with the stopper screw, then tighten the clamp
screw firmly.
2) Attach the lamphouse
Insert the lamphouse to the top part of the dia-illuminator.
Make sure that the positioning pin on the illuminator fits into the
groove on the circular mount of the lamphouse.
Securely fix the lamphouse by the clamp screw on the right side
of the illuminator.
Lamphouse
clam

 Loading...


