Stacked installation on a wall (Optional)
Stacked installation on a wall (Optional)
- - --66
Pole installationPole installation
1. Fix the module to the bracket as in1. Fix the module to the bracket as in
““FFiixxiinng g mmoodduulle e tto o tthhe e bbrra a kkeett” ” ..
2. 2. ThThreread ad ththe e jujubibilelee e ththrorougugh h ththe e momountuntiningg
bracket’s holes.bracket’s holes.
33. . LLiifft t uunniit t tthhe e ppoollee
iigghhtteen n tthhe e jjuubbiilleee e cclliipps s uussiinngg
a a flflaat t ssccrreewwdrdriivveerr..
sectionsection
c c on on prpreveviiouous s papagege
clipsclips
tthhe oe on n ..
NOTE: Fix two ropes to the hoisting pointsNOTE: Fix two ropes to the hoisting points
(one rope on each side of the bracket)(one rope on each side of the bracket)
and connect them in the middle, that they formand connect them in the middle, that they form
a a triangltriangle. This allows for e. This allows for a a balancbalanced lifting. Liftinged lifting. Lifting
the unit with only one hoisting point is also possible,the unit with only one hoisting point is also possible,
but in such a case the unit is out of balance.but in such a case the unit is out of balance.
44. . T T tto o 5 5 NNm m ((33..7 7 llb b fftt))
-head-head
22
11
33
44
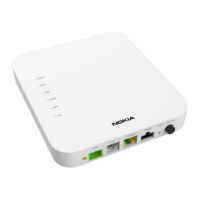
Short position installation on a wall (Optional)Short position installation on a wall (Optional)
11. . KKnnoocck k oouut t hhoolleess
..
2 2 Screw foScrew four fixinur fixing studs to tg studs to the tophe top
ccoovveer r ..
3. Fit the second FQG3. Fit the second FQGAA modulmodulee
..
4. Fi4. Fix the sx the secuecurinring M g M scrscrewsews..
aalll l tthhe e ' ' bblliinndds s uussiinngg
a flat-head screwdrivera flat-head screwdriver
..
of the first unitof the first unit
to theto the
studs and push it down firmlystuds and push it down firmly
44
44
33
22
11
1a
1a
1b1b
1c1c
1d1d
33
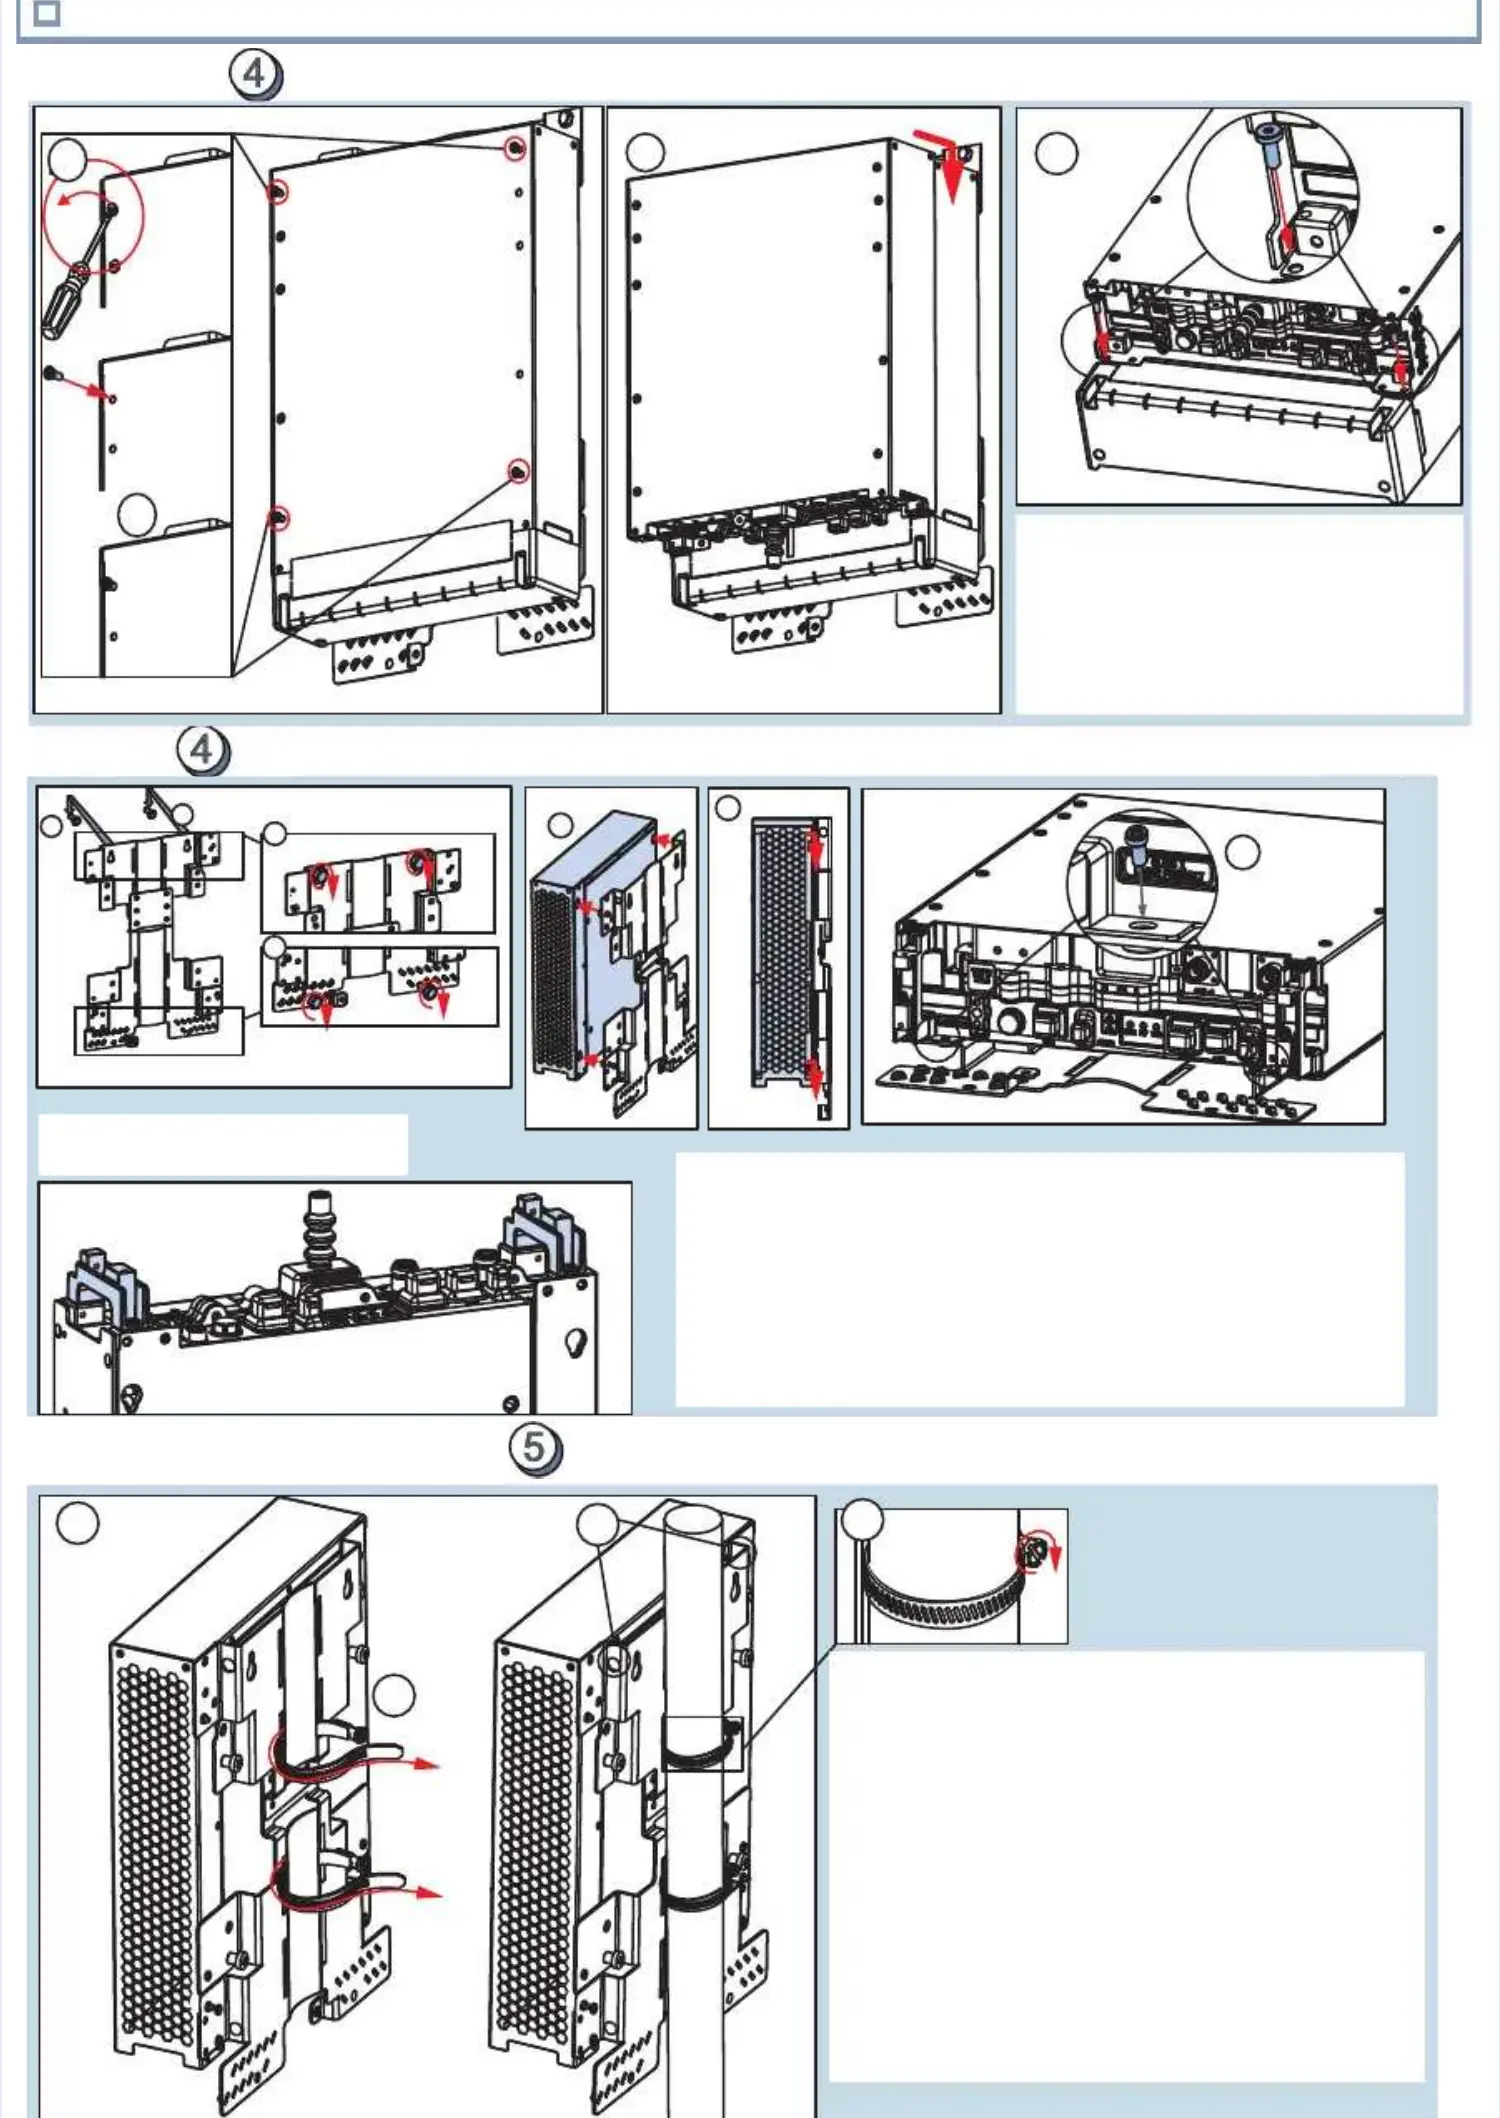
1. Set the mounting bracket to its short position. Fix the bracket.1. Set the mounting bracket to its short position. Fix the bracket.
a. a. ..
b. b. PP
c.c.
d.d.
22. . k k tthhee
thethe
3. 3. ..
4. Fix the two M5 (T25) screws by the front panel.4. Fix the two M5 (T25) screws by the front panel.
Fix the upper mounting screwsFix the upper mounting screws
osition the bracket against the wall, fitting it to the screws.osition the bracket against the wall, fitting it to the screws.
Tighten the upper screws.Tighten the upper screws.
Insert the lower screws and tighten them.Insert the lower screws and tighten them.
ConneConnect the module with brac ct the module with brac et. Aliet. Align the holes ongn the holes on
modmoduleule's 's bacback k to to the the fixfixing ing stustuds ds on on moumountinting ng bracbracketket..
Push the module down until it stopsPush the module down until it stops
NOTE NOTE Use the mUse the module frodule frontont
brackets as hoisting points.brackets as hoisting points.
::
22
44
 Loading...