SZX7
8
3
Using the Eye Shades
(Fig. 4)
#The eye shades are not provided with ESD protection performance.
When ESD protection is required, do not use the eye shades.
When Wearing Eyeglasses
Use with the eye shades in the normal, folded-down position. This will
prevent the eyeglasses from being scratched.
When Not Wearing Eyeglasses
Extend the folded eye shades in the direction of the arrow to prevent
extraneous light from entering between the eyepieces and eyes.
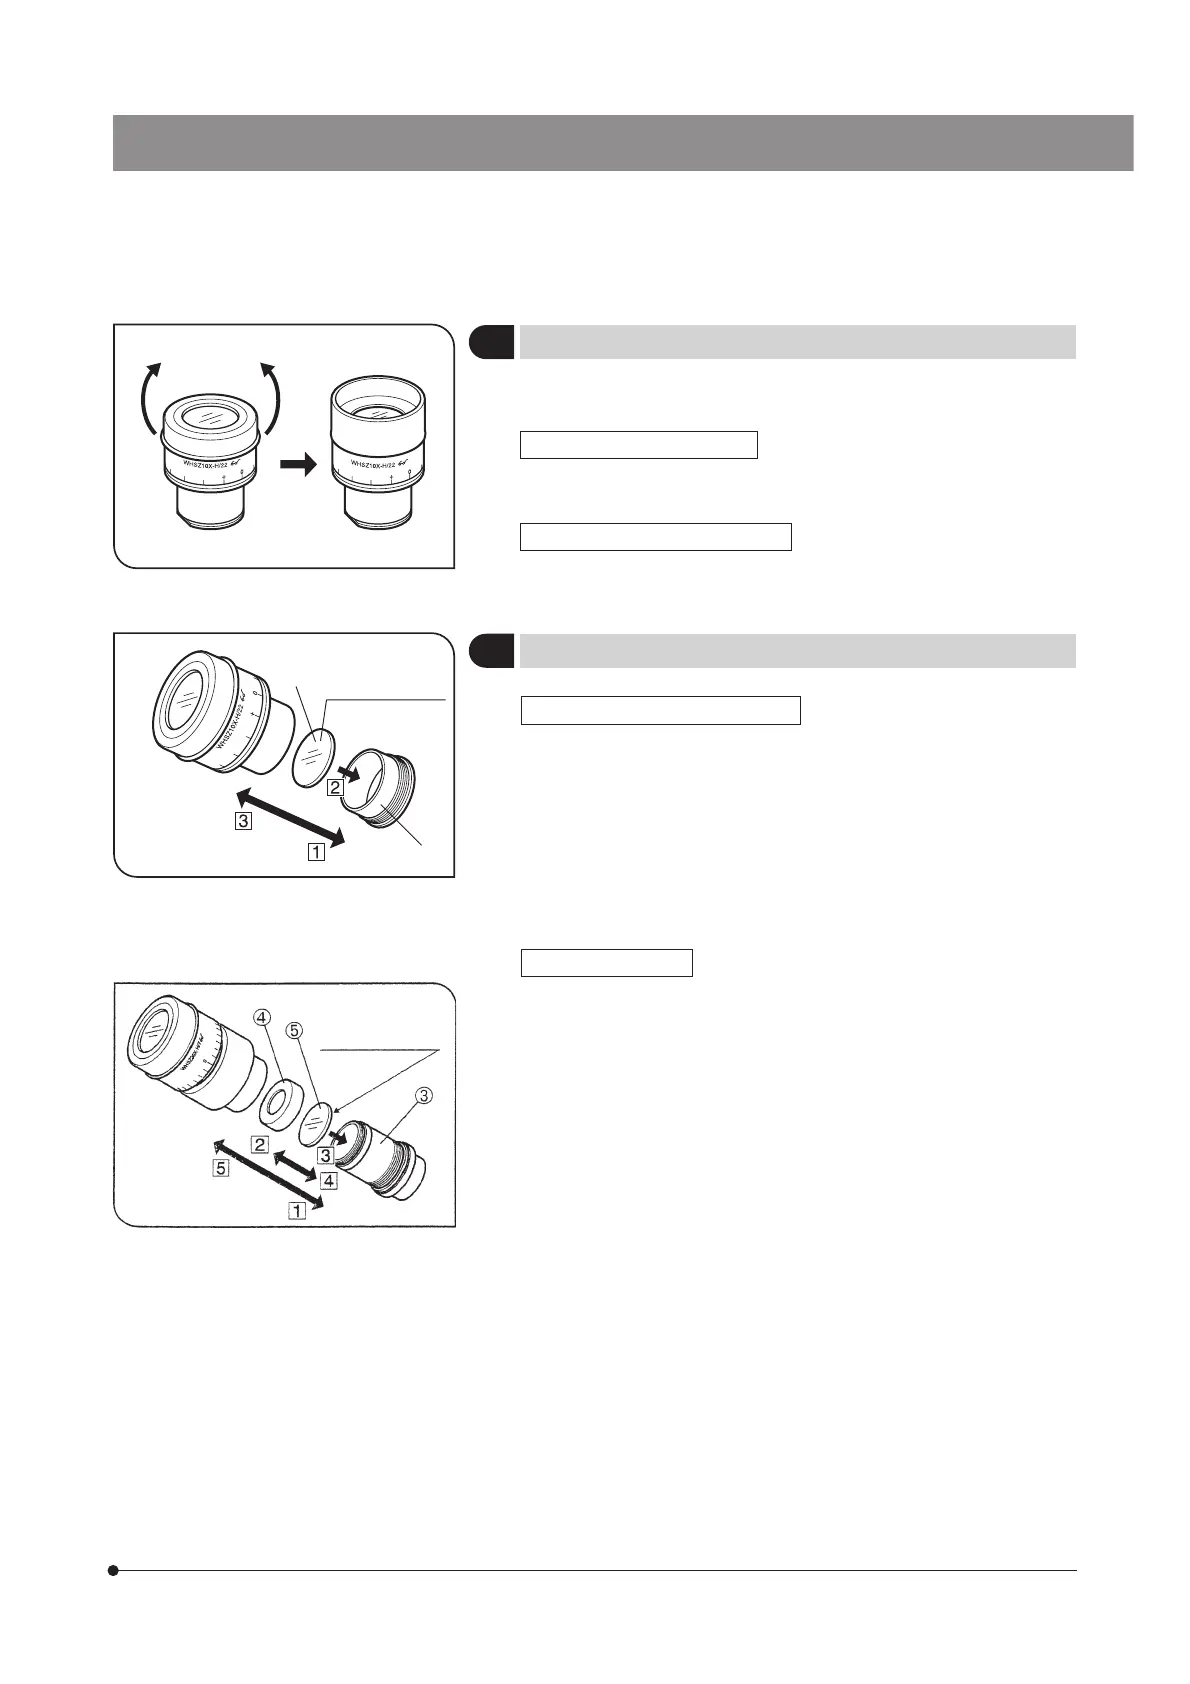
4
Using an Eyepiece Micrometer Disk
(Fig. 5)
Fig. 4
Fig. 5
1. Rotate the disk-mounting ring @ of the eyepiece counterclockwise to
remove.
2. Prepare an eyepiece micrometer disk ² (24 mm dia. x 1.5 mm thick),
remove dust and dirt from its surface, and fit it into the disk-mounting ring
@ so that the engraving on the micrometer disk faces downward.
3. Gently screw in the disk-mounting ring @ incorporating the eyepiece
micrometer disk into the eyepiece. Turn the ring clockwise to attach it
firmly.
#Due to their structures the WHSZ20X-H/30X-H eyepieces apply a
magnification on the focused plane of the eyepiece micrometer disk.
These magnifications are 1.3X with the WHSZ20X-H and 2X with the
WHSZ30X-H. Be sure to compensate for these magnifications when
using the eyepiece micrometer disk in measurements.
Also, insertion of the eyepiece micrometer disk extends the light
path length and deviates the position of the diopter scale. Correct
this deviation by turning the diopter adjustment ring of the eyepiece
toward “+”.
}When the eyepiece micrometer disk is not used, store it by wrapping in a
clean, soft cloth.
WHSZ10X-H/15X-H/20X-H (Fig. 5)
WHSZ30X-H (Fig. 6)
1. Rotate the disk-mounting ring ³ of the eyepiece counterclockwise to
remove.
2. Rotate the push ring | of the eyepiece micrometer disk counterclock-
wise to remove.
3. Prepare an eyepiece micrometer disk ƒ (24 mm dia. x 1.5 mm thick),
remove dust and dirt from its surface, place it on the disk-mounting ring
³ with the engraving facing downward, and fix it with the push ring |.
4. Gently screw in the disk-mounting ring ³ incorporating the eyepiece
micrometer disk into the eyepiece. Turn the ring clockwise to attach it
firmly.
Indication engraved
surface
Indication engraved
surface
²
@
 Loading...