r'_!,'l';IlllE!L_[_
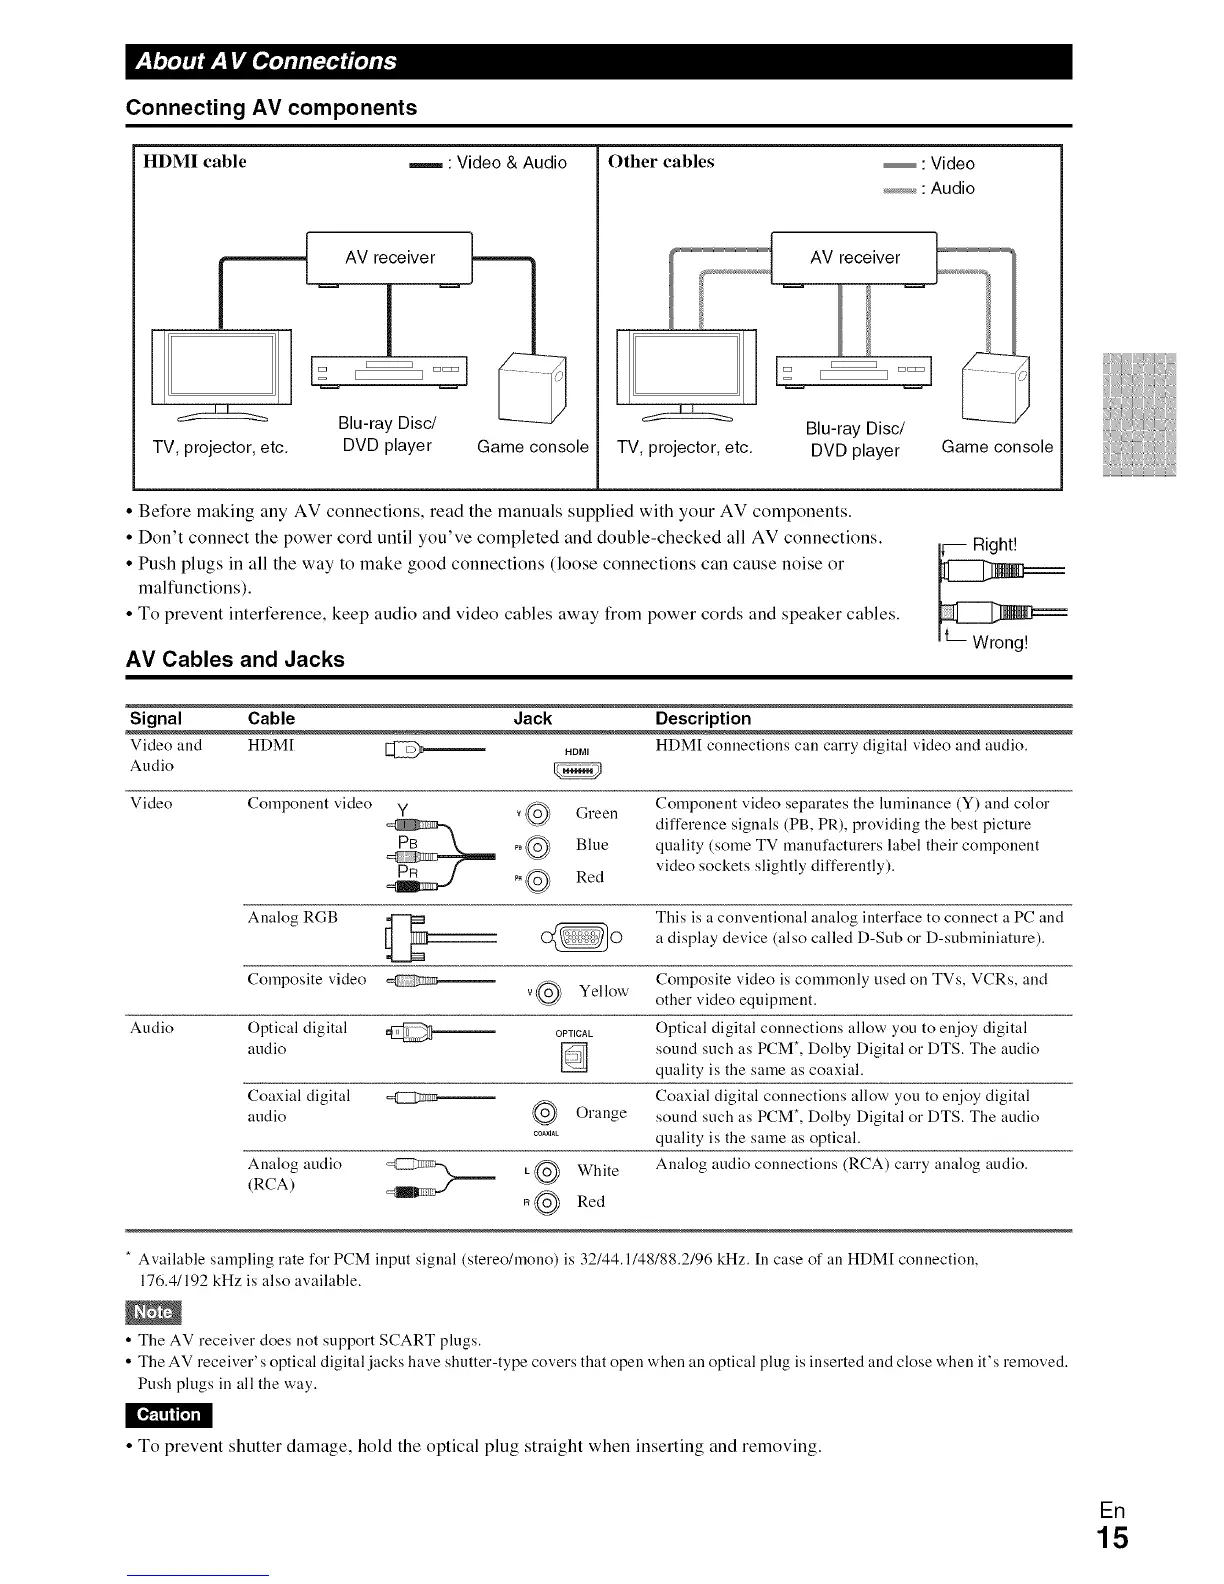
Connecting AV components
HDMI cable
: Video & Audio
Blu-ray Disc/
TV, projector, etc. DVD player Game console
Other cables _ : Video
..........: Audio
TV, projector, etc.
Blu-ray Disc/
DVD player Game console
• Before making any AV connections, read the manuals supplied with your AV components.
• Don't connect the power cord until you've completed and double-checked all AV connections.
• Push plugs in all the way to make good connections (loose connections can cause noise or
malfunctions).
• To prevent interference, keep audio and video cables away from power cords and speaker cables.
AV Cables and Jacks
Signal Cable Jack
Video and HDM[ @_ up,a1
Audio
Video Component video y
Audio
Description
HDM[ connections call carry digital video and audio.
Y@ Green
_ @ Blue
_ @ Red
Component video separates the luminance (Y) and color
difference signals (PB, PR), providing the best picture
quality (some TV manufacturers label their component
video sockets slightly differently).
Analog RGB @-- _0
Composite video __ v@
Yellow'
Optical digital OPTICAL
audio r-_
Coaxial digital __
audio @ Orange
COA×IAL
Analog audio L@ White
(RCA)
R@ Red
This is a conventional analog interface to connect a PC and
a display device (also called D-Sub or D-subminiature).
Composite video is commonly used on TVs, VCRs, and
other video equipment.
Optical digital connections allow you to enjoy digital
sound such as PCM*, Dolby Digital or DTS. The audio
quality is the same as coaxial.
Coaxial digital connections allow you to enjoy digital
sound such as PCM*, Dolby Digital or DTS. The audio
quality is the same as optical.
Analog audio connections (RCA) carry analog audio.
* Available sampling rate for PCM input signal (stereo/mono) is 32144.1148188.2196 kHz. In case of an HDM[ connection,
176.41192 kHz is also available.
• The AV receiver does not support SCART plugs.
• The AV receiver' s optical digital jacks have shutter-type covers that open when an optical plug is inserted and close when it's removed.
Push plugs in all the way.
• To prevent shutter damage, hold the optical plug straight when inserting and removing.
ER
15
 Loading...