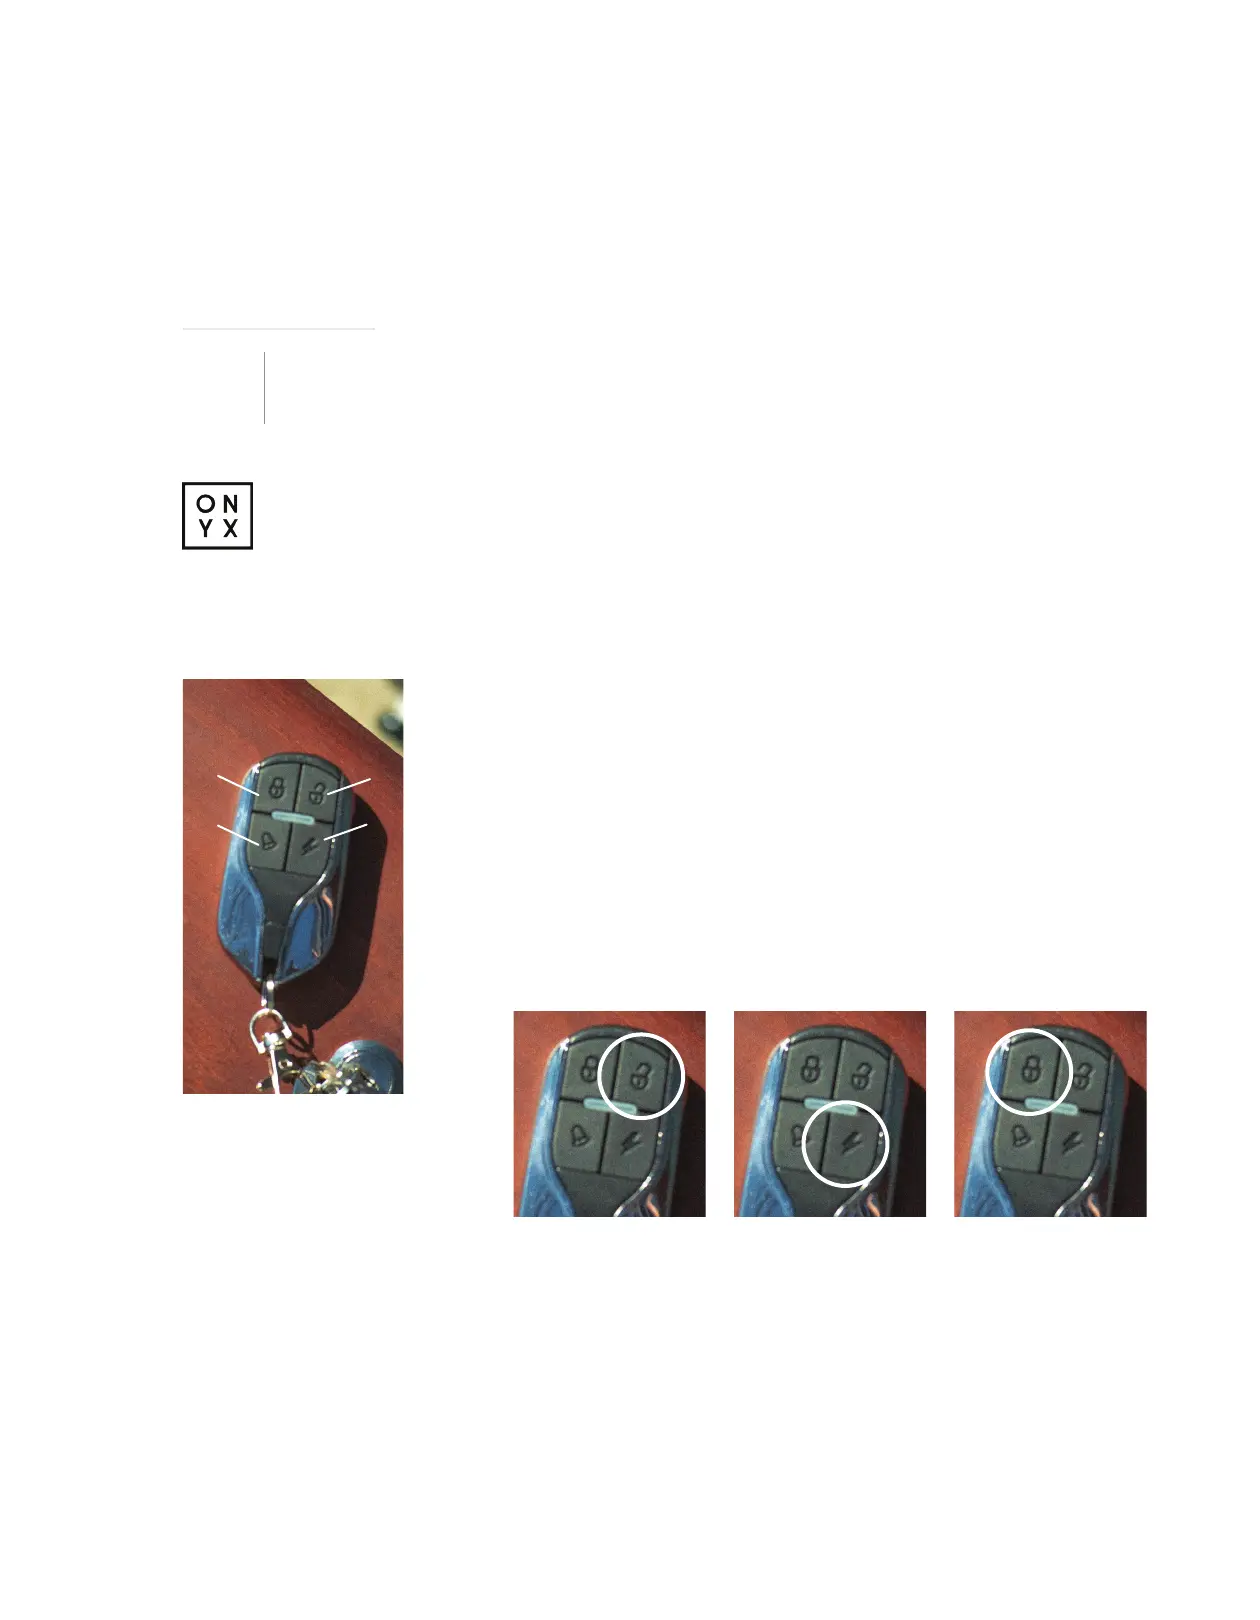
KEY-FOB BUTTON LAYOUT
A. Alarm Lock
B. Unlock Alarm
C. Panic
D. Start
Unlock Button
Fig. 01
Bolt Button
Fig. 02
Lock Button
Fig. 03
A B
C D
USER MANUAL
V1.0
08 09
KEY-FOB POWER ON / OFF / ARM
Each bike comes equipped with two key fob remotes that can turn on and o the main
power to standby, and set the alarm. Note this does not fully kill the power to the
system which allows for the alarm and clock to function. Once the battery is removed
or turned o you will need to rst turn the battery back on for the following to work
correctly again.
TURN OFF ALARM + POWER ON
STEP 1: Press the Unlock button once on the key fob and a audible chirp should
sound to conrm you have activated the system.
(Fig. 01)
STEP 2: Press the Bolt button twice to turn on the system. The dash, and running
lights should illuminate immediately following this step so long as the throttle kill
switch is in the on position.
(Fig. 02) (Reference Function “Throttle Kill Switch On / O”)
POWER OFF TO STANDBY
STEP 1: Press the Unlock button once on the key fob and a audible chirp should
sound to conrm you have deactivated the system. The dash, and running lights
should turn o following this step.
(Fig. 01)
ARMING THE ALARM
STEP 1: Make sure you have followed the steps to power o the system to standby.
STEP 2: Press the Lock button once to set the alarm.
(Fig. 03)
OPERATING CONTROLS
P RO-TI P
 Loading...