43
6
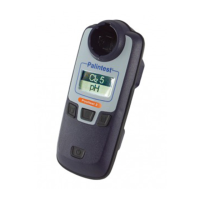
Digital Conductivity Meter
• Sets the calibration values during Relative mV
or Temperature calibration. Scroll through each
SETUP and its sub group menu. Scroll through
Print Function menu and its parameters.
SETUP - Activates the parameter setting menu
to allow you to customise meter configuration,
view calibration points and electrode offset
data, select auto power off, reset meter and
clear memory.
MODE - Select the measurement parameter
option between conductivity, Total Dissolved Solids
RANGE - Allows manual range selection
PRINT - Allows transfer of current measurement
or stored data to either the printer or the computer.
6.3 Meter Preparation
6.3.1 Inserting the Batteries
This meter is packaged with 4 “AAA” alkaline batteries
required for its operation. To insert the batteries into
the meter, follow the procedure outlined below.
1 Open the battery compartment by pressing
down the catch of the battery cover.
2 Insert the batteries correctly according to the
marked polarity of the battery compartment.
3 Close the battery cover, ensuring the catch
is locked in position. Your hand held meter
is now ready for operation.
6.3.2 Conductivity Electrode Information
Your meter includes a conductivity electrode.
Stainless Steel electrodes with an electrode
constant of K = 1.0. This conductivity/TDS
electrode features a built-in temperature sensor
for Automatic Temperature Compensation (ATC).
Wetted parts include:
1 Polyetherimide PEl (Ultem
®
)
2 Polybutylene Terephthalate
PST 58 (Valox
®
)
3 Stainless Steel (SS 304)
The removable protective plastic electrode guard
is meant for simple periodic maintenance and
it must be kept intact during measurement and
calibration. Always immerse the electrode beyond
upper steel band.
NOTE: DO NOT remove the protective electrode
guard during measurement and calibration as it
may affect your readings.
NOTE: We recommend that you do not submerge
the electrode above the protective yellow cap.
You can submerge the cable for brief
6.3.3 Connecting the Electrode to the Meter
1
Insert the 6 pin female connector of the electrode
to the 6 pins male connector on the meter.
Rotate the locking ring clockwise until it locks.
2 To remove the electrode, simply rotate the
connector’s locking ring counter clockwise
and pull away gently for a complete removal.
CAUTION: Do not pull on the electrode cord to
avoid internal wire breakages.
6.3.4 Attaching the Electrode
Holder to the Meter
Two electrode holders are provided:
1
Locate the slot on the right-hand side of the meter.
2 Slide the flange of the holder into the slot.
To attach a second electrode holder:
One holder can be attached onto another.
1 Align the flange of the second holder
with the slot of the first holder
2 Slide the flange of the second holder
into the slot of the first holder.
NOTE: Holders are designed for probes
12mm in diameter.
NOTE: Forcing the electrode into the opening
may damage the holder or your electrode.
6.3.5 Connecting the AC/DC Adapter
The meter can also operate on mains power
using an AC/DC power adapter (sold separately).
IMPORTANT: Switch off the meter and the
power source of adaptor before plugging in.
1 Switch off the meter and power sources.
2 Select the correct AC/DC Adaptor either at
120/220V AC (output Voltage:9 to 15V DC,
Current:>=50mA).
3 Insert the power adapter D.C. jack
into the meter power socket.
4 Switch on the power source of the
adaptor followed by the meter.
 Loading...