EasyManuals Logo

Panasonic KX-NS500 Getting Started

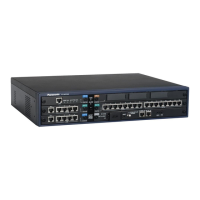
Panasonic KX-NS500
62 pages
To Next Page IconTo Next Page
To Previous Page IconTo Previous Page
Page #20 background imageLoading...
Page #20 background image
3.1 Starting the PBX
WARNING
Make
sure that the AC outlet is properly earthed, then securely connect the 3-pin AC plug including
the earthed pin.
CAUTION
Use only the AC power cord included with the PBX.
Before touching the product (PBX, cards, etc.), discharge static electricity by touching ground or
wearing
an earthing strap. Failure to do so may cause the PBX to malfunction due to static electricity.
Once you have started the PBX, if you unplug the PBX, do not initialise it again as described in "System
Initialisation Procedure". Otherwise, your programmed data will be cleared.
The power supply cord is used as the main disconnect device. Ensure that the AC outlet is located
near the equipment and is easily accessible.
Note
An
Uninterruptible Power Supply (UPS) can be connected to the PBX. A UPS provides temporal power to
the PBX in the event of power failure.
Installing the Hook Clip for the AC Power Cord
1. Insert the hook clip into the hook clip hole.
Note
Use only the hook clip included with the PBX.
20 Getting Started
3.1 Starting the PBX

Other manuals for Panasonic KX-NS500

Questions and Answers:

Question and Answer IconNeed help?

Do you have a question about the Panasonic KX-NS500 and is the answer not in the manual?

Panasonic KX-NS500 Specifications

General IconGeneral
Analog ExtensionsUp to 64
VoIP SupportYes
System TypeHybrid IP-PBX
Power SupplyAC 100-240V, 50/60Hz
Operating Temperature0°C to 40°C
Humidity10% to 90% (non-condensing)
Maximum Extensions288
IP Extensions128
VoIP Channels64
SIP Trunks64
NetworkingYes, supports networking
Built-in ApplicationsCall Center
ExpandabilityYes, via expansion cards and cabinets
Supported ProtocolsSIP, H.323, MGCP
Dimensions430 x 88 x 367 mm

Related product manuals