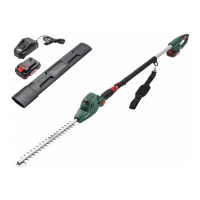
35
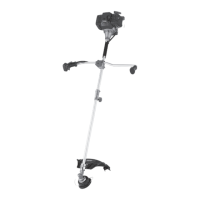
Assembling the motor head
(Fig.B)
1. Insert the extension arm (18) into the
threaded coupling (28).
2. If necessary, turn the extension arm
(18) so that the lug (29) engages in
the recess on the threaded coupling
(28).
3. Tighten the coupling nut (4) onto the
threaded coupling (28).
Disassembling the motor head
(Fig.B)
1. Unscrew the coupling nut (4) from the
threaded coupling (28).
2. Pull the extension arm (18) off the
threaded coupling (28).
Putting on the carrying
strap
Requirements
•Battery removed.
Tools required
•Allen key (20) in Storage (14)
WARNING!Never wear the carry-
ing strap diagonally across your shoulders
and chest: only wear it on one shoulder to
ensure you can detach the device quickly
from your body in the event of danger.
NOTICE!Pulling the push-fit lock (9) re-
leases the device quickly from the carrying
strap (10). To open the push-fit lock, press
the two clamps together.
Putting on the carrying strap
1. Place the carrying strap (10) on one
shoulder.
2. Adjust the length of the strap so that
the snap hook is approximately 10 cm
below your hip.
3. Attach the snap hook on the eyelet (8)
to insert the carrying strap.
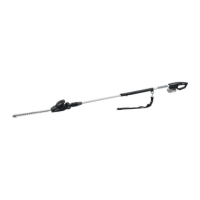
Sliding the eyelet (Fig.D)
Slide the eyelet (8) to better spread the
weight of the device.
1. Loosen the hexagon socket screw (30)
on the eyelet (8).
2. Slide the eyelet to the appropriate pos-
ition.
3. Tighten the hexagon socket screw
again.
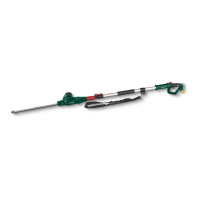
Swivelling out the motor
head
Requirements
•Blade encasing attached
•Tubular shaft assembled
•Motor head assembled
•Battery removed.
Swivelling out the motor head
(Fig.C)
1. Press and hold the locking button (3).
2. Turn the motor head (2) into the de-
sired position.
11 positions are possible.
3. Let go of the locking button (3).
4. Check that the motor head (2) is en-
gaged in the selected position.
Extending the tubular shaft
Requirements
•Battery removed.
Extending the tubular shaft
1. Open the lock (5).
2. Pull/Push the extension arm (18) to the
desired length.
3. Close the lock to fix the length.
Charging the battery
See also the charger instruction manual.
Notes
•If warm, allow the battery to cool be-
fore charging.
 Loading...