7
2
4
5
3
1
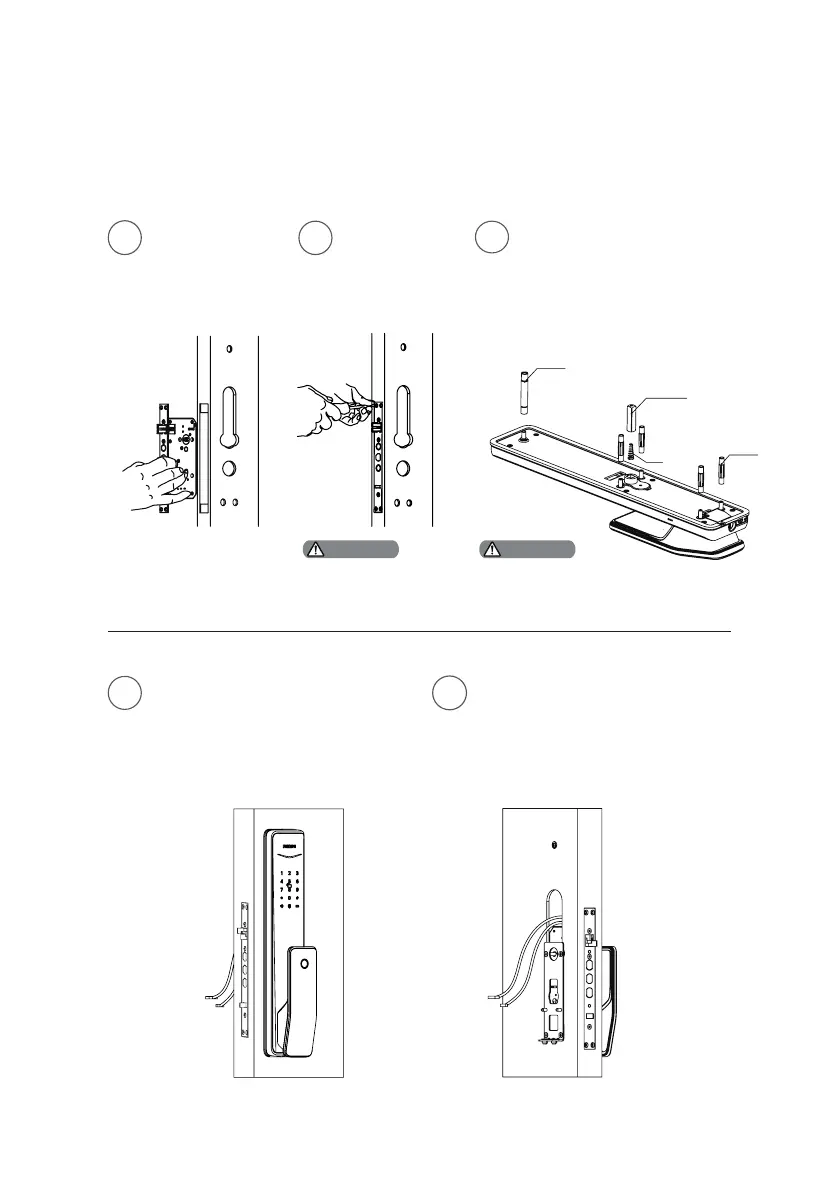
Installation steps
The following installation steps apply to left-open doors. For right-open doors,
please read the chapter [Pre-installation instructions] carefully and make
needed adjustments.
Please make sure
the main dead bolt
is retracted during
installation.
Select a square shaft and connecting
screw tube with appropriate length.
M6 screw tube
M5 screw tube
Use the drilling
template to drill
the needed holes
on the door and
mount the mortise
into the door.
Pass the cable through the hole
on the door. The square shaft
needs to be inserted into the
rotary hole on the mortise, so that
the outer escutcheon stays close
to the outside door.
Tighten the mounting plate
with the 4 M5 chamfer
head screws against the
inside of the door.
Tighten the 4
anchor screws
on the mortise.
Install the connecting
screw tubes on the
outside escutcheon. Place
the square shaft and
compressed spring into
the hole of the handle.
Attention Attention
35mm square shaft
Compressed Spring
 Loading...