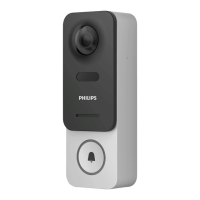
WelcomeEye / Link
5
• In order to make the most of your IP intercom panel, we recommend that you congure it
before installing it in its nal location. Minimum conguration requirements Android (5.0 or
higher) and Apple (IOS 10.3 or higher). To do this, you should test it on a table.
Warning: We recommend that you do not press the call button until the battery has been
inserted.
4. Settings for WiFi use
Warning: Works only with 2.4 GHz WiFi.
Ensure that you have charged the battery for at least 5 hours before installing the intercom
panel (using the USB cable provided).
A CB
32 Gb
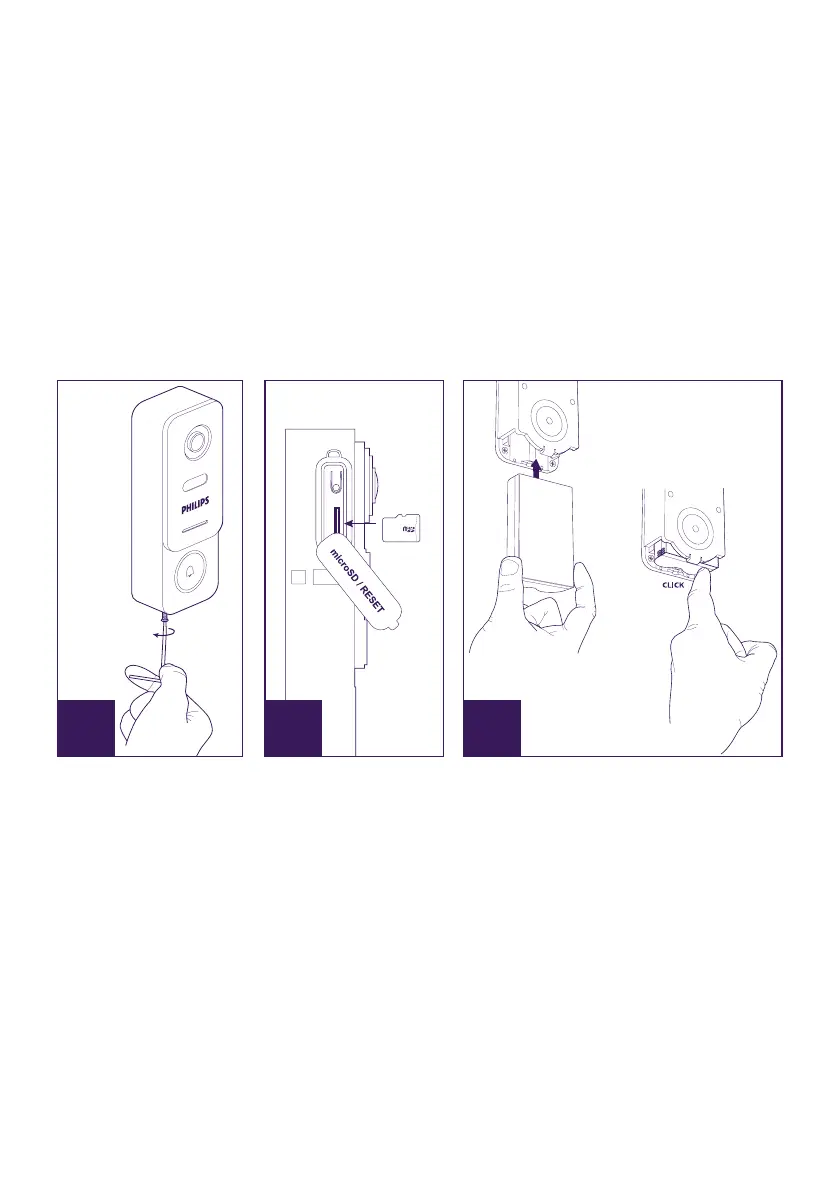
A. Unscrew the anti-theft screw to release the front.
B. If you want to make recordings (person passing through, motion detection), the micro SD
card (provided and already in its original location) is essential.
If you have removed it, raise the protective rubber cover on the side of the intercom panel
and insert the micro SD card. (Make sure you insert it the right way round).
C. Insert the battery (making sure you insert it the right way up, with the micro USB plug
side rst) until the support lug clicks.
Note: The call button will ash red. If this does not happen, press and hold the reset button
for 10 seconds.
E. Warning: Connect your phone to the 2.4 GHz WiFi which will be used for your intercom
panel.
F. Download, install and open the Philips WelcomeHome V2 app from the App Store/
Google Play. (Conrm all authorisation requests).
 Loading...