03_25
03_26
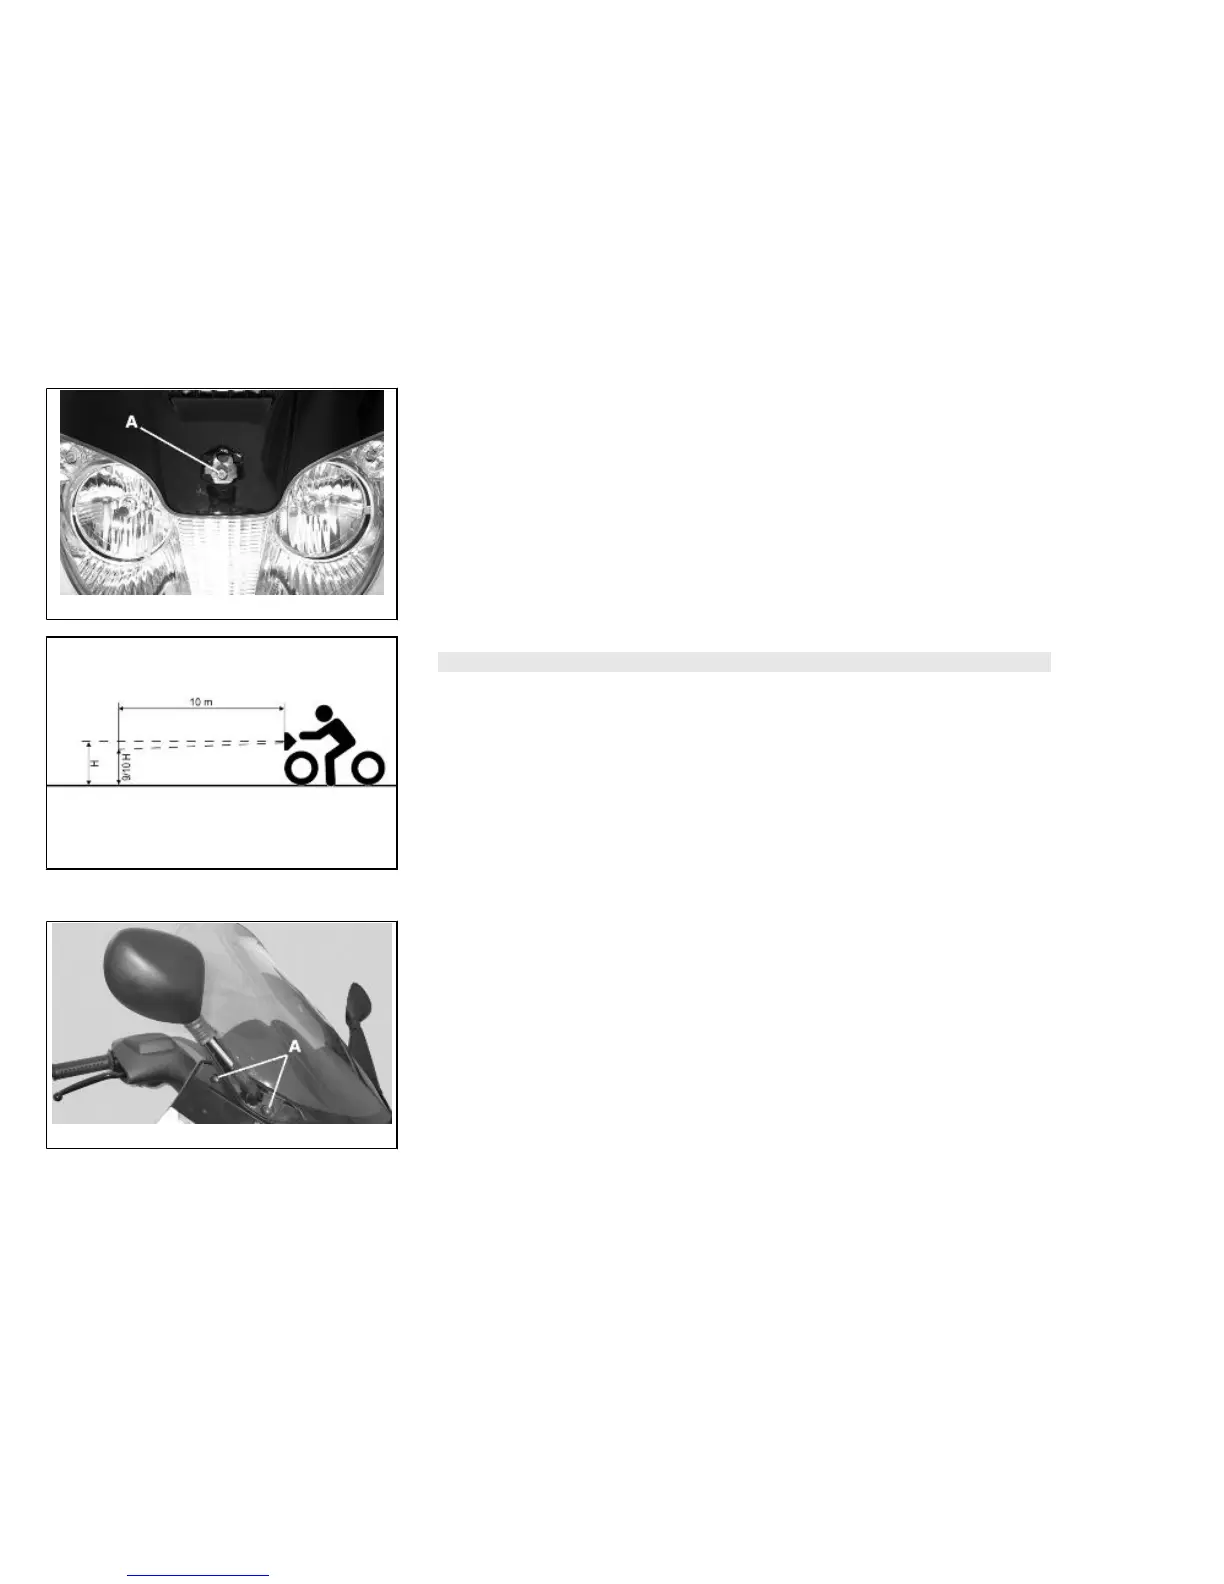
Headlight adjustment (03_25, 03_26)
Proceed as follows:
1. Position the unloaded scooter, in running order and with the tyres inflated to the
prescribed pressure, on a flat surface 10 m away from a half-lit white screen; ensure
that the longitudinal axis of the scooter is perpendicular to the screen;
2. Turn on the headlight and check that the borderline of the projected light beam
should be lower than 9/10 of the distance from the ground to the centre of the vehicle's
headlight, and higher than 7/10;
3. If not, adjust the projection by turning the central screw «A» set inside the glove
box.
N.B.
THE ABOVE PROCEDURE COMPLIES WITH THE EUROPEAN STANDARDS RE-
GARDING MAXIMUM AND MINIMUM HEIGHT OF LIGHT BEAMS. REFER TO THE
STATUTORY REGULATIONS IN FORCE IN EVERY COUNTRY WHERE THE ve-
hicle IS USED.
03_27
Front direction indicators (03_27, 03_28, 03_29)
To replace a burst bulb:
1. Remove the driving mirrors, by lifting the cover and loosening the two screws "A"
on both sides.
2. Remove the front turn indicator light assembly cover, by loosening the four fixing
screws "B".
3. By loosening the two fixing screws "C" remove the turn indicator light;
To reassemble, repeat the operation in the reverse order.
67
 Loading...