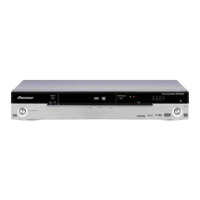
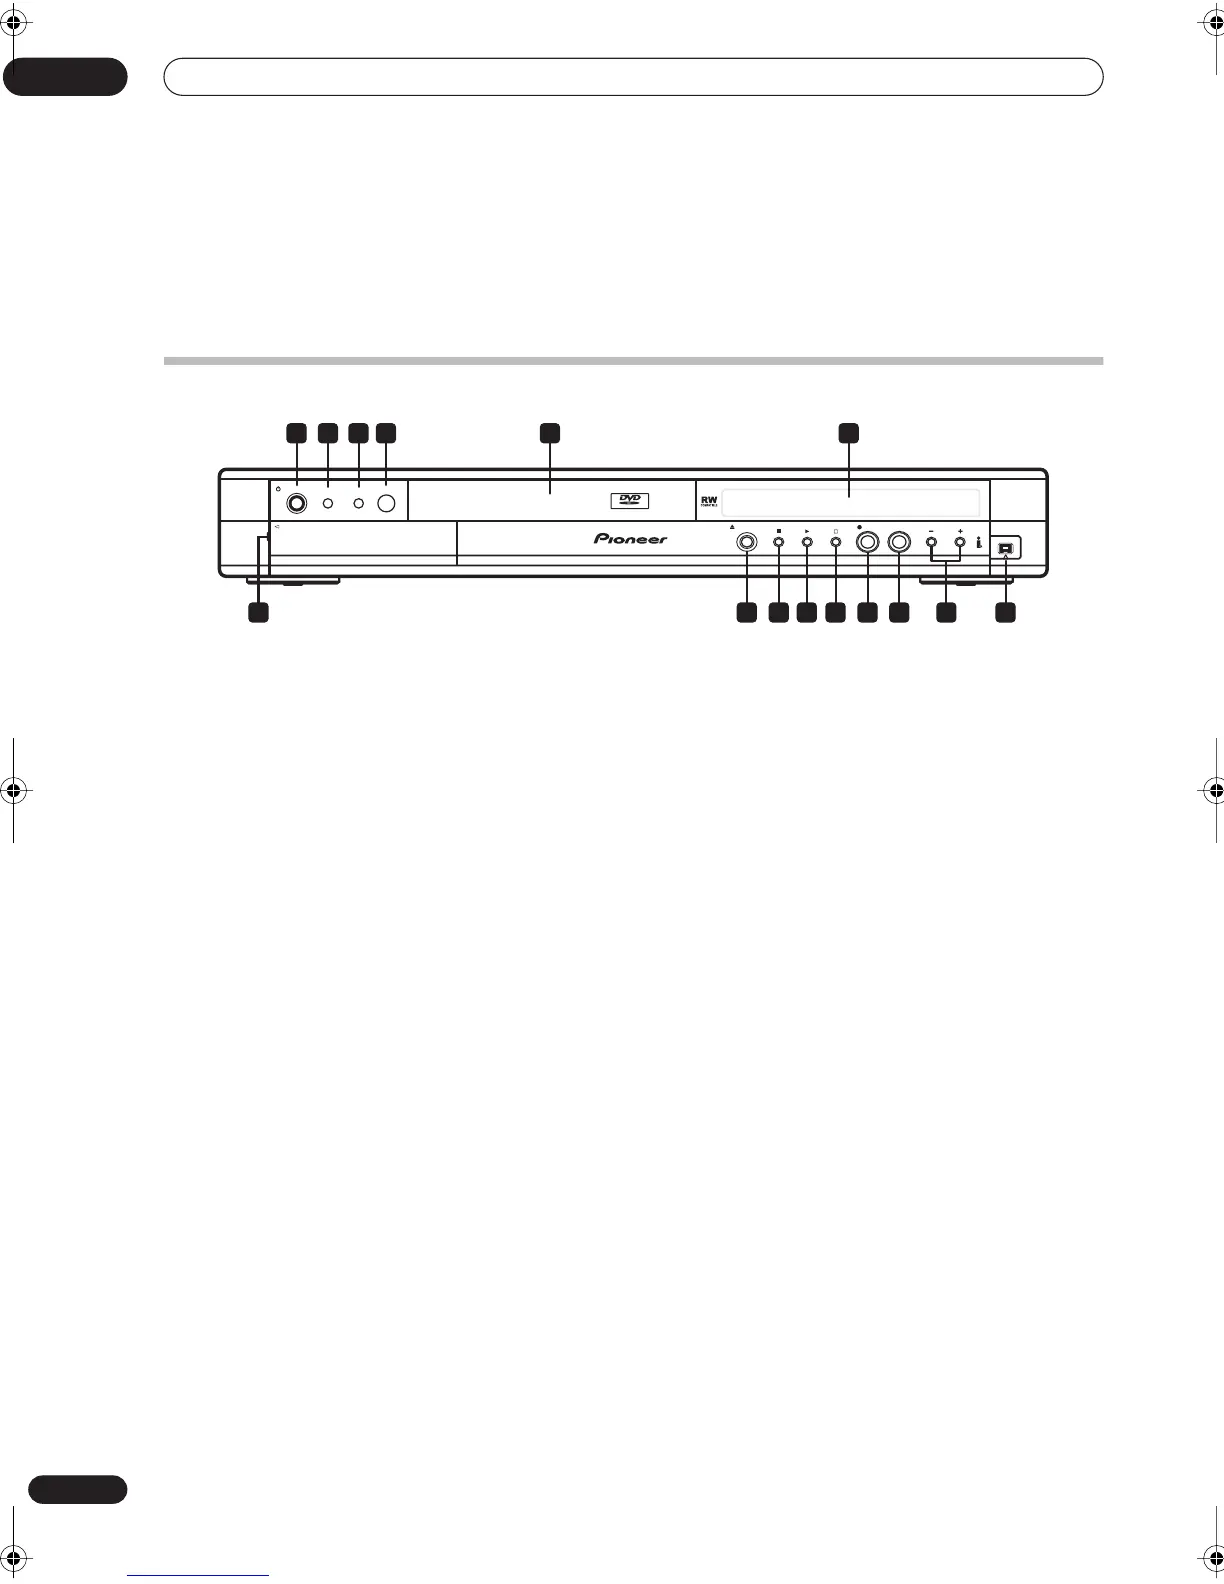
Controls and displays
03
20
En
Chapter 3
Controls and displays
Front panel
1
STANDBY/ON
Press to switch the recorder on/into standby.
2 DISC HISTORY
(page 67)
Press to display the Disc History screen.
3 DISC NAVIGATOR
(page 33, 56)
Press to directly access the Disc Navigator screen.
4 IR remote sensor
(page 10)
5 Disc tray
6 Front panel display
See
Display
on page 21 for details.
7 DV IN/OUT jack (DVR-320 only)
(page 13, 19, 51, 52,
53)
Digital input/output jack for use with a DV camcorder.
8 +/–
(page 27, 29)
Use to change TV channels, skip chapters/tracks, etc.
9 REC MODE
(page 43)
Press repeatedly to change the recording mode (picture
quality).
10
REC
Press to start recording.
11
Press to stop recording.
12
Press to start or restart playback.
13
Press to stop playback.
14
OPEN/CLOSE
Press to open/close the disc tray.
15 Front panel inputs
(page 13)
Pull the cover down where indicated to access the front
panel input jacks. Especially convenient for connecting
camcorders and other portable equipment.
PULL-OPEN
STANDBY/ON
DISC
NAVIGATOR
DISC
HISTORY
OPEN/CLOSE REC
REC MODE
VIDEO/R/RW
DV IN/OUT
1 2 3 4 5 6
781112131415 910
Illustration shows DVR-320
DVR-04_KU.book 20 ページ 2004年1月28日 水曜日 午前10時15分
 Loading...