5.22
BODY / STEERING / SUSPENSION
11. Remove the (2) fasteners (E) attaching the lower A-arm to
the frame and remove the lower A-arm from the vehicle
(see previous illustration).
12. Examine A-arm and bearing carrier bushings and pivot
tubes (see “Exploded View”). Replace if worn. Discard
hardware.
13. If not replacing the A-arm, thoroughly clean the a-arm and
pivot tubes.
14. Insert new A-arm bushings and pivot tubes into the new
A-arm.
Installation
1. Install lower A-arm assembly onto vehicle frame. Torque
new fasteners to 37 ft. lbs. (50 Nm).
2. Attach lower A-arm to bearing carrier. Torque new
fastener to 37 ft. lbs. (50 Nm).
3. Route brake line on top of the lower A-arm and between
lower shock mounting tabs.
4. Reinstall the lower portion of the shock to the lower A-arm.
Torque shock fastener to 27-33 ft. lbs. (37-45 Nm).
5. Install upper A-arm assembly onto vehicle frame. Torque
new fastener to 37 ft. lbs. (50 Nm).
6. Attach upper A-arm to bearing carrier. Torque new
fastener to 37 ft. lbs. (50 Nm).
7. Install wheel and torque wheel nuts to specification.
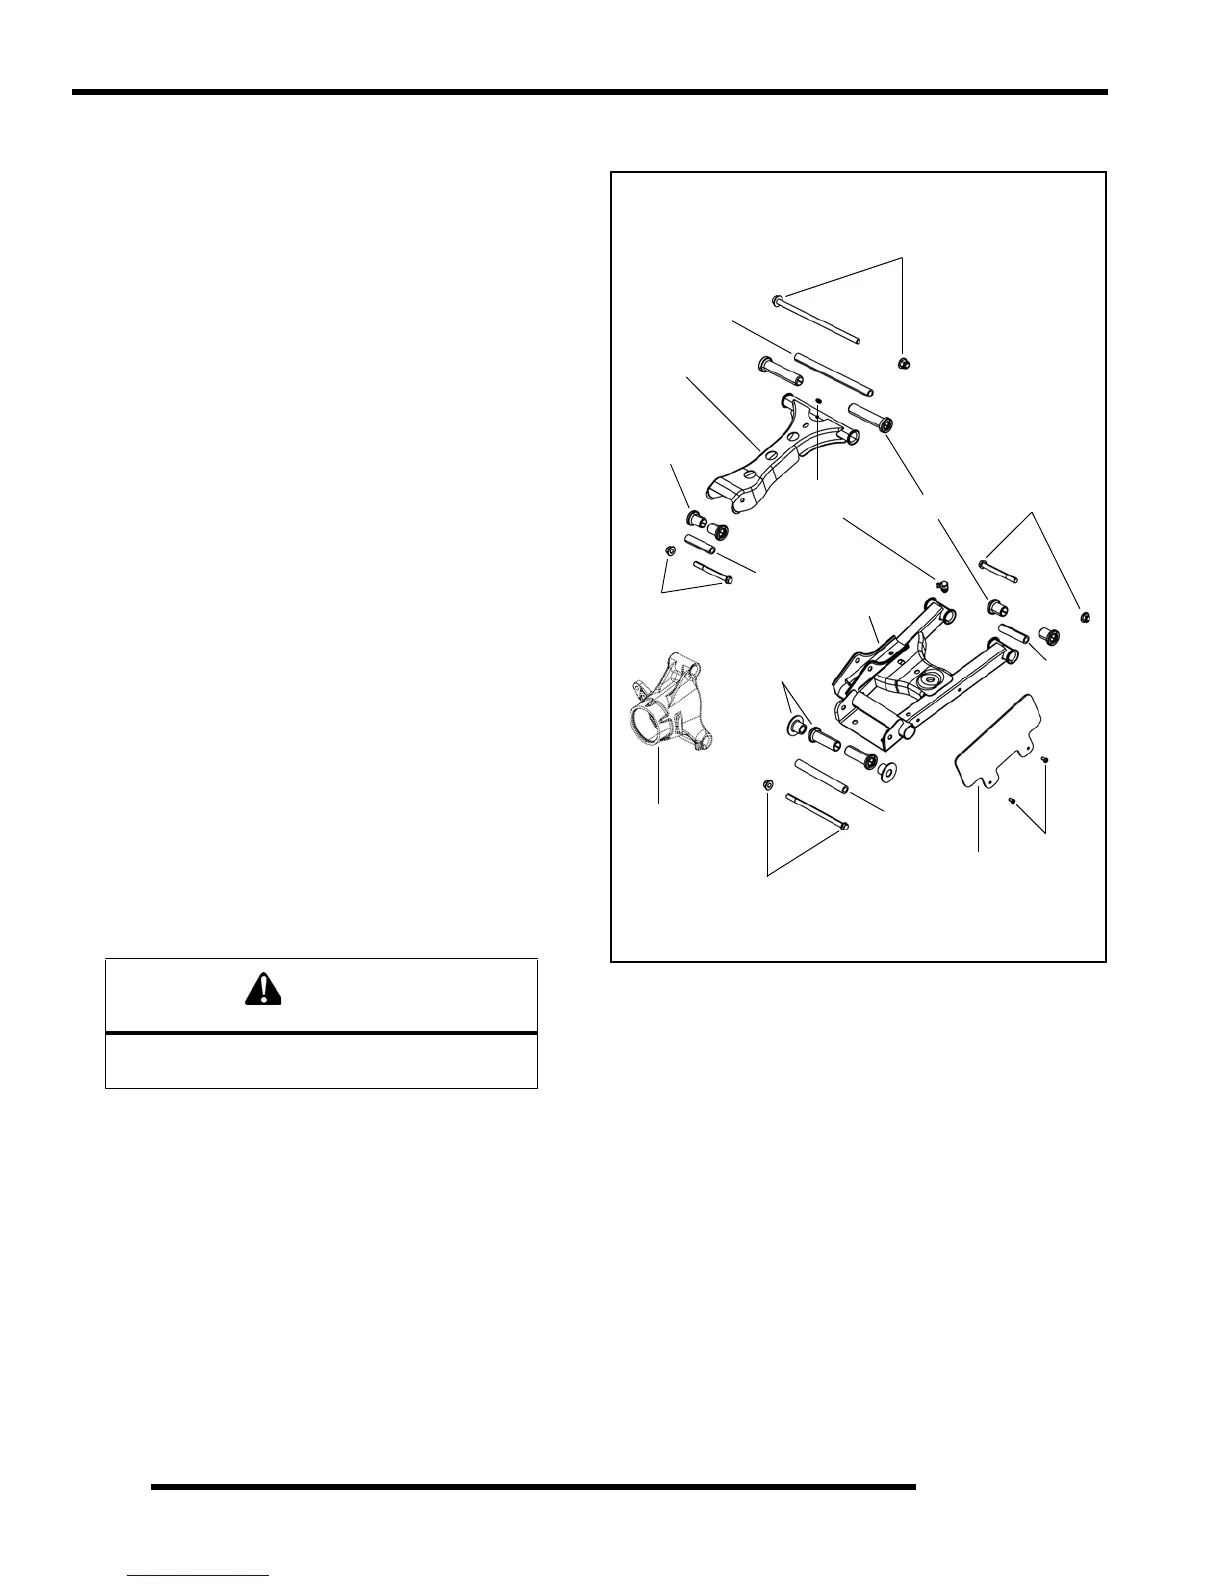
Exploded View
WARNING
Upon A-arm installation completion, test vehicle
at low speeds before putting into service.
Upper
A-arm
Lower
A-arm
Screws
Bearing
CV
Bushings
37 ft. lbs.
(50 Nm)
Pivot Tube
Carrier
Pivot
37 ft. lbs.
(50 Nm)
Grease
Zerk
Shield
37 ft. lbs.
(50 Nm)
Tube
37 ft. lbs.
(50 Nm)
Bushings
Pivot
Tube
Pivot
Tube
Bushings
 Loading...