7.8
FINAL DRIVE
9. Add grease through large end of boot.
10. Position large end of boot on CV joint, purge excess air by
partially compressing axle into CV bell. Lift one edge of
boot to let out excess air. Secure the CV boot with clamp.
11. Repeat this procedure to service the inner CV plunging
joint.
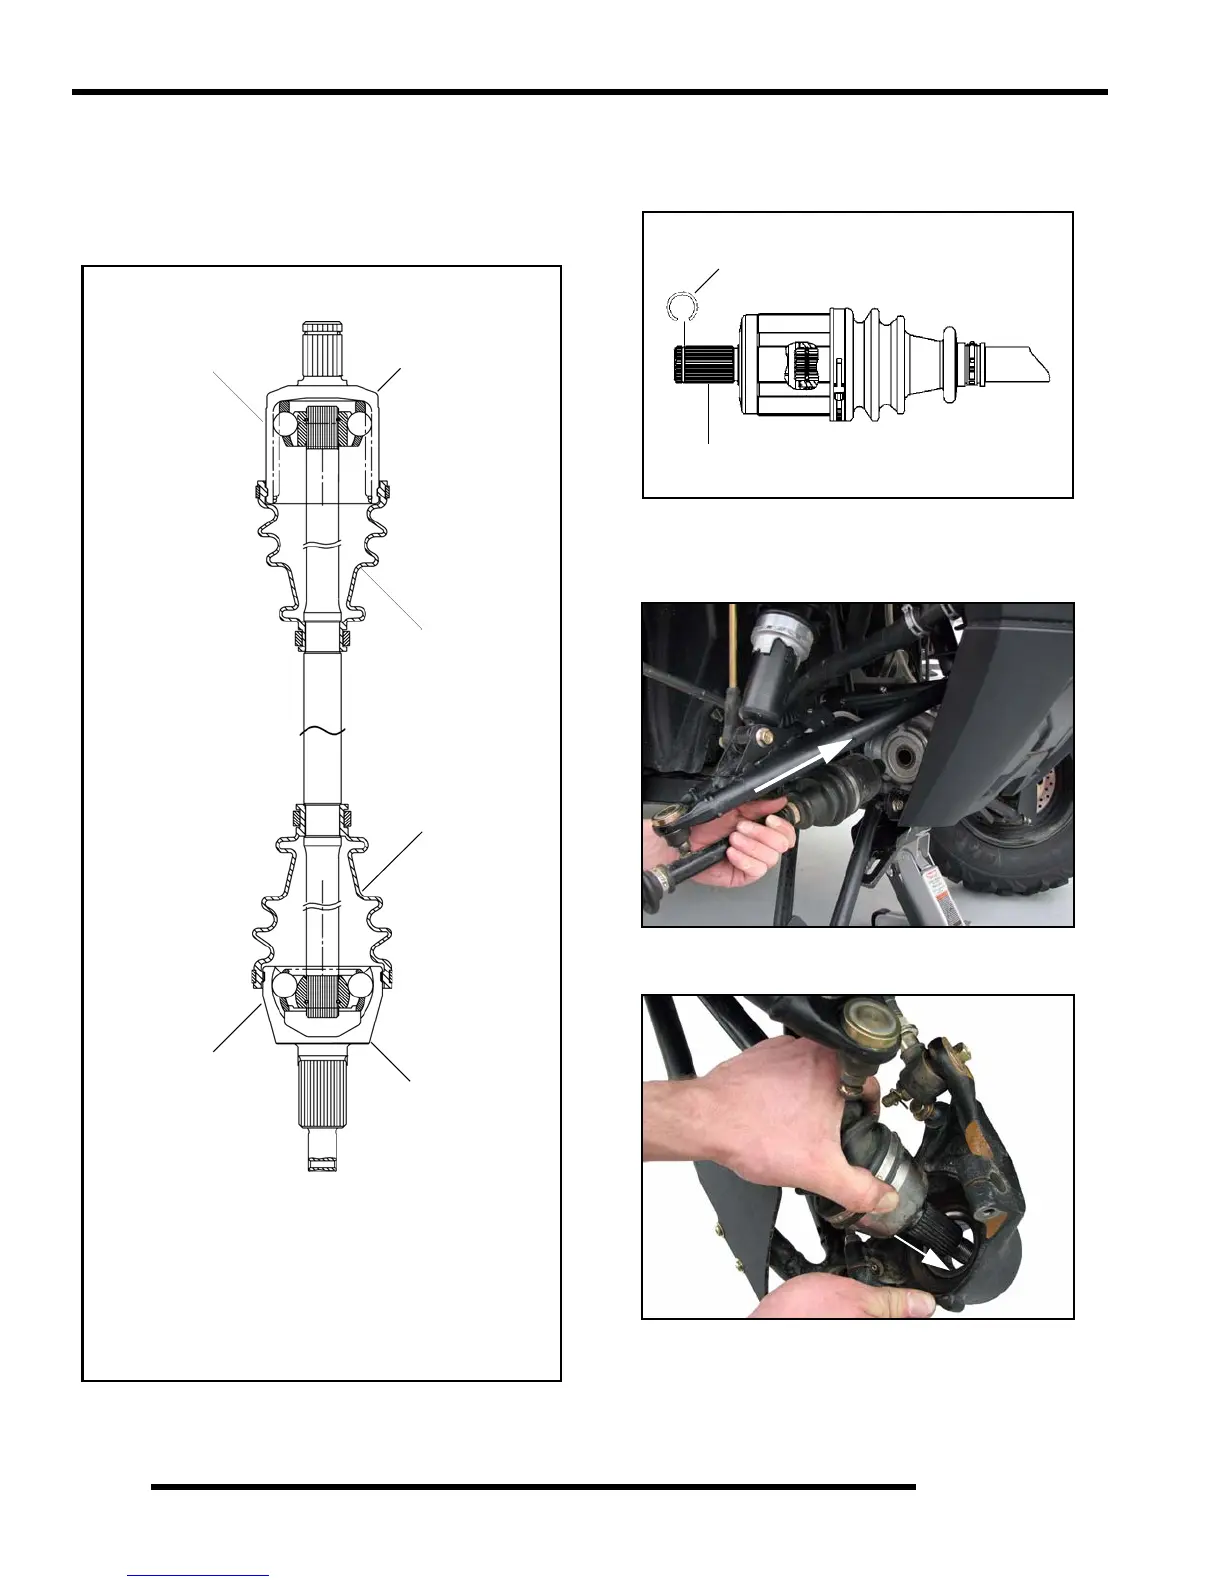
Drive Shaft Installation
1. Install new spring ring on drive shaft. Apply an anti-seize
compound to splines.
2. Align splines of drive shaft with front gearcase and reinstall
the drive shaft. Use a rubber mallet to tap on the outboard
end of the drive shaft if necessary
3. Install drive shaft into the front bearing carrier.
4. Install the upper ball joint end into the front bearing carrier.
FRONT DRIVE SHAFT
Joint Capacity**
45 Grams
Boot Capacity
45 Grams
*CV joint capacity: 45g if boot is replaced only.
Boot Capacity
45 Grams
Joint Capacity*
45 Grams
Another 45g (90g total) if joint is cleaned.
only. Another 45g (90g total) if joint is cleaned.
**Plunging joint capacity: 45g if boot is replaced
Plunging
Joint
CV Joint
Figure 7-8
Apply
Anti-Seize
NEW
Spring Ring
 Loading...