14 INSTRUCTIONS PW220/PW230
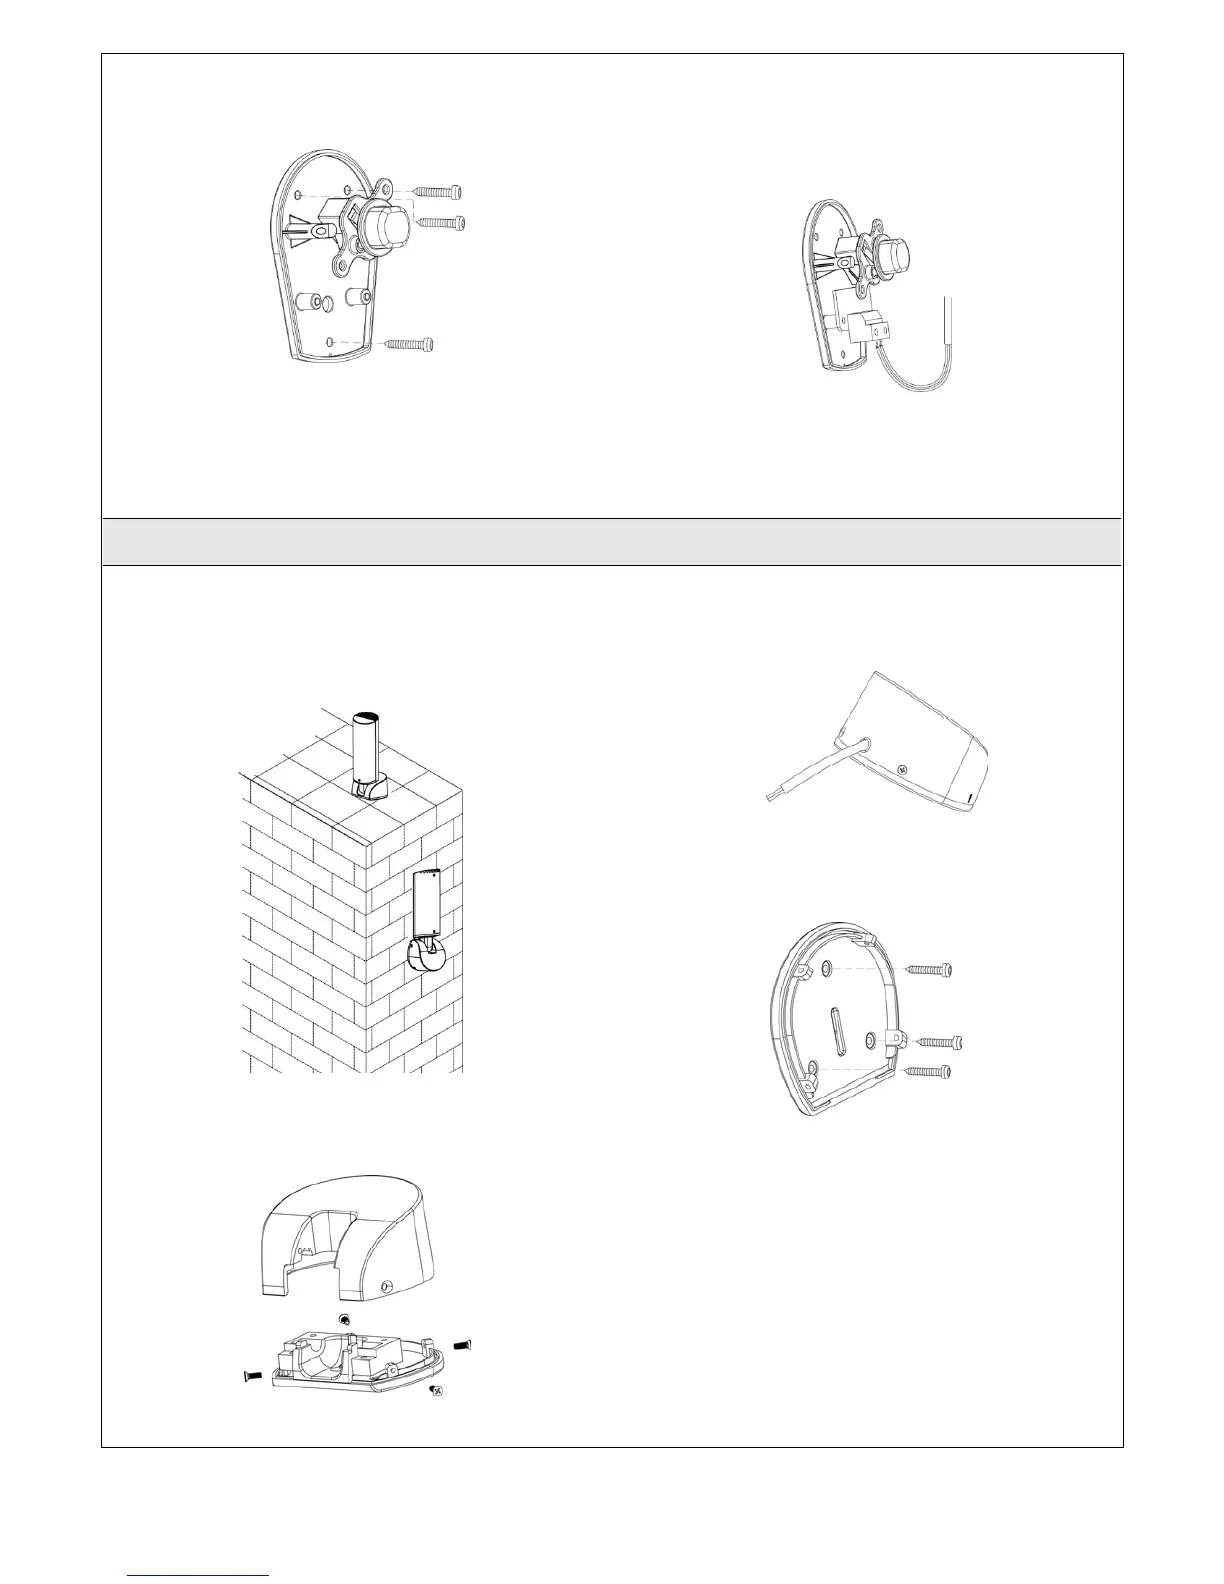
6. Drill the holes in the wall and fix the bottom to the wall
by three screws. See Figure 2.3.4 (3).
Figure 2.3.4 (3)
7. Connect the electric wires to the terminals as shown in
Figure 2.3.4 (4), and it’s not required to distinguish any
polarity. The terminals can be removed for connecting the
wires easily.
Figure 2.3.4 (4)
8. Attach the upper shell to the bottom and screw them up by
two screws and insert the round cover by pressing it to attach
to the whole unit.
2.3.5 PF-1 Flashing Light
1. Decide the installation position of the flashing light. The
flashing light has to be installed near the gate and easy to
be seen by users and passersby. The flashing light can be
installed horizontally or vertically. See Figure 2.3.5 (1).
Figure 2.3.5 (1)
2. Unscrew the four screws on the light base and separate
the base with the bottom as shown in Figure 2.3.5 (2).
Figure 2.3.5 (2)
3. Connect the wires and penetrate the wires into the hole of
the base.
Figure 2.3.5 (3)
4. Drill the holes in the wall and fix the bottom to the wall
by three screws.
Figure 2.3.5 (4)
 Loading...