16
PM-727MV v6 2020-10
Copyright © 2020 Quality Machine Tools, LLC
Section 4 MAINTENANCE
Unplug the 110V power cord before any
maintenance operation!
LUBRICATION
ISO and SAE are the main indexes of viscosity. ISO has
a “one number” scale, but SAE uses dierent indexes for
engine and gear oils (there is also the sux W, mean-
ing multigrade). SAE 20 engine oil has about the same
viscosity as SAE 80 gear oil, both roughly equivalent to
ISO 68.
Recommended lubricants
Gearbox: ISO 68, such as SAE 80W90 auto gear oil, or
Mobil DTE Heavy/Medium circulating oil (about 2 qts.)
Ball oilers: ISO 68 oil, such as Mobil Vactra No. 2, or
equivalent
X, Y and Z axis ways (dovetails): ISO 68 oil, such as
Mobil Vactra No. 2
Quill rack and pinion, Z-axis gears: light general pur-
pose grease, NLGI No. 2, or equivalent
X and Y leadscrews: ISO 68 oil, such as Mobil Vactra
No. 2, or equivalent
Z leadscrew: ISO 68 oil or NLGI No. 2 grease
GENERAL OILING
Assuming a clean environment – free from abrasive par-
ticles and machining debris – lack of proper lubrication
is the main cause of premature wear. Rotating parts are
easy to lubricate, sliding parts are not. Gibs are tight-
ened for the best compromise between rigidity and slid-
eability, which means practically zero gap between the
ways. Take time to understand exactly which are the
bearing surfaces on the various dovetail surfaces; this
is not obvious – some of the interfaces look like bearing
surfaces, but are simply narrow gaps.
Every few hours of operation:
1. Apply the recommended way-oil with a dedicated
short-bristle brush such as the type used for apply-
ing ux.
2. Use a similar brush to apply oil or grease to the
leadscrews
3. Apply oil to the ball oilers, see below.
BALL OILERS
Use a pump-type oil can with tip large enough to more
than span the oiler’s spring-loaded steel ball. Oil pres-
sure will displace the ball, allowing oil to ow, provided
the oil can tip is rmly pressed onto the brass seating.
Before oiling check that the ball is not stuck – press it
lightly with a probe.
GEARBOX DRAIN & REFILL
1. Run the mill a few minutes to warm the oil if neces-
sary.
2. Remove the ll plug on the top surface of he head-
stock.
3. Place a 1-gallon or larger drain pan under the head-
stock.
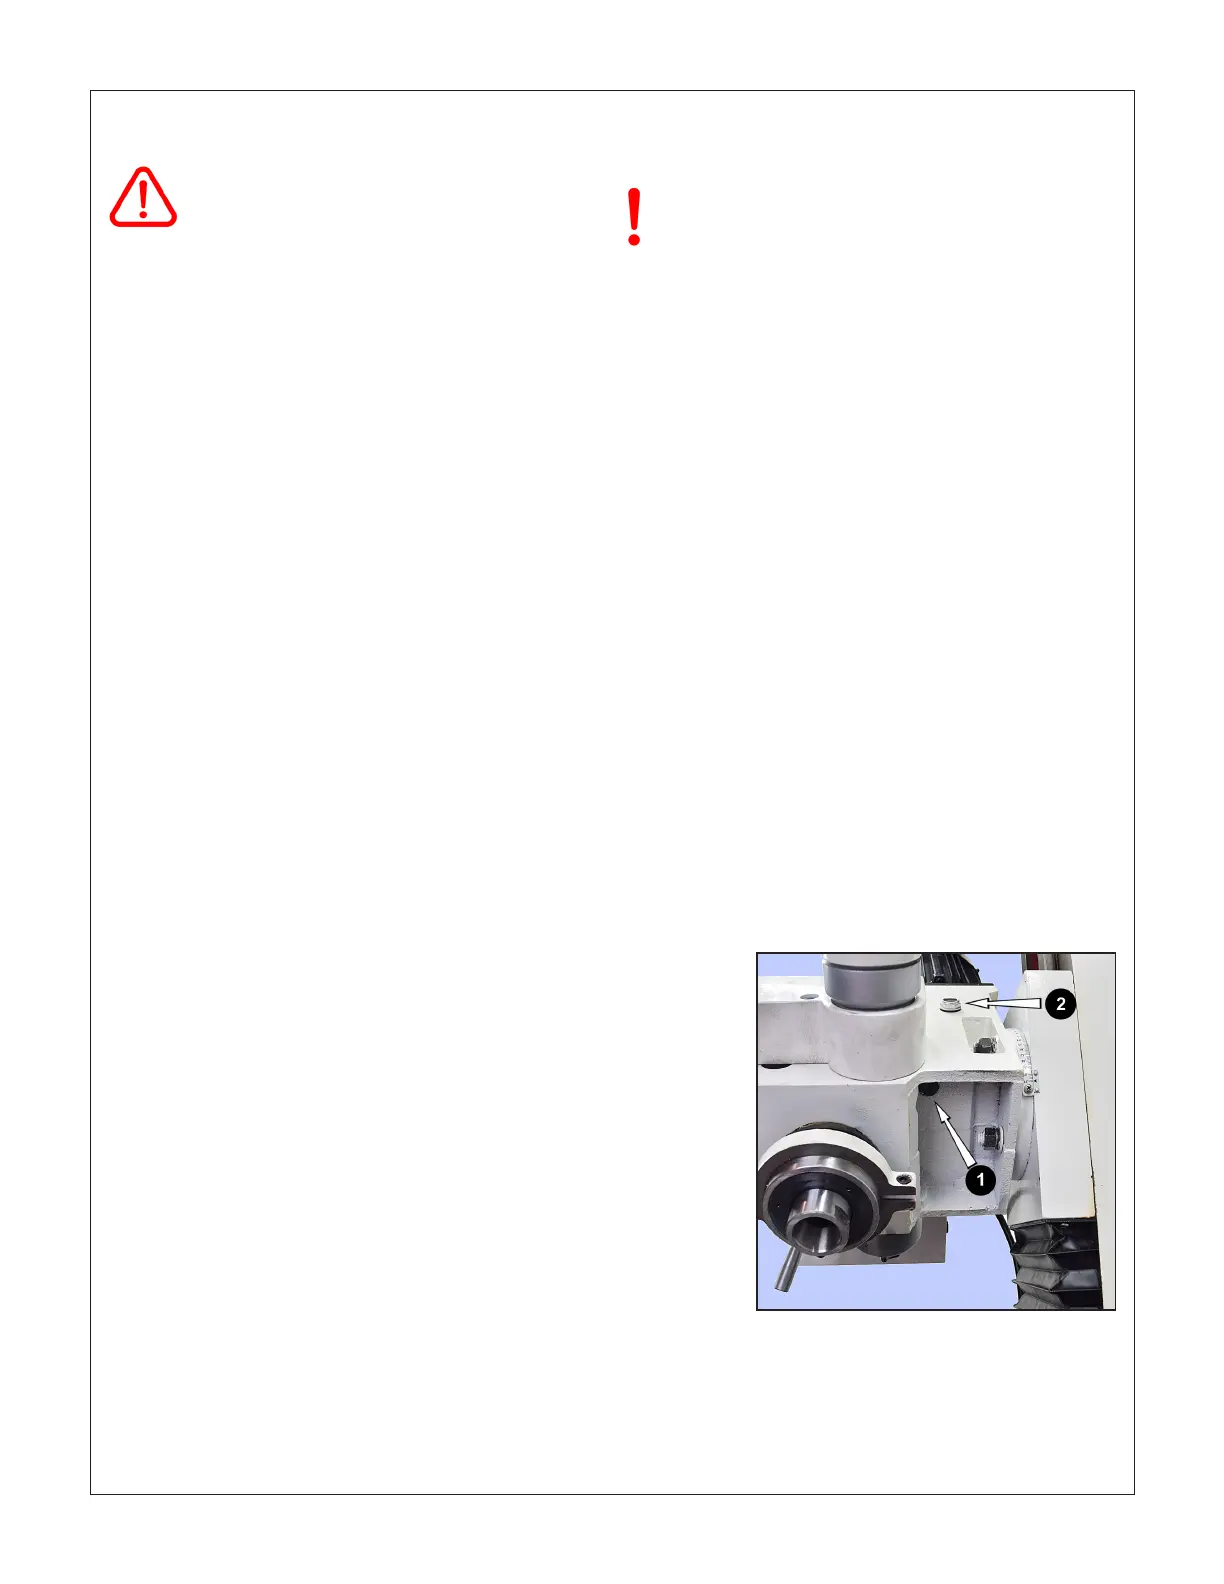
4. Using a 6 mm hex wrench remove the drain plug,
Figure 4-1.
5. Allow the oil to drain completely, then replace the
drain plug.
6. Remove the ll plug, then add just a few ounces of
oil.
7. When satised that the headstock is oil-tight, add
oil to the halfway mark on the sight glass (about 2
qts total).
8. Replace the ll plug.
Figure 4-1 Gearbox oiling
Drain plug (1), sight glass (2)
QUILL RACK & PINION
Lower and lock the quill, Figure 4-2. Using a sti ux
brush, clean the visible portions of the rack and pinion.
Remove all machining debris and foreign ob-
jects before lubricating ANYTHING! If need be,
any oil is better than no oil – but use the recom-
mended lubricants when you can.
 Loading...

