10.1 Check the Soldering Iron
1. Pull out the plug and measure the resistance value between the pins of the
connecting plug when the heating element cooling down to the room
temperature.
2. If the value of ‘a’ is different from the values in the following table, replace
the heating element or cord assembly. Refer to the following steps.
3. If the value of ‘b’ is over the below value, remove lightly the oxidation in the
joint part of the tip and the heat element with sandpaper or steel wool.
a.
Between pins 4&5 (Heating
Element)
<4Ω(Normal)
b. Between pins 3& Tip <2Ω
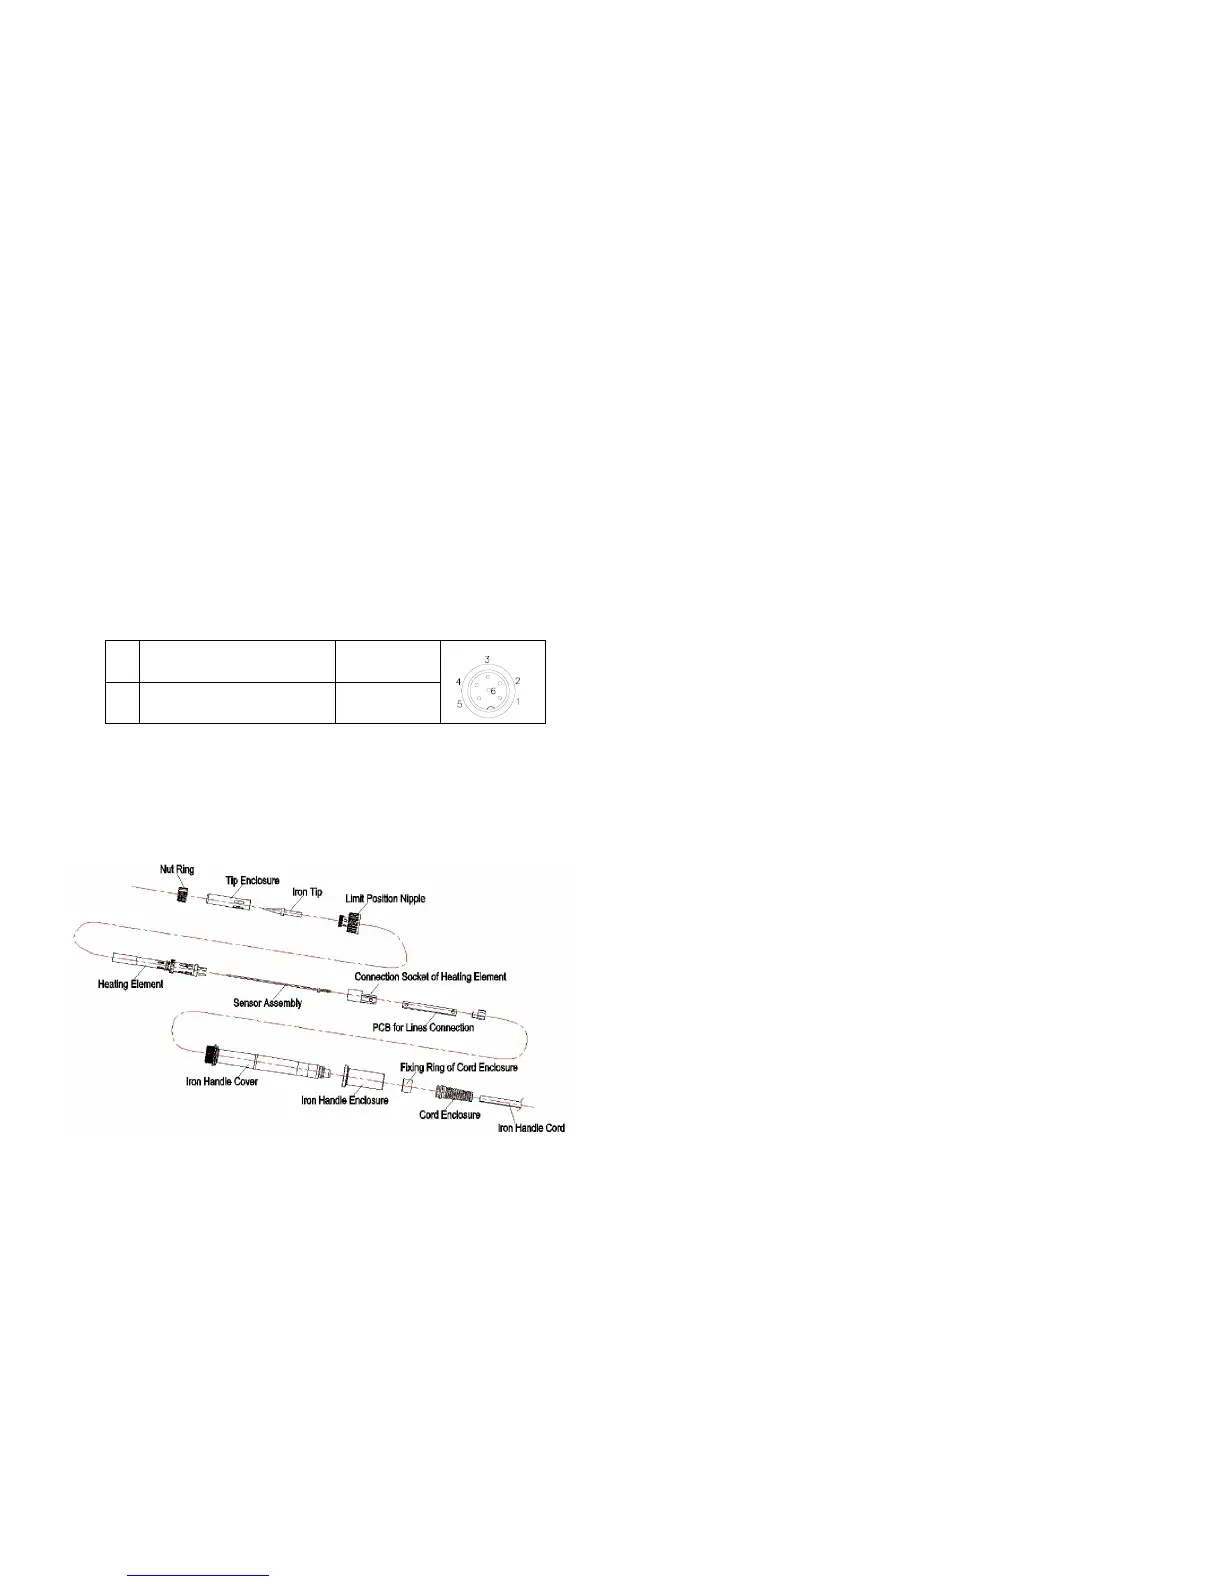
10.2 Disassembling the Iron Handle(for example
901A Iron hand
)
This machine is equipped with a 3-wires grounding plug and must be
plugged into a 3-terminal grounded socket. Do not modify plug or use
an ungrounded power socket. If an extension cord is necessary, use
only a 3-wire extension cord that provides grounding.
Do not use the unit for other applications except soldering.
Do not rap soldering iron against the workbench to shake off residual
solder, otherwise the iron will be damaged by shocks.
Do not modify the unit.
Only use the original replacement parts.
Keep the unit dry. Don’t use or disconnect the unit with wet hands.
The soldering process will produce smoke, so make sure the area is
well ventilated.
While using the unit, don’t do anything which may cause bodily harm or
physical damage.
Children don’t know the danger of electrical appliances. Keep it away
from children.
Page 2 Page 17
 Loading...