ACT III RD
rapid descent core orientation tool
2
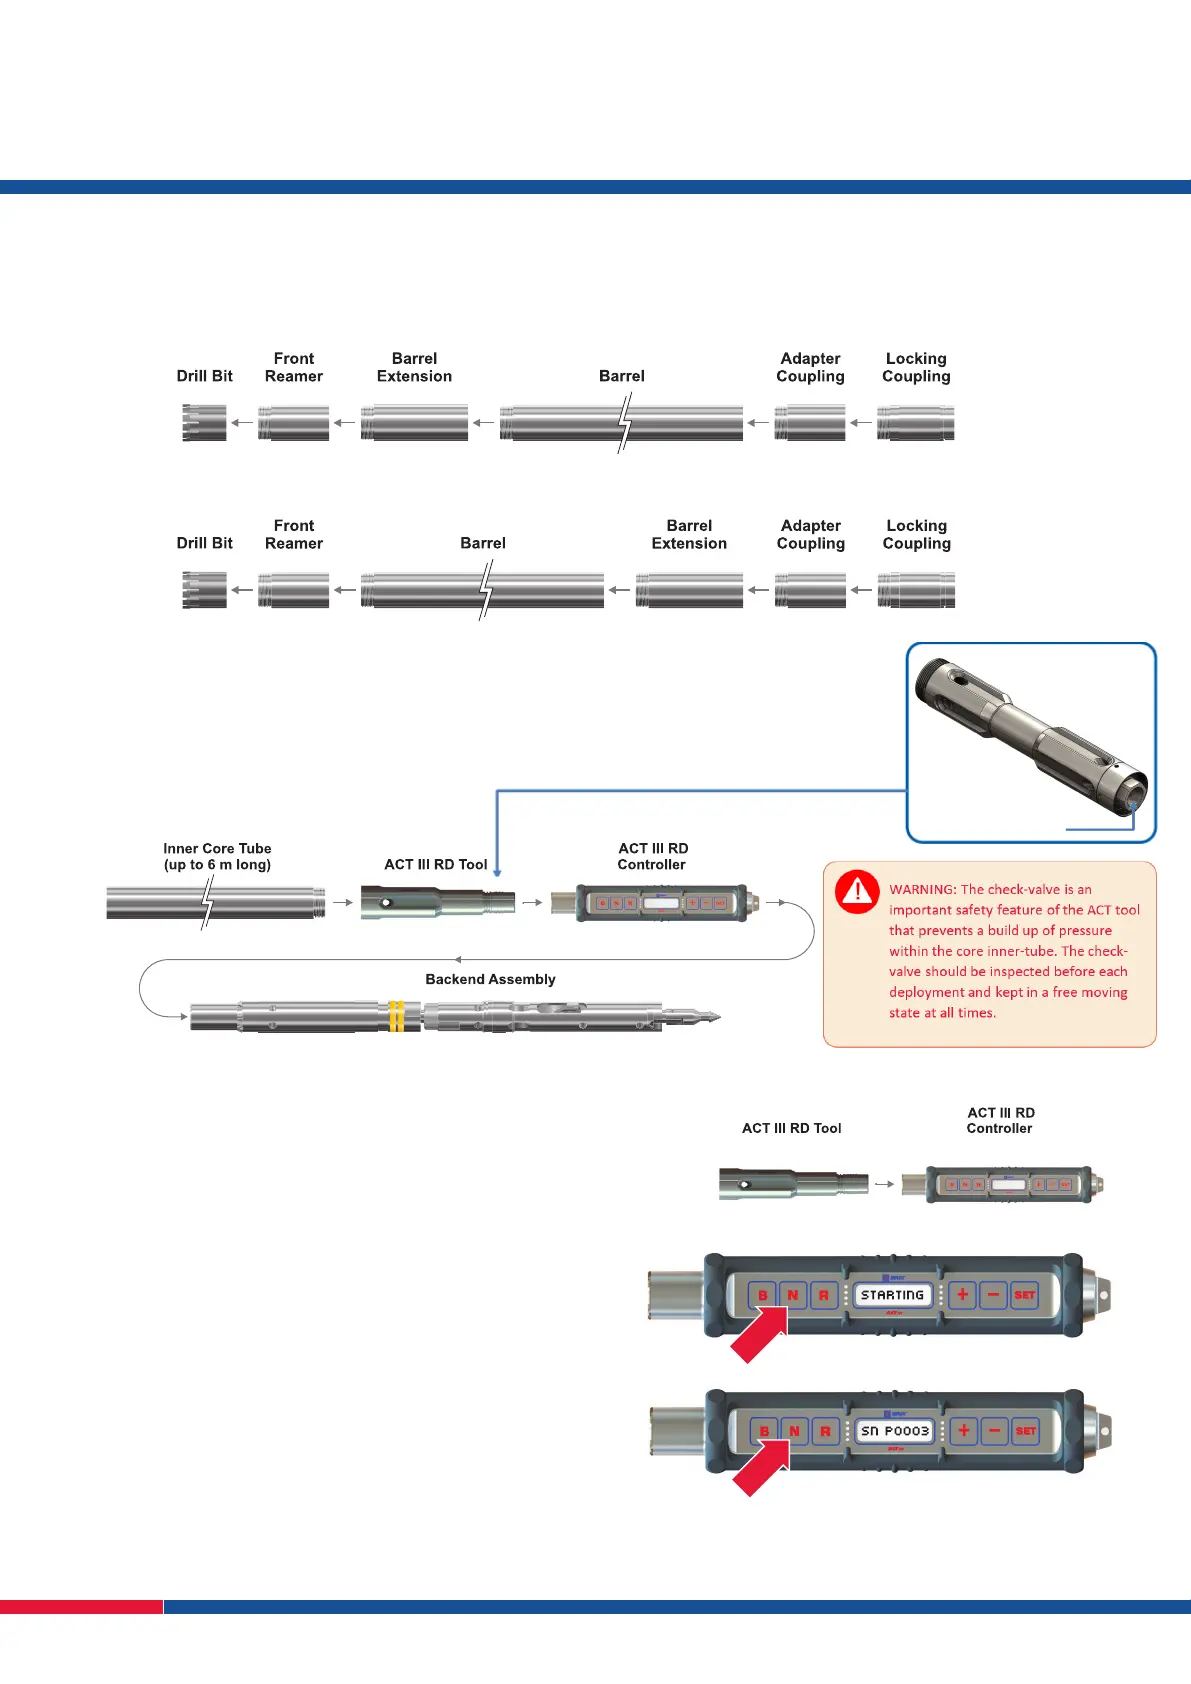
1. Prepare BHA/Core Barrel Assembly
1.1. Front of barrel – Insert the ACT III RD barrel extension between the front end reamer and core barrel (Fig. 1).
1.2. Back of barrel – Insert the ACT III RD barrel extension between the core barrel and the adaptor coupling/back
end reamer (Fig. 2).
N.B. If inserting into the back of the barrel a landing ring MUST be inserted into the ACT III RD barrel extension.
1.3. Tighten ACT III RD Barrel Extension as per standard drilling practice.
2. Prepare Core Inner Tube Assembly
2.1. Insert the ACT III RD tool between the core inner tube and the inner tube backend assembly (Fig. 3).
N.B. There is no need to remove the backend spindle/grease cap from the backend. Tighten the inner tube, ACT III RD and backend, as per
standard drilling practice, using inner tube wrenches NOT pipe wrenches.
3. Initialise ACT III RD
3.2. Remove ‘Top Cap’ from ACT III RD tool to expose the magnetic Infra Red
Port, inspect and grease/replace the o-rings as required.
3.3. Insert the ACT III RD Controller (Fig. 4).
3.4. Press and hold N for 5 seconds, the display will ash STARTING (Fig. 5)
followed by the ACT III RD tool serial number (Fig. 6).
N.B. Continue to hold N while display shows tool serial number.
N.B. If using an ACT II round controller then press the same buttons as
ACT III RD wand.
Due to the robustness of the ‘Peizo Panel’ buttons, the ACT III RD controller has
the ability to remember the pressure used to activate them. The buttons can be
activated by lightly touching or by pressing them very rmly.
N.B. If pressing very rmly, the pressure MUST be maintained for 5 seconds.
If pressure is not constant the button will not activate and will require a 2 second
pause before it can be pressed again.
Pressing lightly will result in easier use.
Section 1: Non Download
Fig. 1
Fig. 2
Fig. 4
Fig. 5
Fig. 6
Fig. 3
Top Cap
Inner Tube
Check-valve
 Loading...