sTUDtrR REVOX
PR99
REPRODUCE ONLY sEcTloN
3/3
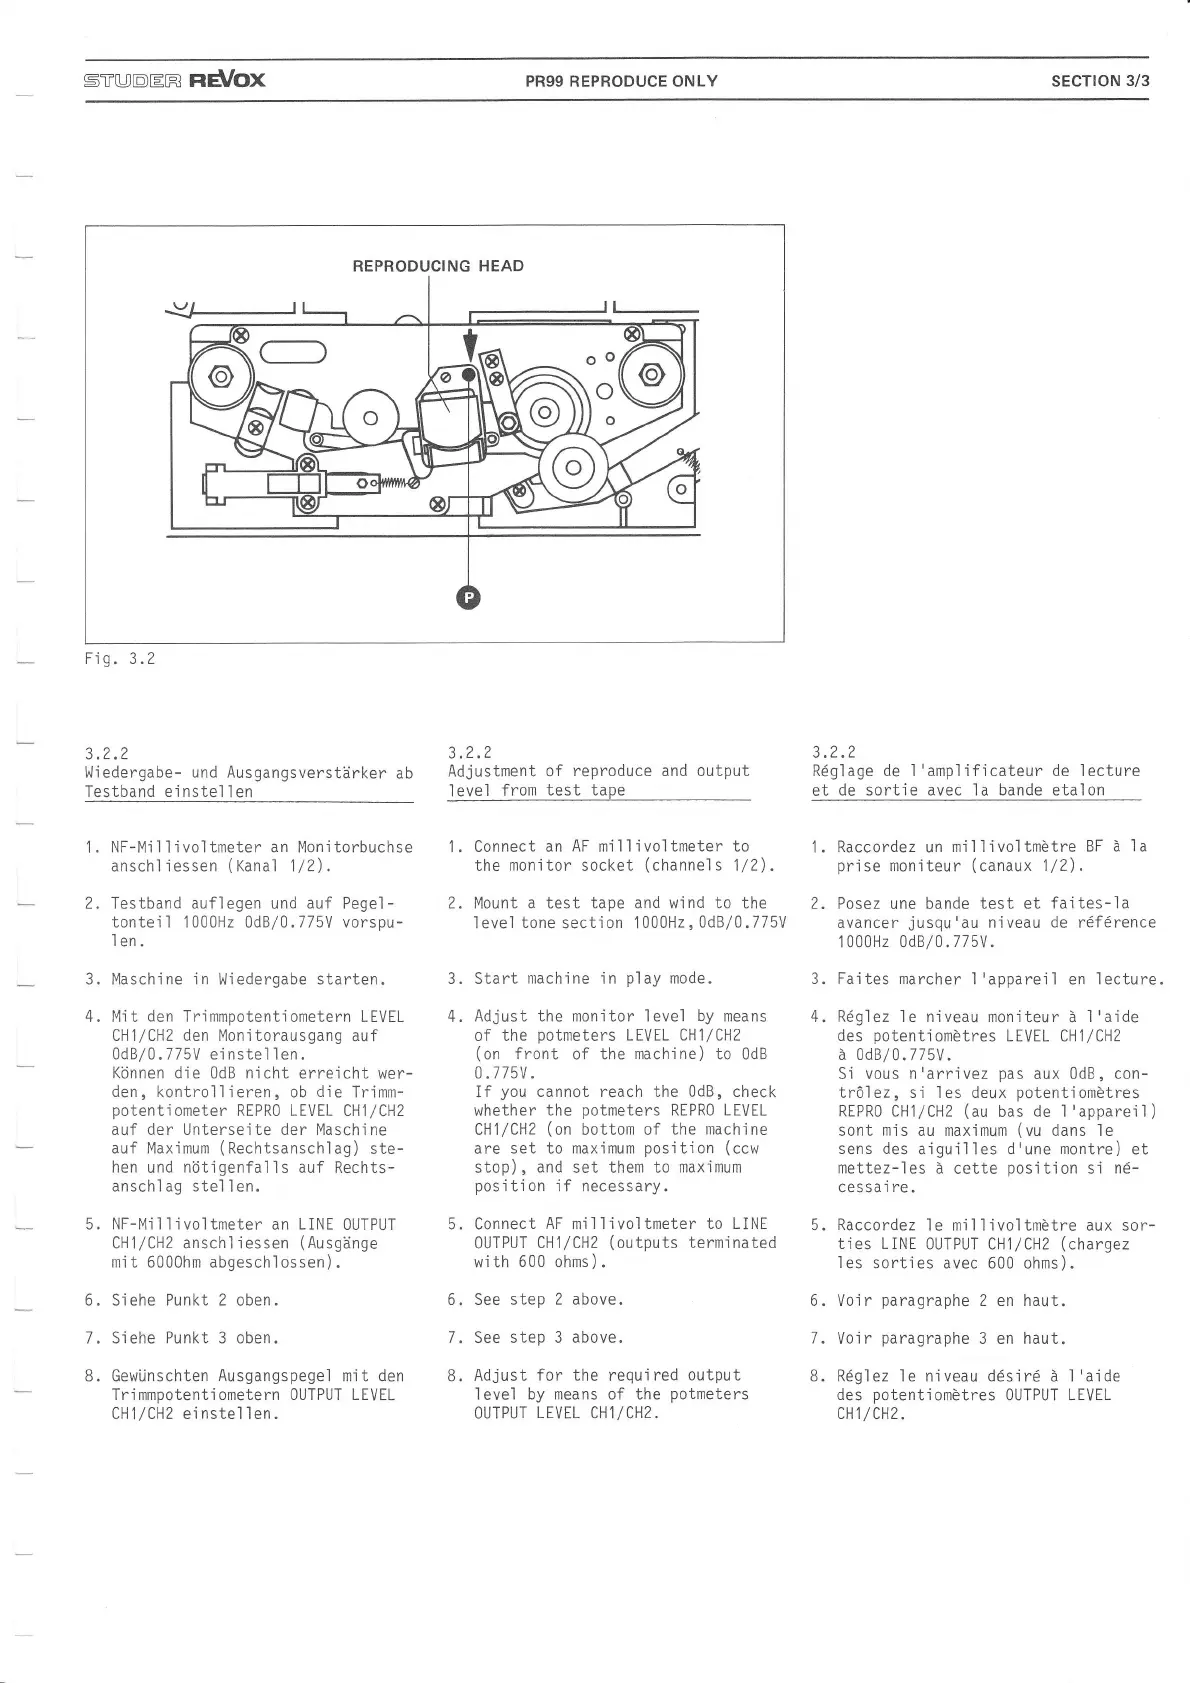
REPRODUCING HEAD
3.
4.
3.
4.4.
Fi
g.
3.2
3.2.2
Wiedergabe-
und
Ausgangsverstärker
ab
Testband einstel len
2.
1.
NF-Mi I I ivol tmeter an Monitorbuchse
anschl iessen
(Kanal
1/2).
Testband auflegen und auf Pegel-
tontei I 1 000H2
0dB/0.775V
vorspu-
len.
Maschine in l^liedergabe starten.
Mit
den
Trimmpotentiometern LEVEL
CH1/CHz den
Monitorausgang auf
jdB/0.775U
e'i nstel I en.
Können die
OdB
nicht
erreicht wer-
den,
kontrollieren, ob
die
Trimm-
potentiometer
REPR0 LEVEL CH1/CH2
auf der Unterseite der lvlaschine
auf Maximum
(Rechtsanschlag)
ste-
hen
und
nötigenfalls
auf Rechts-
anschl
ag
stel
I en.
NF-Mil livoltmeter
an
LINE
OUTPUT
CHl
/
CHZ anschl iessen
(Ausgänge
mi t 6000hm
abgeschl ossen) .
Siehe Punkt 2
oben.
Siehe Punkt 3 oben.
Gewünschten Ausgangspegel mit den
Trimmpotentiometern 0UTPUT LEVEL
CH1
/
CHZ ei
nstel
I en.
6.
Adjustment
of reproduce
and output
level
from
test tape
1.
Connect an
AF
mil
l ivoltmeter
to
the monitor socket
(channel
s 1/2).
2.
Mount
a test tape and wind to the
level
tone
section 1000H2,
\dB/0,775U
Start
nrachine
'i
n
play
mode.
Adjust the monitor leve1
by
means
of the
potmeters
LEVEL CH1/CHz
(on
front
of the
machine)
to OdB
0.775U .
If
you
cannot reach the OdB, check
whether
the
potmeters
REPRO LEVEL
CHl/CHZ
(on
bottom of the
machine
are
set
to
maximum
position
(ccw
stop),
and
set them to
maximum
position
if necessary.
Connect
AF
millivoltmeter
to LINE
0UTPUT
CH1/CHZ
(outputs
terminated
with
600
ohms).
See step
2
above.
See step 3 above.
Adjust
for
the required
output
level by means of the
potmeters
OUTPUT
LEVEL
CH1/CH2.
J. Z.l
Rdglage de 1'amplificateur de
.lecture
et
de sortie avec la bande etalon
2.
1.
5.
6.
7.
Raccordez un
miIlivoltmötre
BF ä Ia
prise
moniteur
(canaux
1/2).
Posez une bande test
et faites-la
avancer
jusqu'au
niveau
de
rdfdrence
1 000H2 0dB/0.775V.
Faites
marcher 1'appareil en lecture.
R6g1ez 1e niveau moniteur
ä
l'aide
des
potentiomötres
LEVEL
CH1/CHZ
ä 0dB/0.775V.
Si vous n'arrivez
pas
aux 0dB, con-
trö1e2, si les deux
potentiomötres
REPR0 CH1/CH2
(au
bas
de
I'appareil
)
sont
mis
au maximum
(vu
dans Ie
sens des
aiguil les d'une
montre)
et
mettez-les
ä cette
position
si
n6-
cessa
i
re.
Raccordez
le millivoltmötre
aux sor-
ties LINE
0UTPUT CH1/CHz
(chargez
les
sorties avec 600 ohms).
Voir
paragraphe
2 en haut.
Voir
paragraphe
3 en haut.
R6g1ez 1e niveau d6sird
ä
I
'aide
des
potentiomötres
0UTPUT LEVEL
c1l
/
CHz.
5.
q
6.
7.
7.
B.
o
o
 Loading...