20
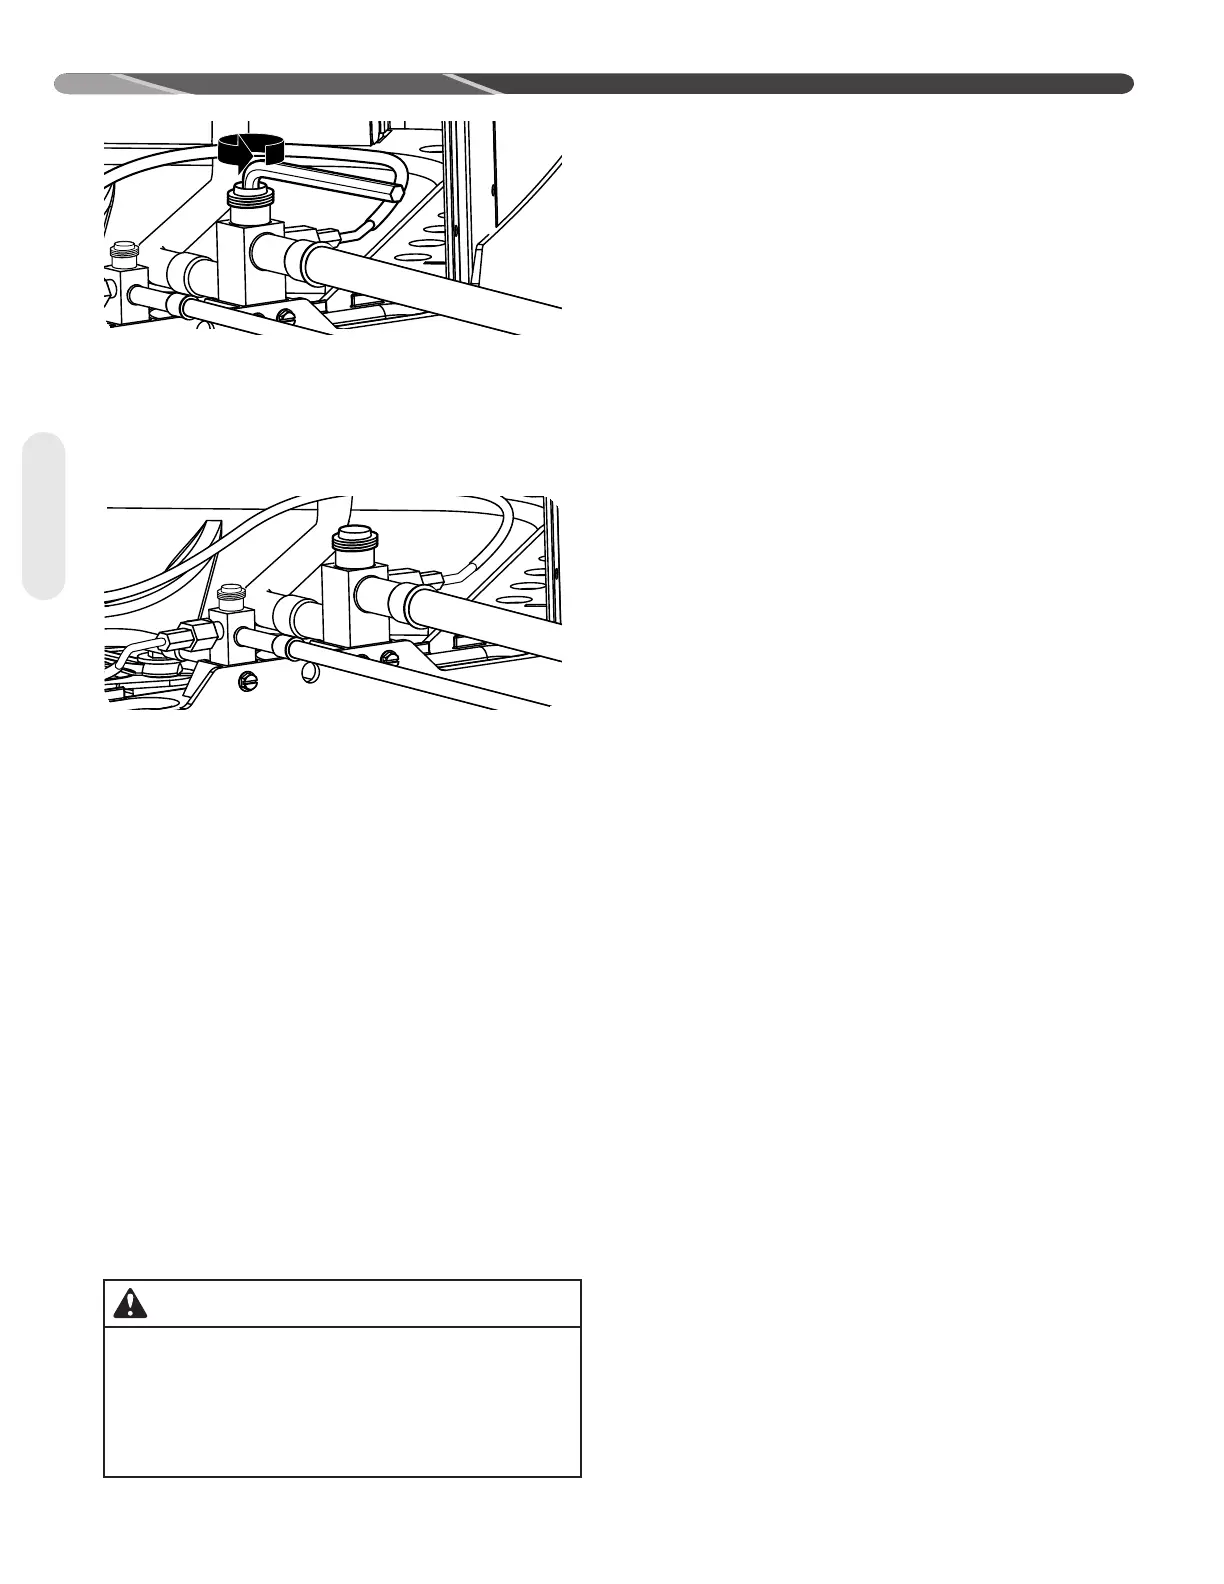
Figure 21: Open Both Service Valves
4. After adequate evacuation, open both service
valves by removing both brass service valve
caps with an adjustable wrench. Insert a 3/16"
[5 mm] or 5/16" [8 mm] hex wrench into the stem
and turn counterclockwise until the wrench stops.
Figure 22: Connect Gauges
5. If not already connected from evacuation pro-
cess, gauges must be connected at this point to
check and adjust charge.
IMPORTANT: Compressors (especially scroll
type) should never be used to evacuate the air
conditioning system because internal electrical
arcing in near vacuum conditions may result in a
damaged or failed compressor. Never run a scroll
compressor while the system is in a vacuum or
compressor failure will occur.
4.8 Final Leak Testing
After the unit has been properly evacuated and
service valves opened, a halogen leak detector
should be used to detect leaks in the system. All joints
and piping within the outdoor unit, indoor coil, and
interconnecting tubing should be checked for leaks. If
a leak is detected, the refrigerant should be recovered
before repairing the leak. The Clean Air Act prohibits
releasing refrigerant into the atmosphere.
4.9 Control Wiring
4.9.1 EcoNet
™
Communications
The EcoNet
TM
enabled (-)A18AZ/(-)P18AZ Series heat
pumps and air conditioners are specifically designed
to be matched with and EcoNet
TM
enabled air-handler
or gas furnace and the EcoNet
TM
Control Center.
While they can be controlled by conventional 24
VAC control wiring and a conventional thermostat for
temporary emergency situations until communication
issues are resolved. Unit operates as a single stage
system, and this eliminates many of the advanced
operating and diagnostic features.
4.9.2 EcoNet
™
Control Center
Installation
The EcoNet
TM
Control Center should be mounted 4
to 5 feet [1.2 to 1.5 m] above the floor on an inside
wall of the living room or a hallway that has good
air circulation from the other rooms being controlled
by the Control Center. It is essential that there
be free air circulation at the location of the same
average temperature as other rooms being controlled.
Movement of air should not be obstructed by furniture,
doors, draperies, etc. The Control Center should not
be mounted where it will be affected by drafts, hot
or cold water pipes or air ducts in walls, radiant heat
from fireplace, lamps, the sun, T.V. or an outside wall.
See instructions packaged with Control Center for
detailed mounting and installation instructions.
4.9.3 EcoNet
™
Communication
Wiring Connections
The four 18 AWG low-voltage control wires must be
installed from the EcoNet™ Control Center to the
indoor unit and from the indoor unit to the outdoor
unit. The wire length between the Control Center and
indoor unit should not be greater than 100 feet [30.5
m].
The wire length between the indoor unit and outdoor
unit should not be greater than 125 feet [38.1 m].
Running low-voltage wires in conduit with line voltage
power wires is not recommended. Low-voltage wiring
must be connected to the low voltage terminal block
on the Universal Outdoor Control . The terminal block
can be unplugged from the control board to facilitate
wiring.
• An EcoNet™ communicating heat pump system
consists of these matched components:
• EcoNet™ communicating outdoor unit.
• EcoNet™ communicating air handler or EcoNet™
communicating furnace.
• EcoNet™ Control Center.
WARNING:
Turn off electric power at the fuse box or service
panel before making any electrical connections.
Also, the ground connection must be completed
before making line voltage connections. Failure
to do so can result in electrical shock, severe
personal injury, or death.
Wiring
 Loading...