19
4. Installing the Printer Driver
● If you connect the computer by a USB cable, do not
connect the cable until you are instructed to do so on
the screen.
● The following items are necessary to set up a wired
connection.
● USB cable or Ethernet cable
For Windows
1. Turn on your computer.
2. Download the latest driver from the manufacturer's website.
3. Double-click the downloaded file.
4. Confirm the installation location of the driver, and then
unzip the file.
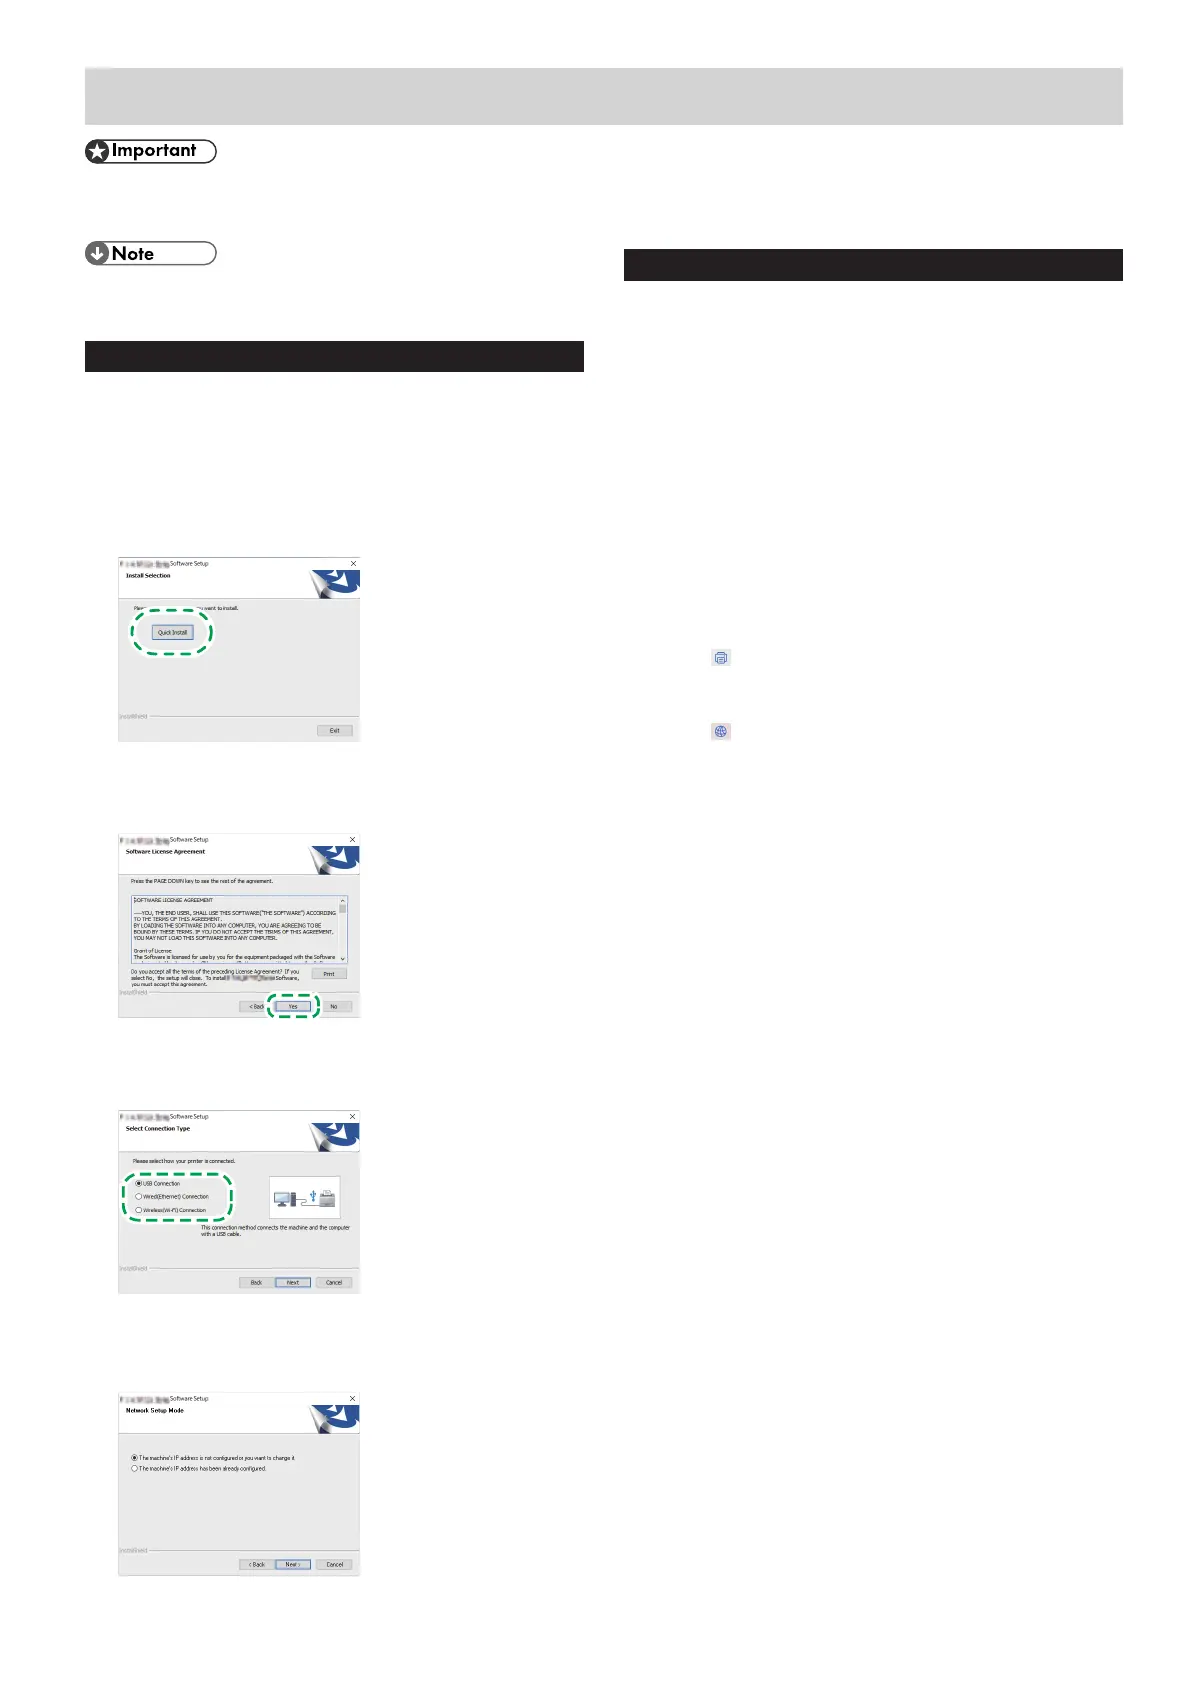
5. Click [Quick Install].
6. The software license agreement appears in the [Software
License Agreement] dialog box. After reading the agreement,
click [Yes].
7. Select [USB Connection], [Wired(Ethernet)Connection] or
[Wireless(Wi-Fi)Connection] according to communication
environment or your device.
8. Follow the instructions in the setup wizard.
If you already completed the Wi-Fi setting, click [The machine's
IP address has been already configured.].
9. Click [Finish] in the [Setup Complete] dialog box. If the
installer prompt you to restart Windows, reboot your
computer.
Setup is completed.
For macOS
The following procedure is explained using macOS 11.2.3 as an
example.
1. Turn on your computer.
2. Download the latest driver from the manufacturer's website.
3. Double-click the downloaded file.
4. Follow the instructions in the setup wizard.
5. Click [Close] in the [Summary] dialog box.
6. Select [System Preferences...] from the Apple menu.
7. Click [Printers & Scanners].
Check that the machine automatically recognized by plug-and-
play appears in the printers list.
8. Click the [+] button.
When Using the USB Connection:
1. Click
(Default) and select the machine from the list, and
check that the machine name is displayed in "Use".
When Using the Network Connection:
1. Click
(IP), and configure the information of the machine.
2. Enter the address, and then select the protocol.
3. Check that the machine name is displayed in "Use".
9. Click [Add].
10. Select [Set] or [Not Set] for [Tray 2], and then click [OK].
11. Quit System Preferences.
Setup is completed.
 Loading...