cobas c 111 Installation Manual
04906900001
INSTALLATION-MANUAL cobas c 111
Version 3.0 Page 23 of 43
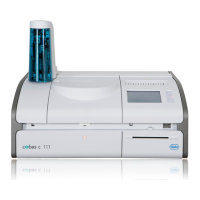
6. Start-up of the Instrument
6.1 Instrument with ISE unit
6.1.1 Instrument placement & preparation:
1. Follow all steps of procedure 6.2.1 below (see Instrument without ISE Unit)
2. Connect the ISE power supply cable into an appropriate AC wall socket.
3. Follow all steps of procedure 6.1.2 below.
6.1.2 Starting the instrument & setup of ISE
Notice: All operator-related instructions on how to handle the instruments during
the following procedure are described in the Operator’s Manual.
1. Before switching on the instrument, make sure that the Transfer Head can move
smoothly, and all covers are closed properly.
2. Switch on the instrument by pressing the mains power switch to “I”
3. The instrument will perform an initialization and check all vital components.
Please wait until the instrument will show the status “Standby”.
4. Log in as admin
Notice: Upon delivery, the instrument is drained of water, so eventually an error
message “Air detected in the fluid system” will appear. Ignore it until you
performed step 6. Otherwise you have to check the fluid tubing for leakages.
5. Check the Reagent Disk. If there is none inside, please insert one. (The de-
scription on how to insert a Reagent Disk is found in the Operator’s Manual)
Notice: If there is a Reagent Disk inside, but is not detected by the software, then
check for correct identification by the flags. Exactly one of these flags needs
to be broken away for correct ID.
6. Use the Diagnostic function “Fill and empty fluid system” to fill the fluid system.
Watch closely the water and cleaner fluids flowing through the tubing. Remove
the transfer head cover for this purpose.
7. Use the Maintenance function “Deproteinize Probe” to activate the probe for
correct pipetting. This process needs 2 “False bottom”-cups, (or any other suit-
able cup) one filled with 1.5 ml of ISE Deproteinizer, and one filled with 1 ml of
Activator. Those tubes have to be prepared before starting this maintenance
function. Follow the instructions given by the software, when and how to place
these tubes.
8. Check the correct setting of time and date.
9. Perform ISE Applications Import and installation if not yet done.
To do so, access to Utilities > Applications > Laboratory Parameters > select then
Add Tab click ( + ). As next “Import Application” tab will be displayed and by
clicking on it the System will ask for the BTS or for an upload using the USB
Stick. After providing this information select the Add Tab again click ( + ) and
click in Install Application. The installation will be performed. Once the
installation is successfully done, the brackets which were surrounding the
application name previously won’t be visible anymore.
For example:[K] installation not yet done. ; K installation already done.
 Loading...