cobas c 111 Installation Manual
04906900001
INSTALLATION-MANUAL cobas c 111
Version 3.0 Page 29 of 43
6.3 Single ISE unit
6.3.1 Attaching the ISE unit to the base instrument (if applicable)
1. Unpack the ISE unit and preposition all ISE accessory parts, like Electrodes,
Calibrator indirect, Reference solution and Solution 1-2.
2. Remove left and right side panel of the base instrument.
3. Move the transfer head to the sample area and remove the left side panel and
main cover.
4. Remove the transfer head cover.
5. Remove the screws on the left and right side that holds the rear service flap and
fold it backwards.
6. Remove the complete ISE Cover and left side panel of the ISE unit.
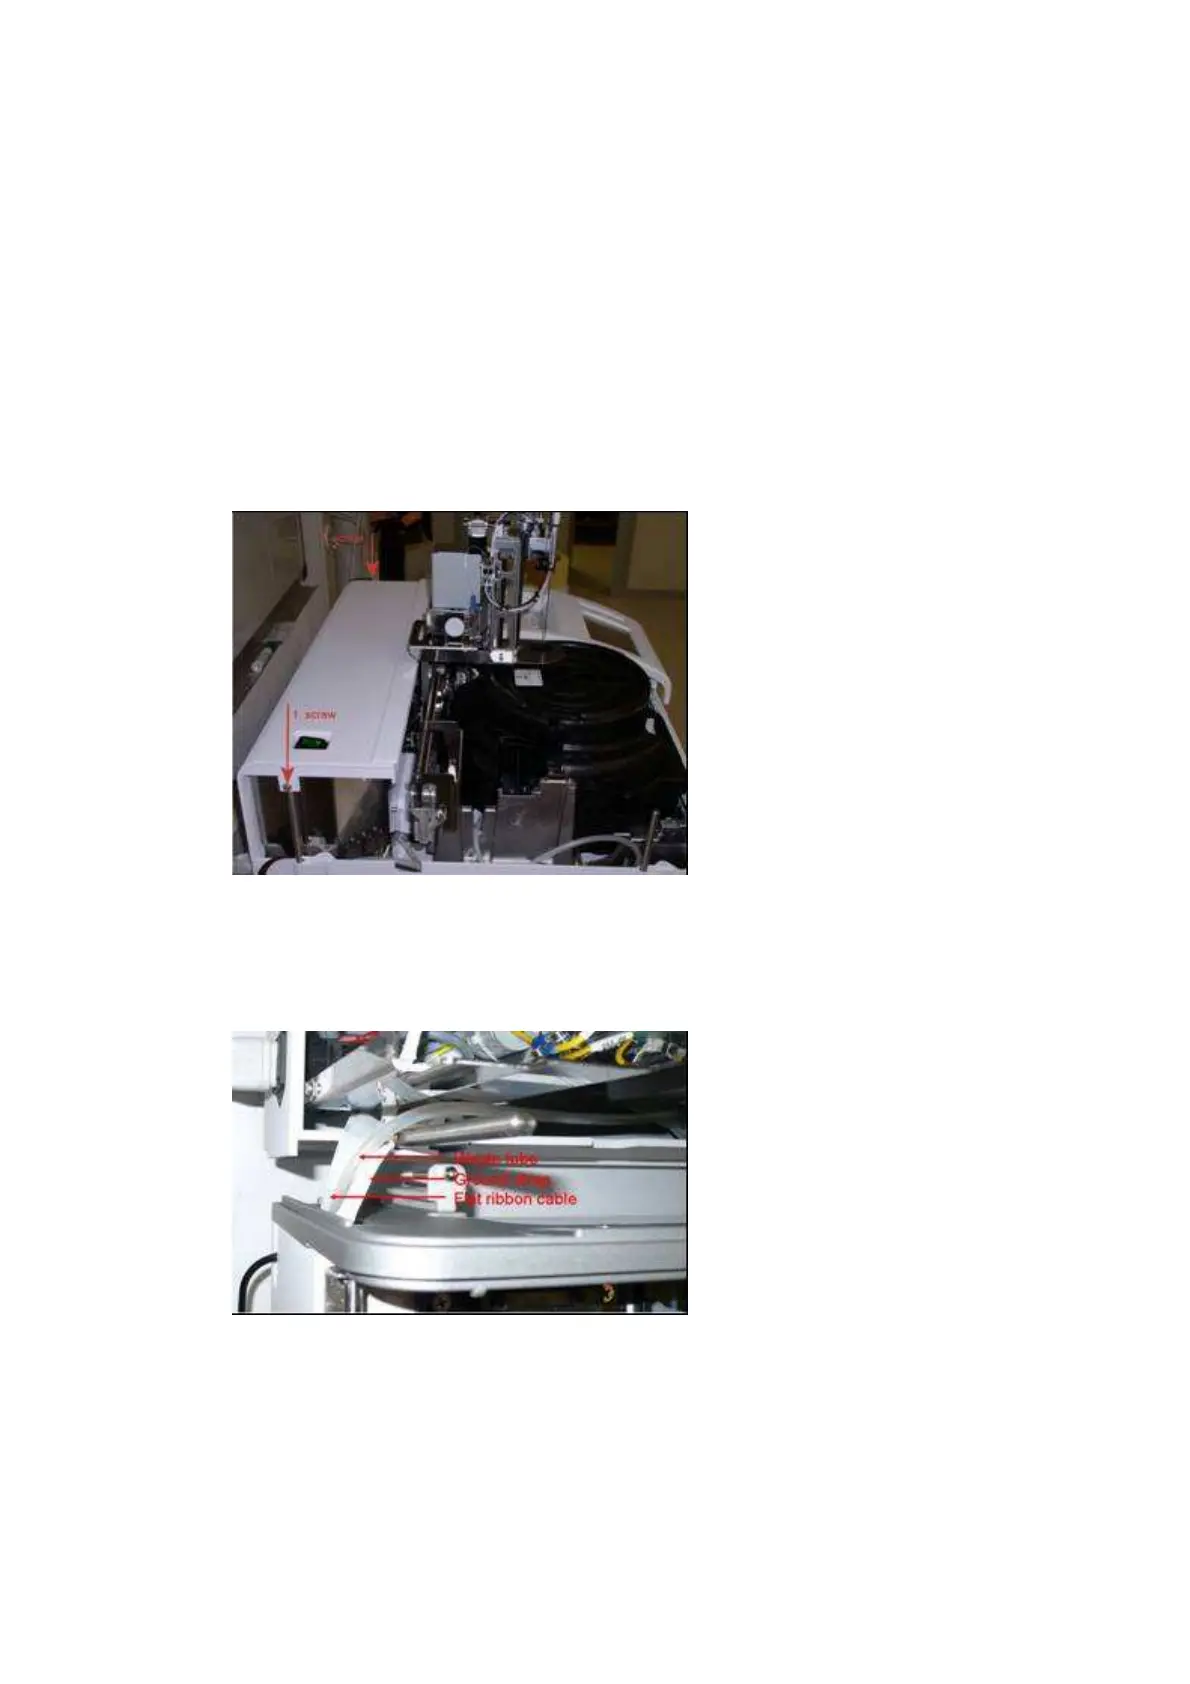
7. Route the flat ribbon cable from the instrument into the ISE. Route the ground
strap from the ISE into the instrument. Route the waste tube from the ISE into
the instrument (the end with the quick fit connector belongs into the ISE).
8. Fit the right side of the ISE unit to the left side of the instrument by inserting the
rails into the guides. There are 2 screws that attach the ISE unit to the base
instrument.
Notice: Take care not to squeeze the waste tube at any position!
Fixation of rear panel
Routing of ISE connections
 Loading...