EasyManua.ls Logo

Roland EM-50 User Manual

Roland EM-50
76 pages
To Next Page IconTo Next Page
To Previous Page IconTo Previous Page
Page #30 background imageLoading...
Page #30 background image
Owner's
Manual
1.
Press
the
[STYLE/SONG]
button
and
check
whether
the
display
contains
the
icon.
STYLE
PROGRESSION
INTRO
ONGINAL
FRL
VARIATION
2.
Press
the
MODE
[ARRANGER]
button
so
that
the
icon
appears.
3.
Select
the
Music
Style
you
want
to
use
as
backing
track.
If
you
like,
you
can
activate
the
ONE
TOUCH
func-
tion
“One
Touch
Program”
or
select
a
User
Program
“User
Programs”.
4.
Select
the
Upperl
or
Upper2
part
using
the
[UPPER
1/2]
button.
If
you
like,
you
can
layer
the
Upper!
&
Upper2
parts
by
pressing
[INTEL/LAYER]
until
the
LAYER
icon
appears.
5.
If
you
also
want
to
record
the
melody
(using
Upperl
and/or
Upper2),
select
the
Tones
to
be
used
(see
page
20).
This
is
only
necessary
if
you
do
not
wish
to
take
advantage
of
the
ONE
TOUCH
function
or
one
of
your
User
Programs.
Note:
You
can
also
record
the
melody
at
a
later
stage.
See
"Second
recording
pass"
on
page
30.
6.
Set
the
tempo
using
the
TEMPO
buttons.
MODE
ARRANOER
ORGAN
MORUMS
.
Int
TRACK
7.
Press
the
[REC]
button
once
or
twice
to
select
the
function.
KEYBOARD
[——MOBE-——ji
VELO
ARRANGER
ORGAN
M
DRUMS
pum
swn
L
STANDARD
8.
Start
recording
in
one
of
the
following
ways:
a)
Play
the
first
melody
notes
(to
the
right
of
the
Split
point).
This
will
start
the
recording
without
Arranger
backing.
You
can
add
it
whenever
you
like
by
pressing
[START/STOP]
or
by
playing
a
chord
in
the
left
half
of
the
keyboard
(if
the
SYNC
START
function
(see
page
13)
is
on).
The
Arranger
will
then
start
at
the
next
downbeat.
Note:
If
you
start
recording
without
the
Arranger
and
want
to
bring
it
in
at
a
later
stage,
it
would
be
a
good
idea
to
switch
on
the
metronome.
Note:
If
you
start
recording
using
this
method,
you
can
stop
the
Arranger
by
pressing
[START/STOP]
and
impro-
vise
an
ending
without
backing,
because
recording
doesn't
stop.
b)
Press
the
[START/STOP]
button
to
start
Arranger
playback
with
the
selected
Division.
C)
Activate
the
SYNC
START
function
and
press
one
or
several
keys
to
the
left
of
the
Split
point.
9.
Stop
recording
in
one
of
the
following
ways:
a)
Press
[REC]
again.
b)
Press
the
[ENDING]
button
to
start
the
Ending
phrase.
As
soon
as it
ends,
recording
stops.
C)
If
you
started
recording
using
methods
(b)
or
(c)
above,
press
[START/STOP]
to
stop
both
the
Arranger
and
recording.
10.
Stop
the
metronome
if
it
is
still
running.
Note:
Save
your
song
to
disk
or
via
MIDI
if
you
want
to
keep
it
and
play
it
back
sometime
in
the
future
(see
page
34).
Listening
to
your
song
To
listen
to
your
song,
press
the
[START/STOP]
(>
/B)
button.
The
EM-50/30
automatically
switches
to
the
Song
mode.
The
display
now
contains
the
fol-
lowing
icons
(the
INTRO,
VARIATION,
etc.,
icons
are
no
longer
available):
MARKER
MARKER
BWD FWD
en
RECO
~
2nd TRK
REPEAT
PLAY
|
REC
A—B
The
PLAY
icon
is
surround
by
a
box
to
indicate
that
playback
is
running.
Press
[START/STOP]
once
again
to
stop
playback.
Second
recording
pass
Suppose
that
you
are
happy
with
the
accompaniment
but
would
like
to
redo
the
melody
(or
that
you
delib-
erately
forgot
about
the
melody
the
first
time
around).
The
EM-50/30
allows
you
to
do
just
that
and
best
of
all:
you
only
need
to
play
the
melody
again
because
the
accompaniment
resides
on
a
separate
track!
Note:
The
2nd
TRACK
function
is
only
available
for
fresh-
ly
recorded
songs,
i.e.
songs
you
did
not
load
from
disk
(or
via
MIDI).
1.
Press
the
[REC]
button.
KEYBOARD
OE
vi
ARRANGER
ORGAN
M.DRUMS
It
now
automatically
selects
the
2nd
TRACK
function,
which
is
indicated
by
the
following
icon:
LAS
|
This
icon
by
itself
only
indicates
the
2nd
TRACK
record
standby
mode.
You
still
need
to
start
it.
Be
careful
not
to
press
the
[REC]
button
too
often
(the
mc?
|
icon
must
not
be
displayed).
30

Table of Contents

Question and Answer IconNeed help?

Do you have a question about the Roland EM-50 and is the answer not in the manual?
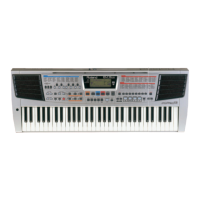
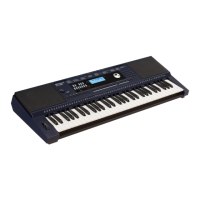
Roland EM-50 Specifications

General IconGeneral
Number of Keys61
KeyboardVelocity-sensitive
Reverb Types8
Chorus Types8
DisplayLCD
Power SupplyAC Adapter
Polyphony64
Speakers12 cm x 2
ConnectorsMIDI, Headphone

Summary

Features

D Beam Controller

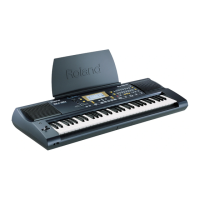
Controls various parameters by moving your hand over an infrared light beam.

64 User Programs with Style Hold function

Memories for saving panel settings, including Style, Tone, and tempo.

64 Music Styles in ROM + 8 in Flash-ROM

Offers 72 automatic accompaniments, 64 in ROM and 8 in Flash-ROM.

1. Important notes

Power supply

Guidelines for using the correct power supply and avoiding noise interference.

2. Panel descriptions

2.1 Front panel

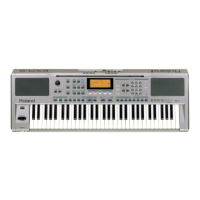
Detailed explanation of all controls and buttons on the EM-50/30's front panel.

4. Playing with accompaniment

About the Arranger

Detailed explanation of the Arranger's automatic accompaniment function.

4.1 Basic Music Style operations

Step-by-step guide to starting Arranger playback using Music Styles.

4.3 Selecting other Styles

4.4 Style Progression and Style Morphing

4.5 Other useful Music Style functions

5. Upper part functions

5.3 Selecting Tones for the Upper parts

5. Upper part functions

5.4 Keyboard Velocity

Explanation of velocity sensitivity and how it affects note volume/brightness.

5.5 D Beam Controller

Instructions for operating the D Beam Controller for musical expression.

5.8 Transpose & Octave

7. M.Drums mode

7.1 Selecting other Drums Sets

Guide on selecting different Drum Sets for M.Drums mode.

8. Using the Recorder

8.2 Recording your own Songs

Introduction to the EM-50/30's flexible 2-track recording capabilities.

Recording with Arranger backing

Guide for recording melodies with Arranger accompaniment.

8.2 Recording your own Songs

Recording with Arranger backing (continued)

Details on the first and second recording passes for Arranger backing.

8.2 Recording your own Songs

8.4 Saving your Song

Instructions for saving recorded songs to internal memory or disk.

8.4 Saving your Song

Saving your Song to disk (EM-50 only)

Detailed steps for saving songs to a floppy disk on the EM-50.

Save operation

Steps to save a song to a formatted disk.

8.7 Playing back Standard MIDI Files (EM-50 only)

8.8 Live performance with song backing (Minus One)

10. Advanced Arranger settings

10.4 Disk User Styles (EM-50 only)

11. User Programs

11.1 Writing your settings to a User Program

Detailed steps for writing current settings into User Program memories.

11.2 Selecting a User Program

Selectively recalling User Program settings (Style Hold)

12. Parameter mode

12.1 Editing the parameters (general procedure)

General steps for accessing and modifying the EM-50/30's advanced parameters.

12.2 Parameters

Detailed descriptions of various system parameters for fine-tuning.

12.2 Parameters

13. MIDI functions

13.1 Editing the MIDI parameters (general procedure)

General steps for accessing and editing MIDI parameters.

Parameters in Style mode

Configuration of MIDI parameters when using the Arranger.

13.1 Editing the MIDI parameters (general procedure)

Parameters in Style mode (continued)

MIDI filters for various messages and synchronization setup.

Synchronization parameters (continued)

14. Archiving/loading settings

14.1 Archiving your settings via MIDI (Dump TX)

Method for transferring settings to a computer or sequencer via MIDI.

14.1 Archiving your settings via MIDI (Dump TX)

Transmitting archived/new data to the EM-50/30

Steps to transfer archived settings back to the EM-50/30.

14.2 Disk functions (EM-50)

Loading files from disk

How to load User Programs and Custom Styles from a floppy disk.

Saving files to disk

How to save Songs, User Programs, and Custom Styles to disk.

14.2 Disk functions (EM-50)

Saving files to disk (continued)

Completing file saving, naming conventions, and error handling.

14.4 Initializing your EM-50/30 (Factory)

Related product manuals