Purity and Convergence Adjustment
-19-
CONVERGENCE ADJUSTMENT
Preparation: After carrying out purity adjustment and
before proceeding to convergence
adjustment, provisionally insert the rubber
wedge so that there is no vertical or
sideways play in the deflection yoke.
Signals: Display a crosshatch pattern.
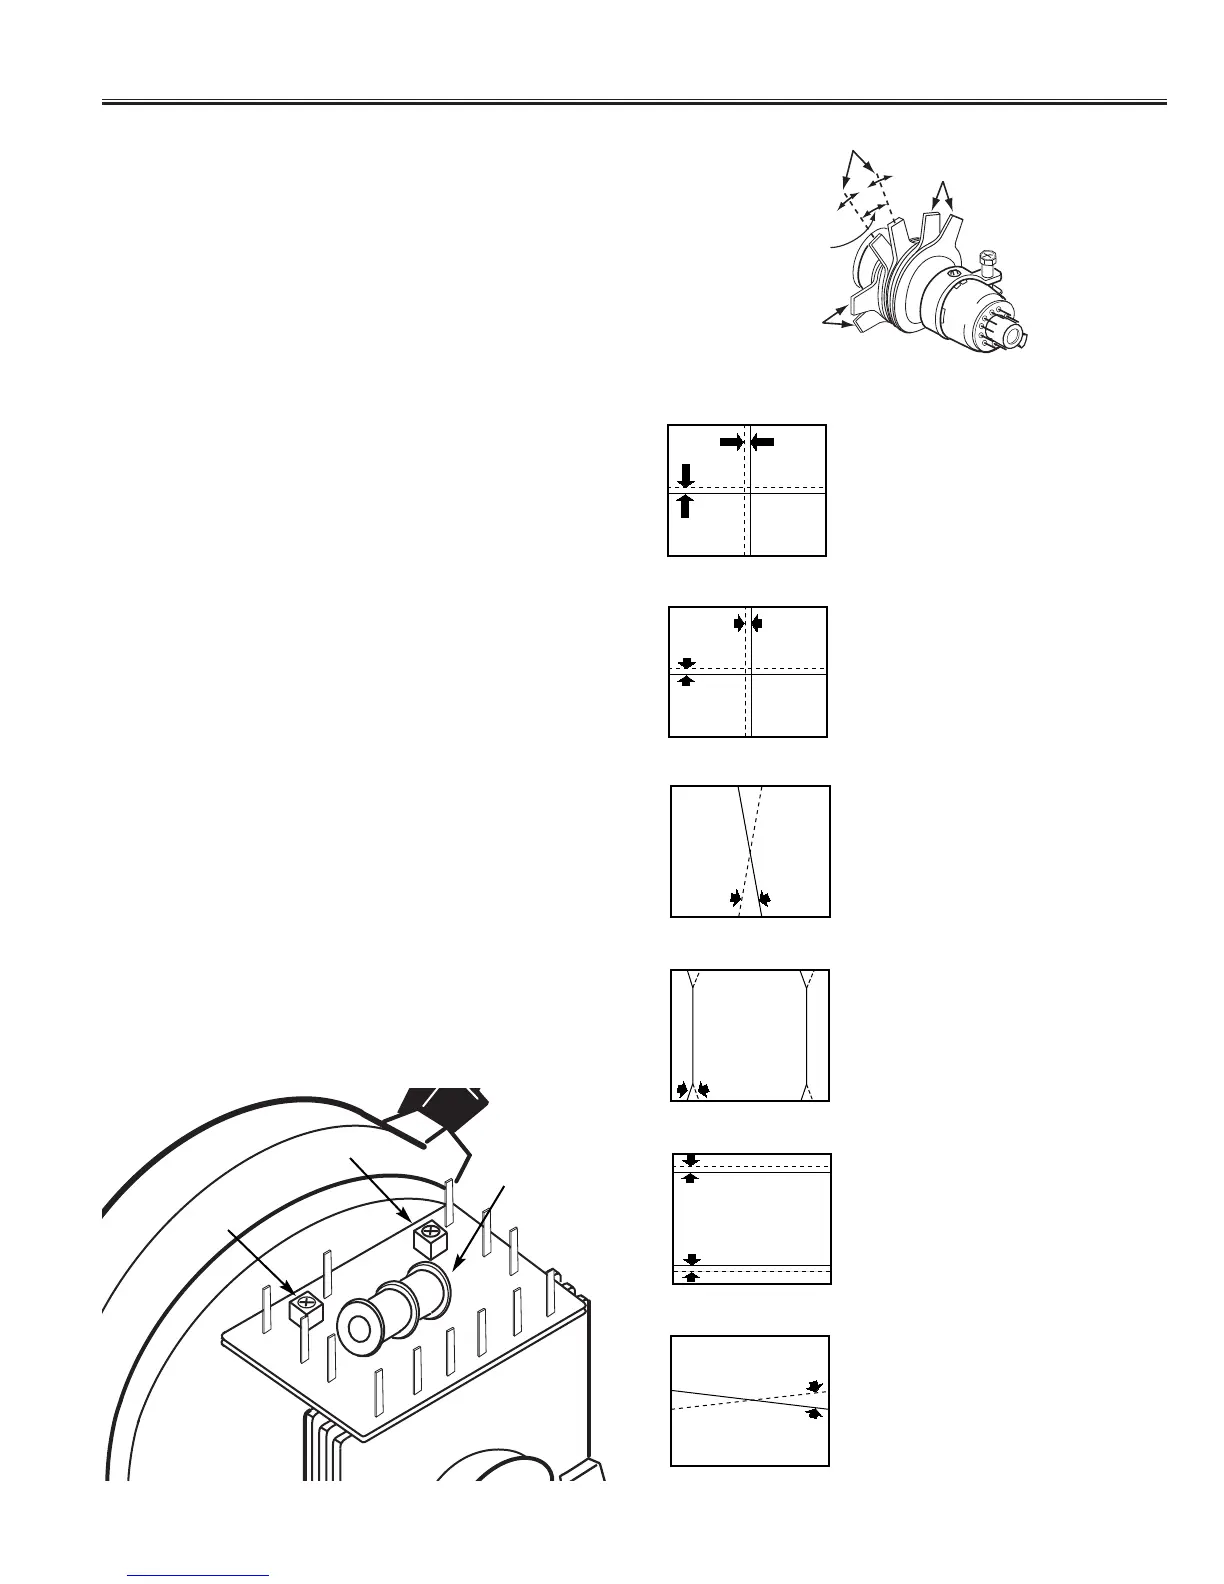
1. Red/blue center adjustment
Adjust the angle between the tabs (1) and (2) in Figure
5 and rotate them together until the lines of the red and
blue crosshatch patterns (vertical and horizontal lines)
are superimposed in the center of the screen.
2. Green and red/blue center adjustment
Adjust the angle between the tabs (3) and (4) in Figure
5 and rotate them together until the lines of the green
crosshatch pattern are superimposed with the red/blue
crosshatch pattern (vertical and horizontal lines) which
were superimposed in step 1).
3. Vertical lines at screen center (Red and Blue)
Use the VR2 control (see Figure 8) at the top of the
deflection yoke to correct the vertical line convergence
at the center of the screen.(See Figure 9.)
4. Vertical lines at screen top and bottom
Use the VR1 control (see Figure 8) at the top of the
deflection yoke to correct the vertical line convergence
at the top and bottom of the screen. (See Figure 10.)
5. Horizontal lines at screen top and bottom
Rotate the Deflection yoke to the left or right to correct
the horizontal line convergence at the top and bottom of
the screen. (See Figure 11.)
If vertical lines are intersecting at the top and bottom,
use a screwdriver to adjust the Balance coil at the top of
the deflection yoke. (See Figure 12.)
 Loading...