10
Remote Control Unit (continued)
Using the Remote Control Unit
SENSOR button When you press this button (use a small-tipped object such as a ballpoint pen),
the mark will appear at the display. And the room temperature is detected by
the sensor which is built into the indoor unit and the air conditioner is controlled
accordingly.
If the remote control is located near a heat source, such as a space heater or in direct
sunlight, press the SENSOR button to switch to the sensor on the indoor unit.
Temperature Display Selector button
This switches the temperature display between °C and °F.
Time Display Selector button This switches the time display between 24-hour time and 12-hour time.
ACL button (ALL CLEAR) Puts the remote control unit into pre-operation status. Always press this button
after replacing the batteries.
ADDRESS switch • The address switch changes to prevent mixing of signals from remote control
units when two air conditioners are installed next to each other. Normally, the
address switch is set to A. For more information, please contact the dealer
where you made the purchase.
• Normally, the tabs on the remote control unit should not be bent.
The remote control unit sends the temperature signal to the air conditioner regularly at five minute
intervals. If the signal from the remote control unit stops for more than 15 minutes due to the loss of the
remote control unit or other trouble, the air conditioner will switch to the temperature sensor which is built
into the indoor unit and control the room temperature. In these cases, the temperature around the remote
control unit may differ from the temperature detected at the air conditioner’s position.
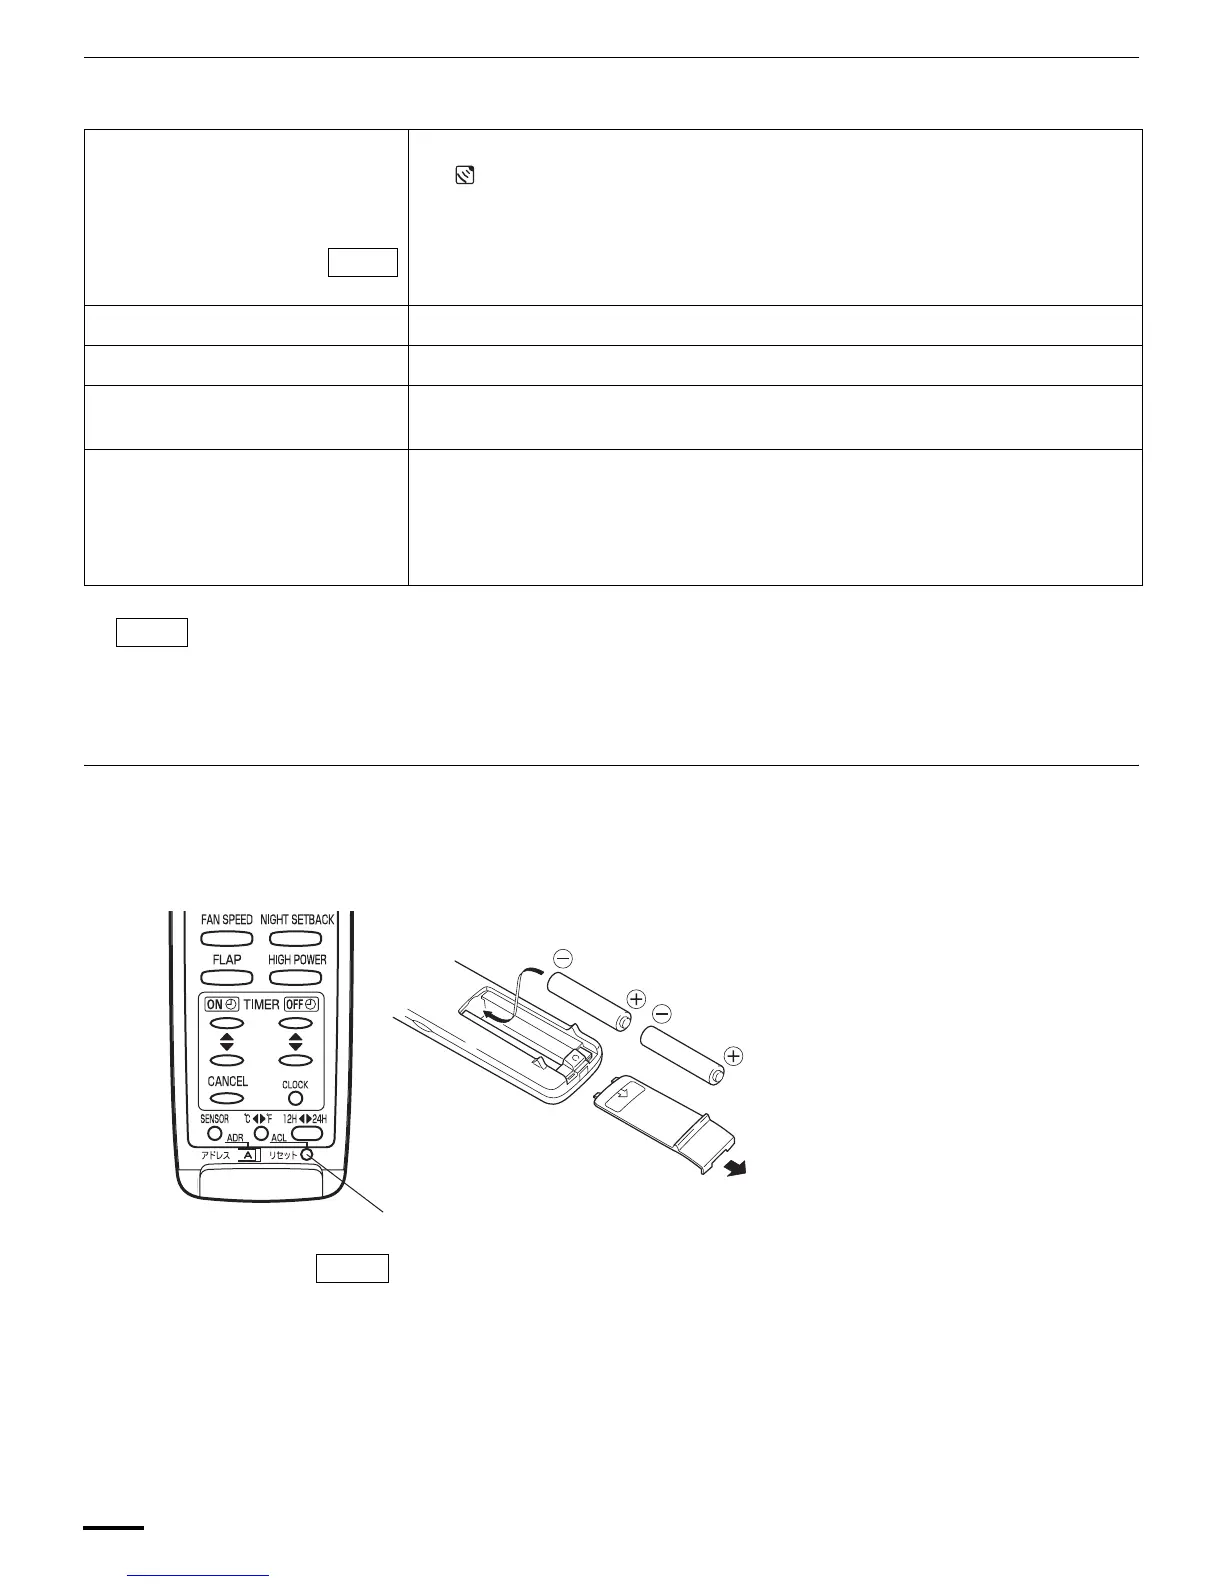
How to Install Batteries
• The batteries last about six months, depending on how much you use
the remote control unit. Replace the batteries when the remote control
unit’s display fails to light, or when the remote control cannot be used to
change the air conditioner’s settings.
• Use two fresh leak-proof type-AAA alkaline batteries.
• In replacing batteries, follow the instructions as mentioned in the sub-
section “How to Install Batteries”.
• If you do not use the remote control unit more than 1 month, take out the
batteries.
NOTE
NOTE
1. Slide the cover in the direction
indicated by the arrow and remove it.
2. Install two AAA alkaline batteries.
Make sure the batteries point in the
direction marked in the battery
compartment.
3. Use a thin object such as the tip of a
pen to press the ACL button.
ACL button
NOTE
OI-803-10-EG
01_KS0971_En.fm Page 10 Monday, October 17, 2005 4:17 PM