- 9 -
Turn the projector on and press the MENU button to display
the On-Screen Menu. Select the Setting Menu with the
Point
ed buttons. Press the Point 8 or OK buttons to
access the sub-menu items.
1
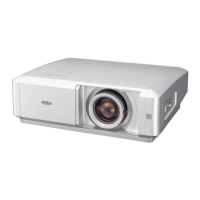
Put the blower’s nozzle into a hole.
2
Blow air into the projector with the blower watching the
position of the dust from the screen.
3
Set the projector back into the right position, then press any
button on the top control or on remote control to quit the
Cleaning function.
4
5
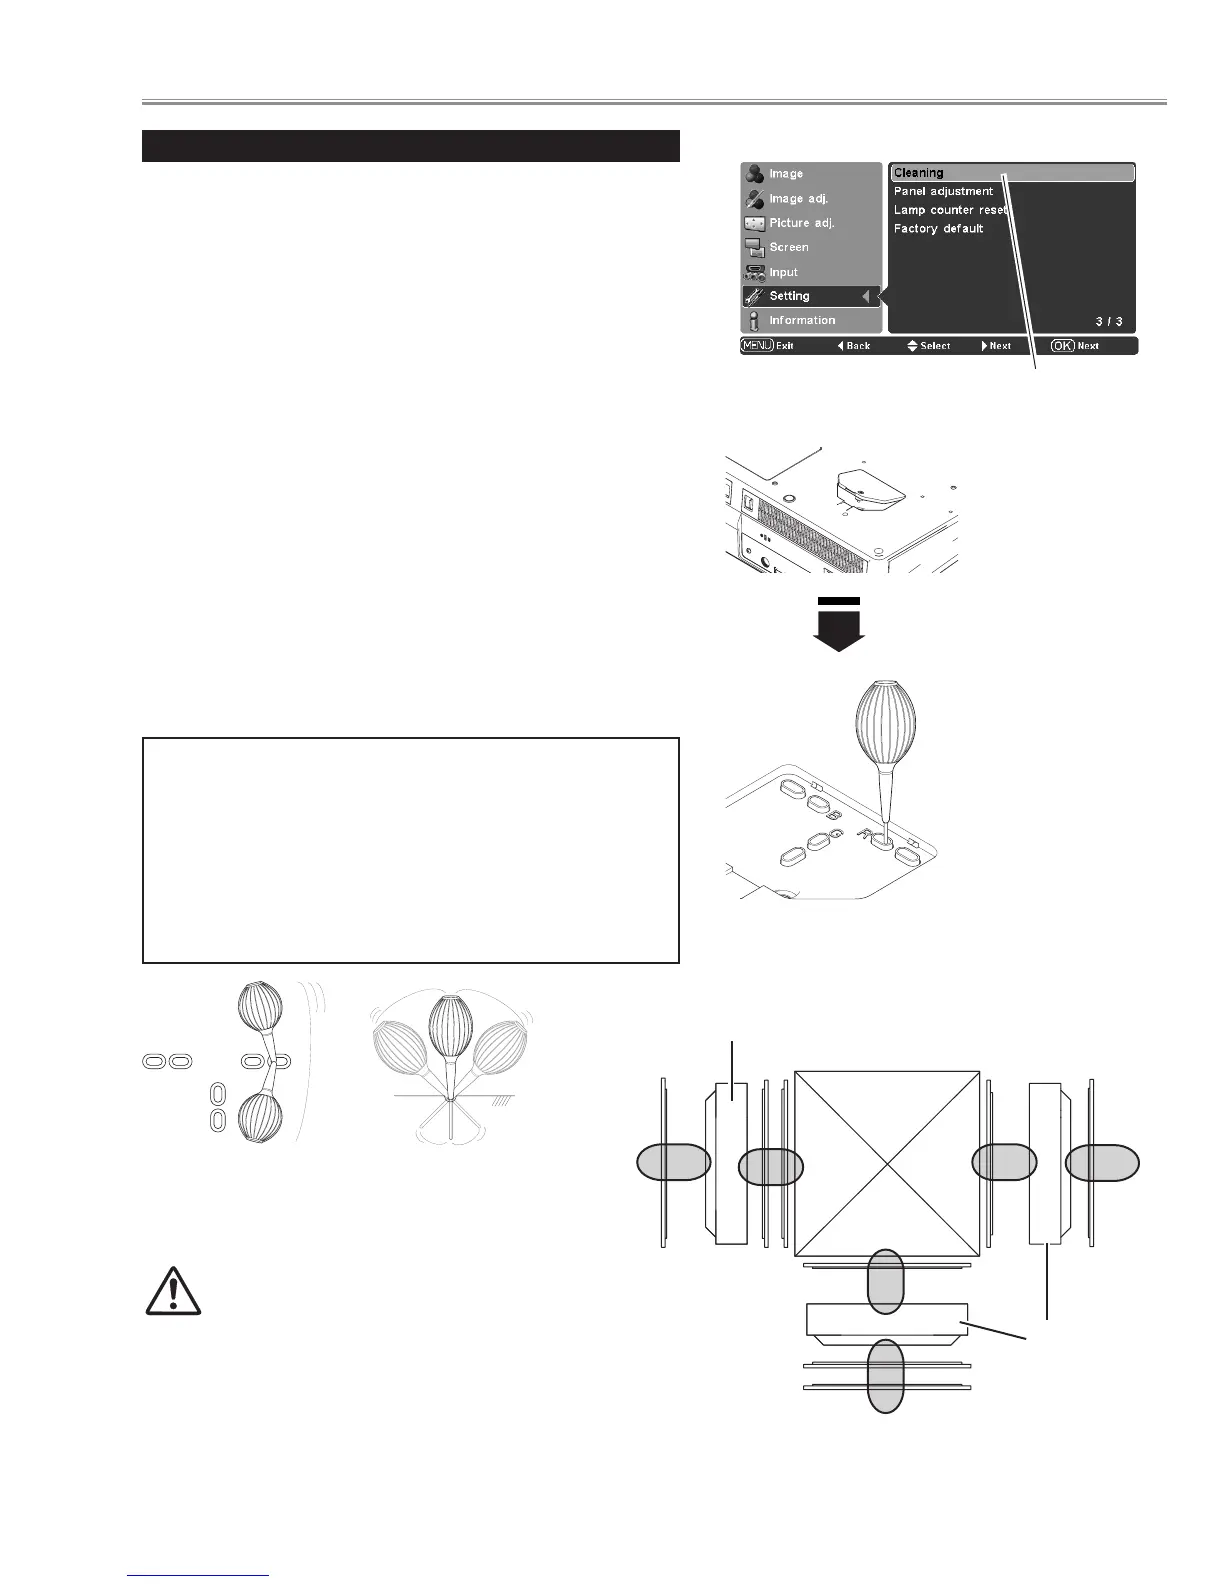
Clean by using the Cleaning function in the Setting Menu
Select Cleaning and then press the OK or Point 8 buttons.
The screen is blacked out temporarily.
Turn the projector over. Loosen the screw that secures the
hole cover, and then open the hole cover.
When cleaning is done, pull the blower out of the hole and
replace the hole cover and secure it with the screw.
6
7
Loosen the screw that
secures the hole
cover.
The nozzle will go no
further than a certain
point when it is put
into the hole. Do not
attempt to push the
nozzle in further, or it
could break and is
stuck inside of the
projector.
* Do not open the hole cover except when you clean the inside of the projector to
prevent foreign matters from getting into the projector. If it is open especially while
operating the projector, the optical parts could damage.
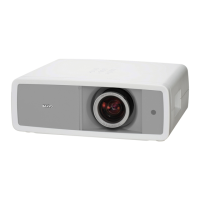
Which hole to put the nozzle in?
When you look at the screen:
● When a red spot (dust) is showed up, put the nozzle into
the R panel cleaning holes.
● When a green spot (dust) is showed up, put the nozzle
into the G panel cleaning holes.
● When a blue spot (dust) is showed up, put the nozzle into
the B panel cleaning holes.
Wave the nozzle back and forth inside of the projector.
(Do not attempt to bend the nozzle.)
Use only the supplied blower and nozzle.
Do not use a commercially available
compressed air duster. It causes the interior of
the projector to malfunction with release of cold liquid
propellant. We could not guarantee the malfunction of
breakage by using other tools.