23
25A1104 (Rev.1)
TROUBLESHOOTING
Current draw and DC regulator tests
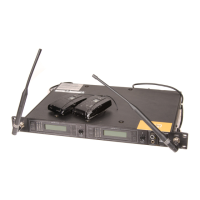
1. Connect the PS20 DC power supply to CON400.
2. Verify current draw is 120mA +/- 25mA.
3. If the current draw is above or below above specification disconnect the 9Vdc, 5Vdc and 3.3Vdc regulated power supply
feed points to each section of the receiver to deductively troubleshoot which section is causing the excessive current
drain.
DC regulated Power supply voltages
CHECK FOR 9.0VDC (±0.2 VDC) AT TP_9V (PIN 4 OF IC400):
1. If not, check for 12Vdc minimum at the output of CON400. If the output of CON400 is not 12Vdc minimum check the
external power supply for proper operation.
2. Check for 12Vdc minimum at the input of Pin 3 of IC400. If the input of Pin 3 of IC400 is not 12Vdc minimum verify the
electrolytic capacitor (C399 and/or C406) is not reversed.
3. Check D400 for proper placement and operation.
4. Check for solder bridges or shorted foil traces (defective PCB).
5. Disconnect the 9Vdc power supply feed points from each section of the receiver to deductively troubleshoot which sec-
tion may be loading down the regulator output.
6. Lastly, replace IC400.
CHECK FOR 5.0VDC (±0.1 VDC) AT TP_5V (PIN 2&4 OF IC401):
1. If 5.0Vdc is not measured at TP_5V, verify that the electrolytic capacitor C405 is not reversed.
2. Disconnect the 5Vdc-power supply feed points from each section of the receiver to deductively troubleshoot which sec-
tion may be loading down the regulator output.
3. Lastly, replace IC401.
CHECK FOR 3.3VDC (±0.2 VDC) AT TP_3.3V (PIN 4 OF IC430):
1. If 3.3Vdc is not measured at TP_3.3V, verify that the electrolytic capacitors C430, 431,432 are not shorted out.
2. Disconnect the 3.3Vdc-power supply feed points from each section of the receiver to deductively troubleshoot which
section may be loading down the regulator output.
3. Lastly, replace IC430.
4.
Initial Setup:
ATE mode setup & use:
There are three different ATE mode test frequencies available in every frequency group, which are Flow, Fmid and Fhigh.
The Fmid frequency may not be the center of the band. It is selected for the best tuning of FL510 filter. Set the receiver into
ATE mode by shorting "ATE LE" to GND and then apply power to the receiver's DC jack. Press the channel button until you
observe the 7-segment LED display providing a selection of
1, 2, 3 for frequency groups H7, K7, M7, M10, R10, and T10 and
b, C, d for frequency groups P11, Q11, R11, R12, and JB. For example, when the 7-segment LED display's a "1" this is Flow,
"2" is
Fmid and "3" Fhigh. When you depress the channel button for approximately 3-seconds the receiver enters into a micro
controller reference level programming mode. When a "C" is displayed, press and release the channel button several times
so you can observe the 7-segment LED display providing a selection of a blinking C, A, or P. The "C" is to cancel the micro
controller reference level-programming mode (do not confuse this "C" for
Fmid for groups P11, Q11, R11, R12, JB). The "A"
is to set the audio LED reference level. The "P" is to set the predictive no switch level. Once the respective C, A, or P is selected
and left blinking, the micro will perform the respective operation when the 7-segment LED display returns to the previous 1, 2,
or 3 display.
Disabling diversity:
For Channel A to be active, short TP2 to ground and connect TP3 to 3.3Vdc. For Channel B to be active, short TP3 to
ground and connect TP2 to 3.3Vdc.
·Use RG58, RG174 or any other low loss, 50 ohms cable for all RF input connections. Keep the test cables as short as
possible between the RF generator and receiver. Note: any external "ON Channel" interference in the frequency of operation
 Loading...