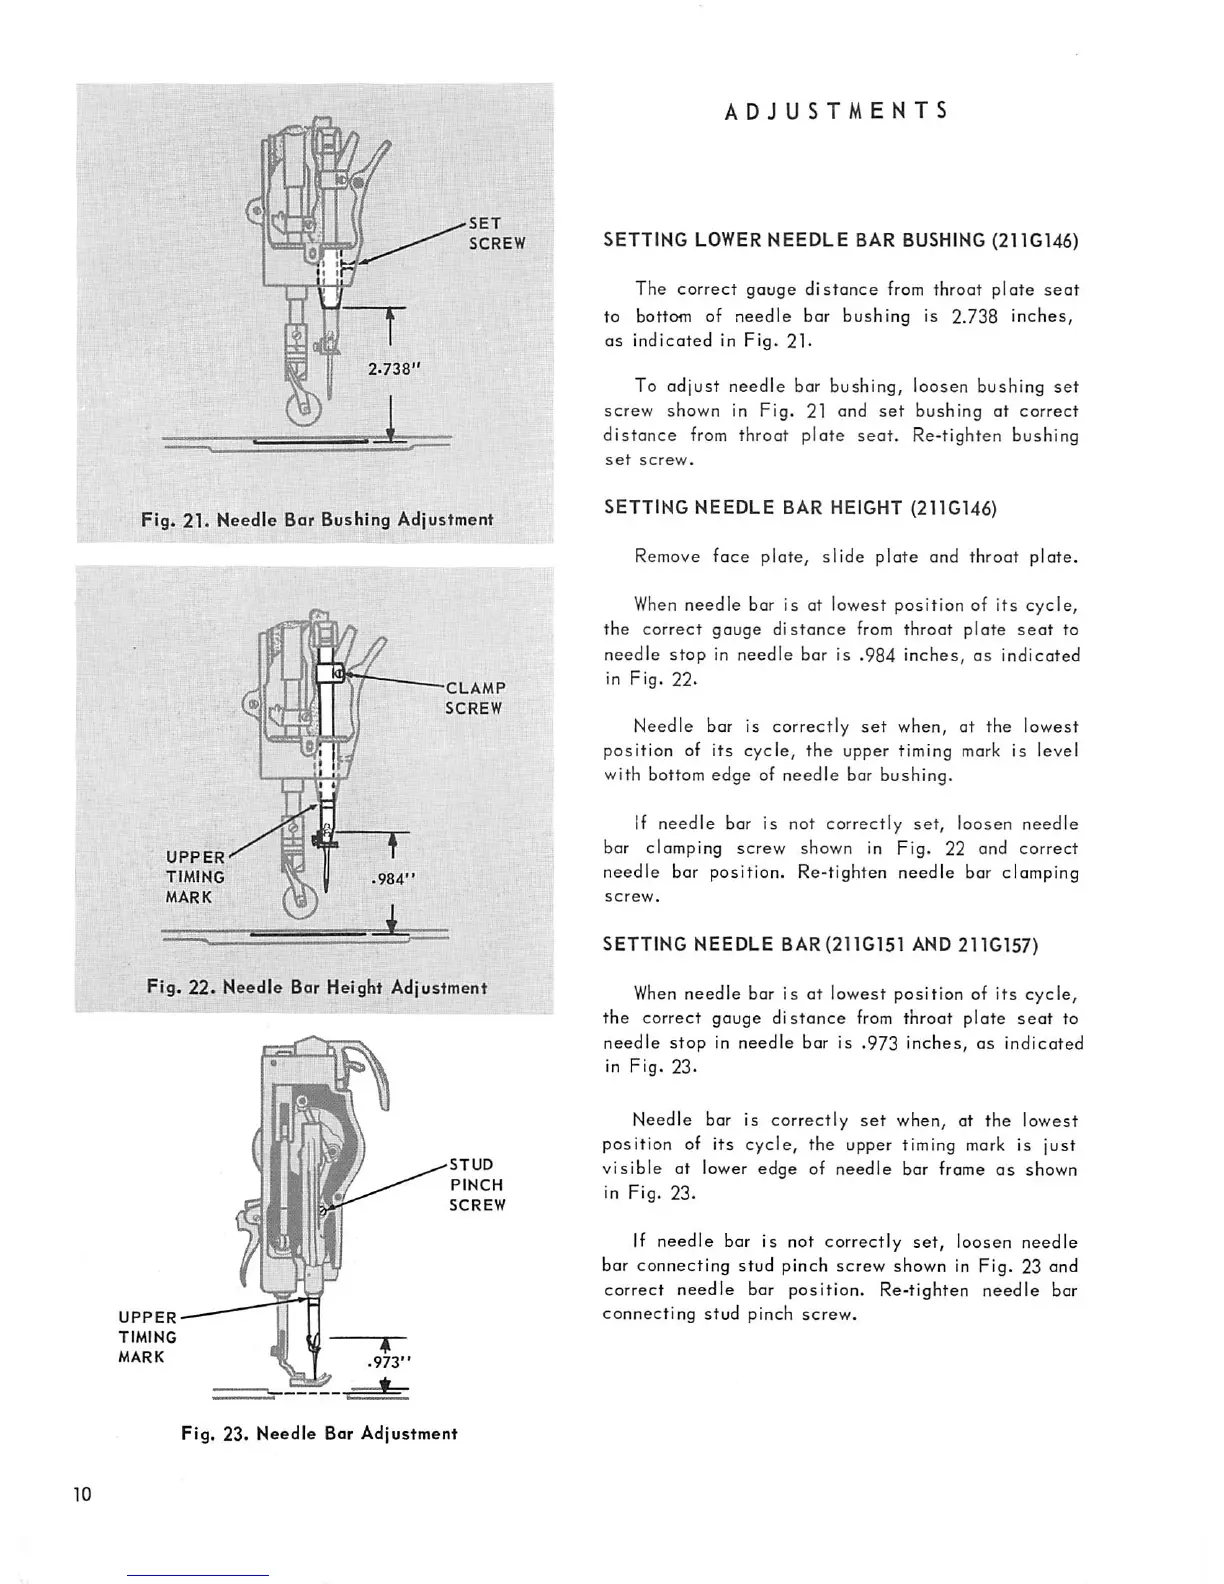
2.738"
SET
SCREW
Fig. 21. Needle Bar Bushing Adjustment
UPPER
TIMING
MARK
CLAMP
SCREW
Fig.
22.
Needle Bar Height Adjustment
UPPER
TIMING
MARK
STUD
PINCH
SCREW
Fig.
23.
Needle
Bar
Adjustment
ADJUSTMENTS
SETTING LOWER
NEEDLE
BAR BUSHING (211G146)
The
correct
gauge
distance
from
throat
plate
seat
to bottom of needle bar bushing is 2.738 inches,
as indicated in Fig. 21.
To
adiust
needle
bar bushing, loosen bushing
set
screw
shown in
Fig.
21 and
set
bushing
at
correct
distance
from
throat plate
seat.
Re-tighten bushing
set
screw.
SETTING NEEDLE BAR HEIGHT (211G146)
Remove face plate,
slide
plate
and throat plate.
When
needle bar is at lowest position of
its
cycle,
the
correct
gauge
distance
from
throat
plate
seat
to
needle
stop
in needle bar is .984 inches, as indicated
in Fig. 22.
Needle bar is
correctly
set
when, at the lowest
position of its
cycle,
the
upper timing mark is level
with bottom edge of
needle
bar bushing.
If
needle
bar is not correctly
set,
loosen needle
bar clamping screw shown in Fig. 22 and correct
needle bar position. Re-tighten needle bar clamping
SETTING NEEDLE BAR(211G151 AND 211G157)
When
needle bar is at lowest position of
its
cycle,
the correct gauge
distance
from throat plate
seat
to
needle
stop
in
needle
bar is
.973
inches,
as
indicated
in
Fig.
23.
Needle bar is correctly
set
when, at the lowest
position of its cycle, the upper timing
mark
is just
visible
at lower edge of needle bar frame
as
shown
in Fig. 23.
If needle bar Is not correctly set, loosen needle
bar connecting stud pinch screw shown in Fig. 23 and
correct
needle
bar position. Re-tighten
needle
bar
connecting
stud
pinch
screw.
 Loading...