LOWER
THREADING
BOBBIN
REMOVAL
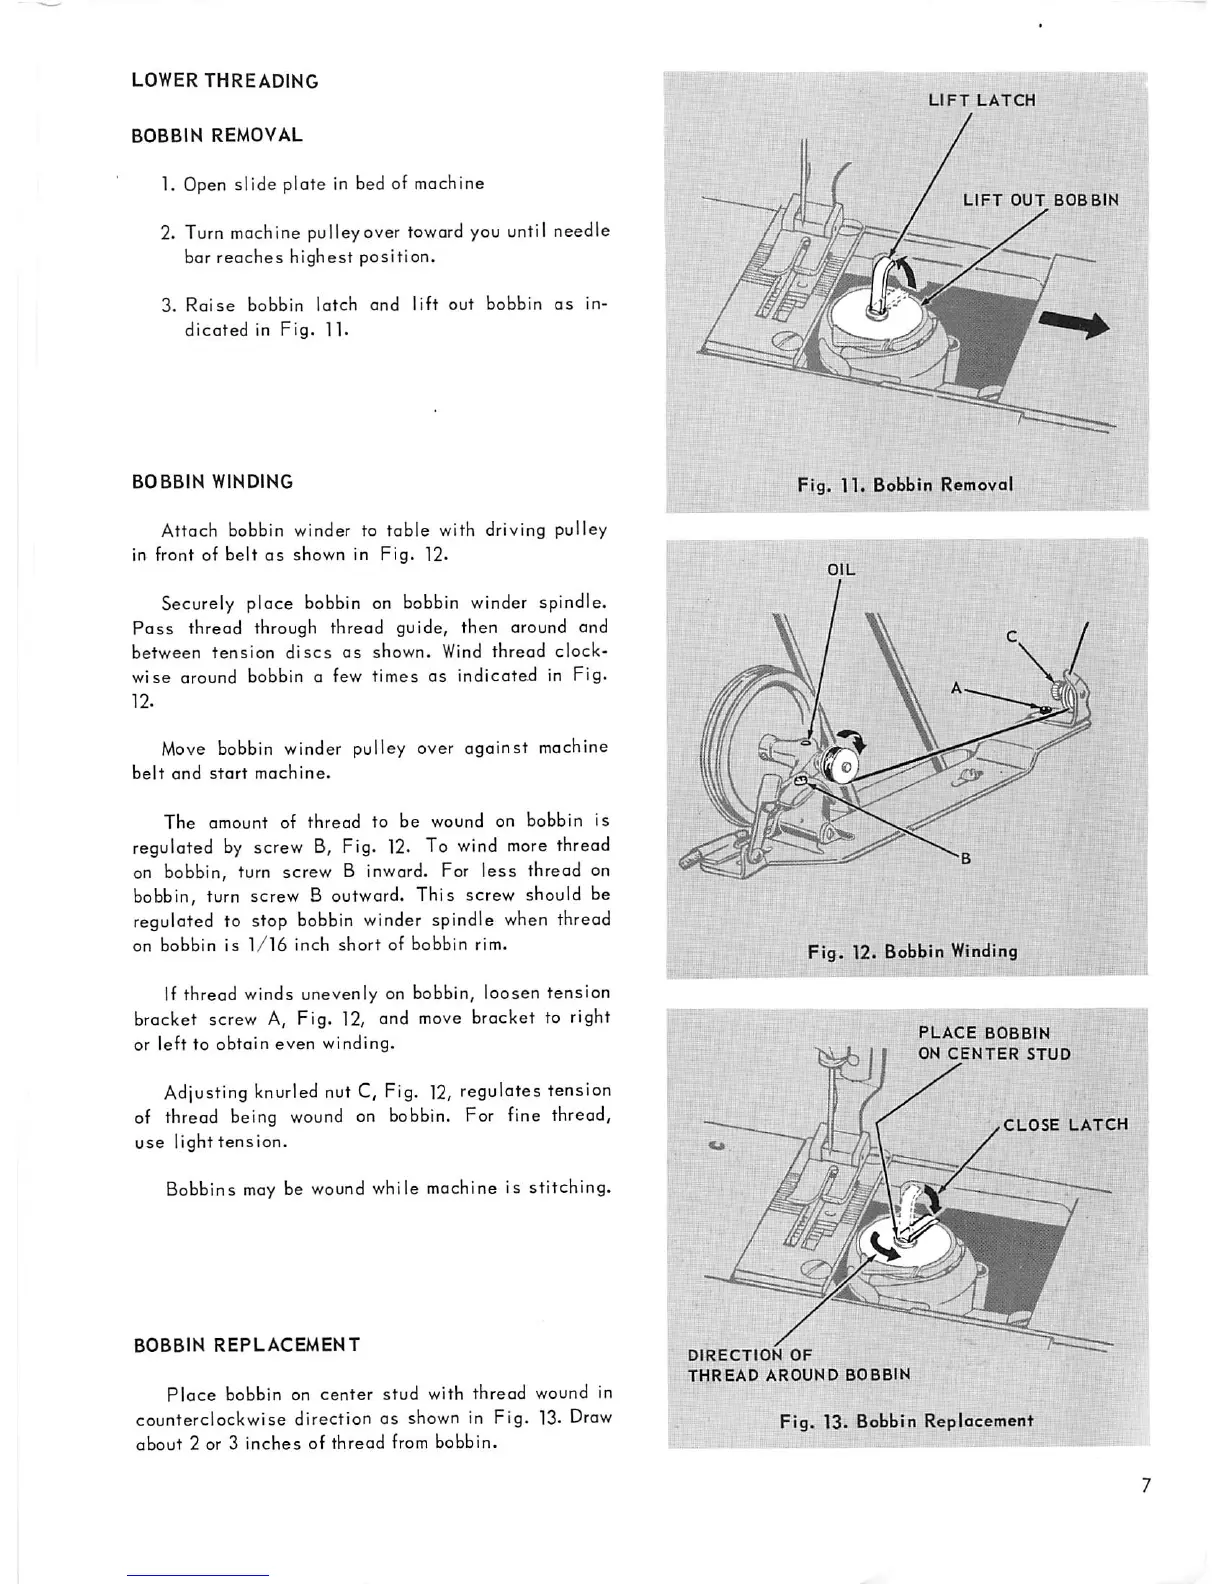
1. Open slide plate in bed of machine
2. Turn machine pulleyover toward you until needle
bar
reaches
highest
position.
3.
Raise
bobbin
latch
and
lift
out
bobbin
as
in
dicated
in
Fig.
11.
BOBBIN
WINDING
Attach bobbin winder to
table
with driving pulley
in front of
belt
as
shown
in
Fig.
12.
Securely place bobbin on bobbin winder spindle.
Pass
thread through thread guide, then around and
between
tension
discs
as
shown.
Wind
thread
clock
wise
around
bobbin a few
times
as
indicated
in
Fig.
12.
Move
bobbin winder pulley over against machine
belt
and
start
machine.
The
amount
of
thread
to
be
wound
on
bobbin
is
regulated
by
screw B, Fig.
12.
To
wind
more
thread
on bobbin, turn screw B inward. For
less
thread on
bobbin, turn screw B outward. This screw should be
regulated to stop bobbin winder spindle when thread
on
bobbin
is
1/16
inch
short
of
bobbin
rim.
If thread winds unevenly on bobbin, loosen tension
bracket screw A, Fig. 12, and
move
bracket to right
or
left
to
obtain
even
winding.
Adjusting knurled nut C, Fig.
12,
regulates tension
of thread being
wound
on
bobbin.
For fine thread,
use
light
tension.
Bobbins
may
be
wound
while machine is stitching.
BOBBIN
REPLACEMENT
Place
bobbin
on
center
stud
with
thread
wound in
counterclockwise
direction
as shown in
Fig.
13. Draw
about
2 or 3
inches
of
thread
from
bobbin.
Bpf''
LIFT
LATCH
LIFT
OUT
BOBBIN
Fig. 11. Bobbin Removal
Fig.
12. Bobbin Winding
PLACE
BOBBIN
ON
CENTER
STUD
CLOSE
LATCH
•
DIRECTION
OF
THREAD
AROUND
BOBBIN
Fig.
13. Bobbin Replacement
 Loading...