■
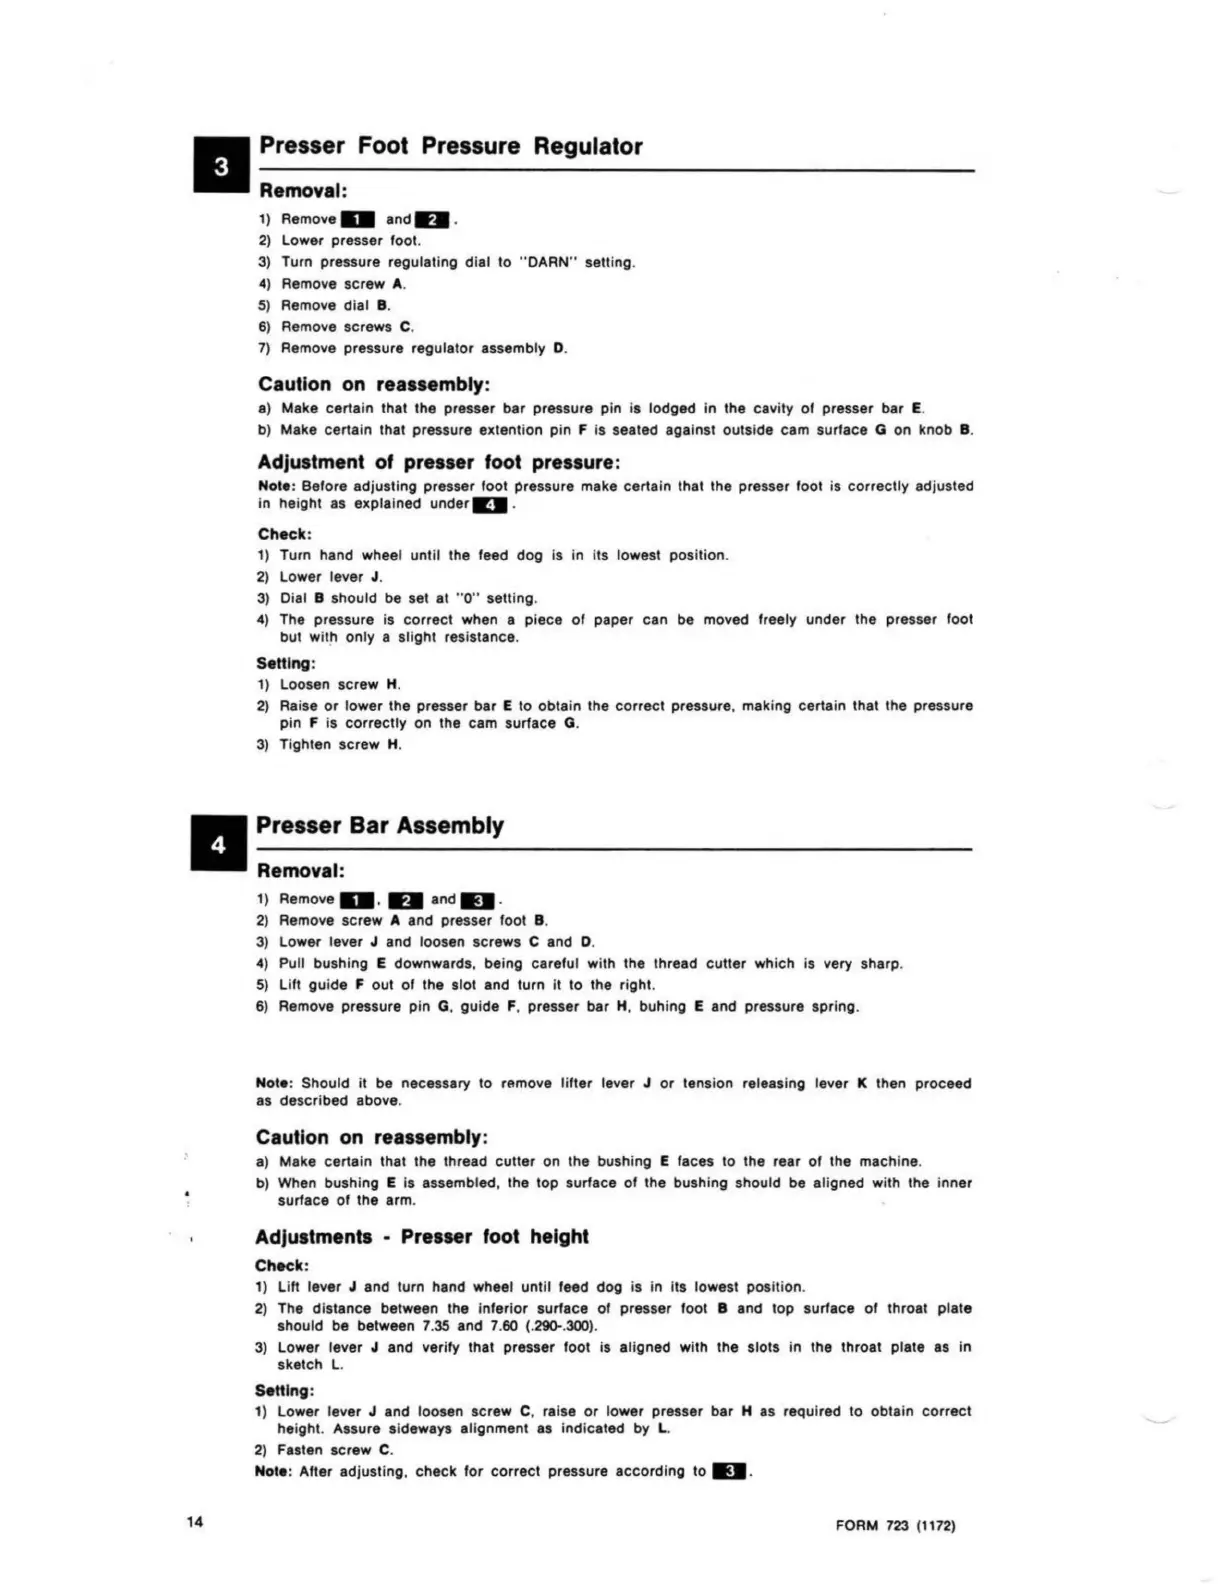
Presser
Foot
Pressure
Removal:
Regulator
14
1)
RemoveD
andO
.
2)
lower
presser foot.
3) Turn pressure regulating dial to "
DARN
"' setting.
4) Remove screw A.
5) Remove dial 8 .
6)
Remove screws C.
7) Remove pressure regulator assembly D.
Caution
on
reassembly:
a)
Make certain that the presser bar pressure pin is lodged in the cavity of presser bar E.
b) Make certain that pressure extention pin F is seated against outside cam surface G on knob 8.
Adjustment of presser foot pressure:
Note: Before adjusting presser foot pressure make certain that the presser foot is correctly adjusted
in
he
ight
as
explained
underD
.
Check:
1) Turn hand wheel until t
he
feed dog is in its lowest position.
2)
lower
lever J .
3) Dial 8 should be set at " O" setting.
4) The pressure is correct when a piece of paper can be moved freely under the presser foot
but witt, only a slight resistance.
Setting:
1)
loosen
screw H.
2)
Ra
ise
or
lower the presser bar E to obtain the correct pressure, making certain that the pressure
pin F is correctly on the cam surface G.
3)
Tighten scr
ew
H.
4
Presser Bar Assembly
------
Removal:
1) Remove
D,
D andllllJI .
2) Remove screw A and presser foot 8 .
3)
lower
lever J and loosen screws C and D.
4)
Pu
ll bushing E downwards, being careful with the thread cutter
wh
ich is very sharp.
5) l i
ft
guide F out of the slot and turn it to the right.
6)
Remove pressure pin G, guide F, presser bar H, buhing E and pressure spring.
Note: Should it be necessary to ramove
lifter
lever J
or
tension releasing lever K then proceed
as
described above.
Caution on reassembly:
a)
Make certain that the thread cutter on the bushing E faces to the rear of the machine.
b)
When bushing E is assembled, the top surface of the bushing should be aligned with the inner
surface of the arm.
Adjustments • Presser foot height
Check:
1) l i
ft
lever J and turn hand wheel until feed dog is in Its lowest position.
2) The distance between the inferi
or
surface of presser foot 8 and top surface of throat plate
should be between 7.35 and 7.60 (.290-.300).
3)
lower
lever J and verify that presser foot is aligned with the slots in the throat plate as in
sketch
l.
Setting:
1)
lower
lever J and loosen screw C,
ra
i
se
or
lower presser bar H
as
required to obtain correct
height. Assure sideways alignment
as
indicated by l .
2)
Fasten screw C.
Note: After adjusting, check
for
correct pressure according to Ill.II.
FORM
723
(
1172)
 Loading...